When it comes to carp fishing, rigs and their mechanics are something that can cause anglers all kinds of problems. But if you're new to carp fishing, finding the right carp rig to use really doesn't have to be complicated.
To get you off on the right foot, below we’re showing you how to tie six of the very best set-ups to cast out this season. Between them they cover every eventuality, and offer deadly and well-proven presentations for everything from wafters and bottom baits, to pop-ups and zig rigs.
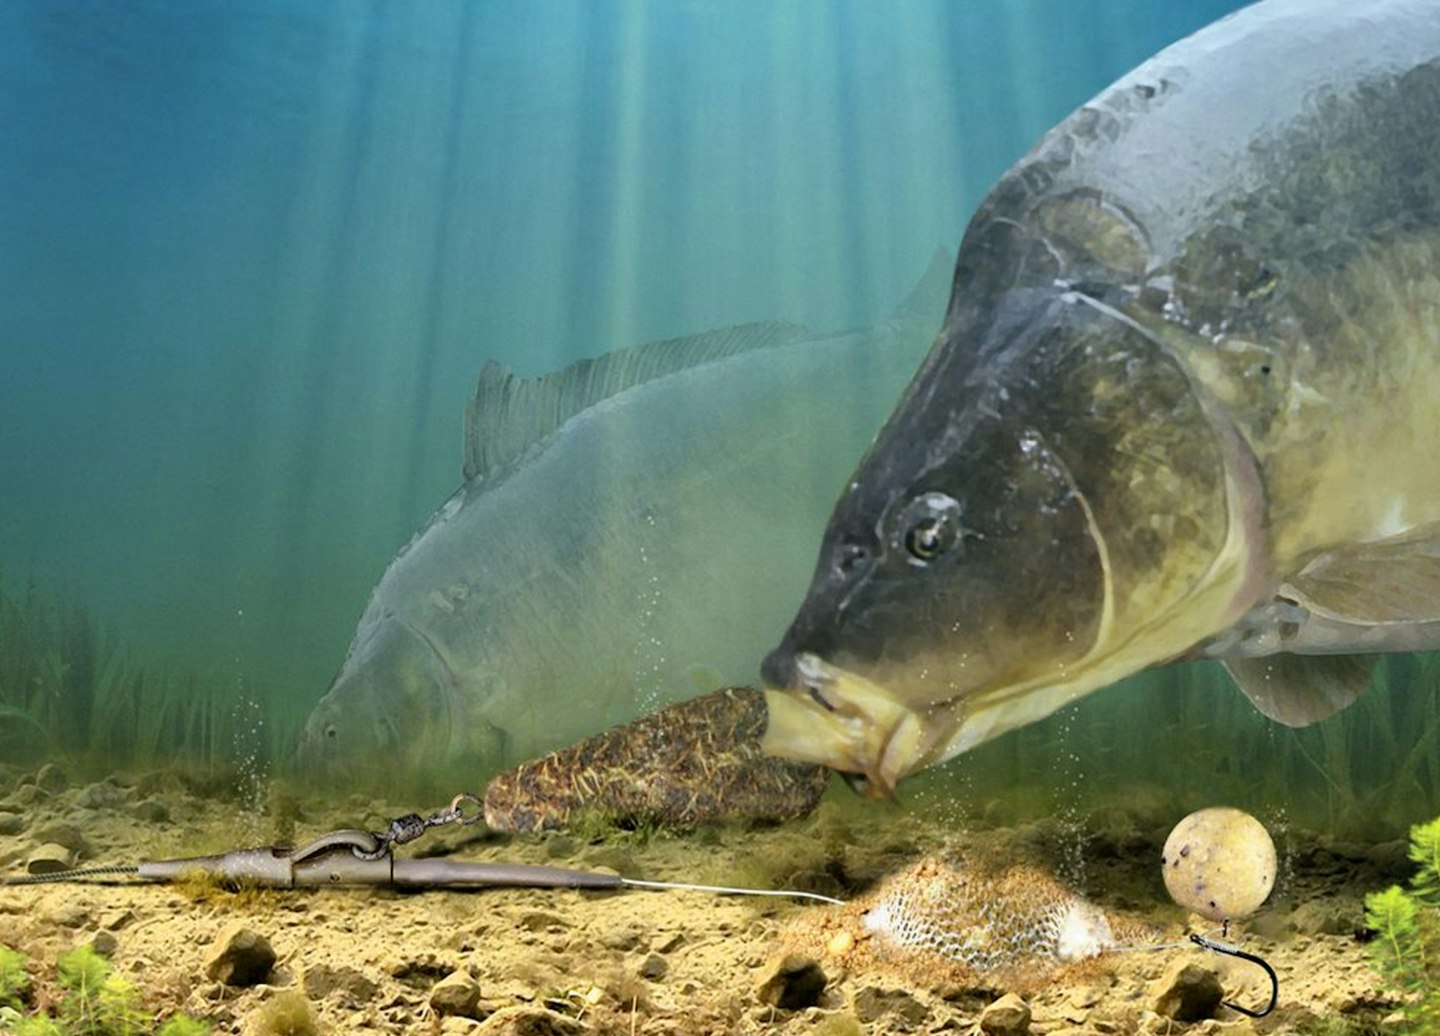
Solid PVA bag rig
BEST FOR: Presenting a small pile of highly-attractive bait, plus the hookbait, over all lakebed types apart from really deep silt or thick weed.
In cold weather, putting out big spreads of bait can be the kiss of death on all but the most heavily-stocked venues.
A single hookbait approach can work well, but why not take it to the next level by popping a bright, fruity pop-up inside a solid PVA bag to get little concentrated piles of grub into areas where the fish are holed up?
What you put into the bag is down to you, but tick to easily digestible and highly attractive items such as small, low-oil pellets, groundbait, powders and maggots.
Stick to small pop-ups, wafters or fake baits on short braided hooklinks, but don’t go too small with the hook. Stick to sizes 6 to 10, tailoring your choice to match the size of hookbait.
To enhance the bag’s attraction even more, you can inject it with liquid just prior to casting out. Hemp oil, which doesn’t congeal in cold water, is particularly good.
The beauty of this set-up is that it is presentable over pretty much any bottom, particularly when there isn’t much thick weed about. Even over a layer of silkweed, the hookbait is protected inside the bag and you can be confident that it is fishing.
THE BEST CARP RODS WILL HELP YOU GET YOUR RIGS OUT TO WHERE THE CARP ARE FEEDING!

Step-by-step
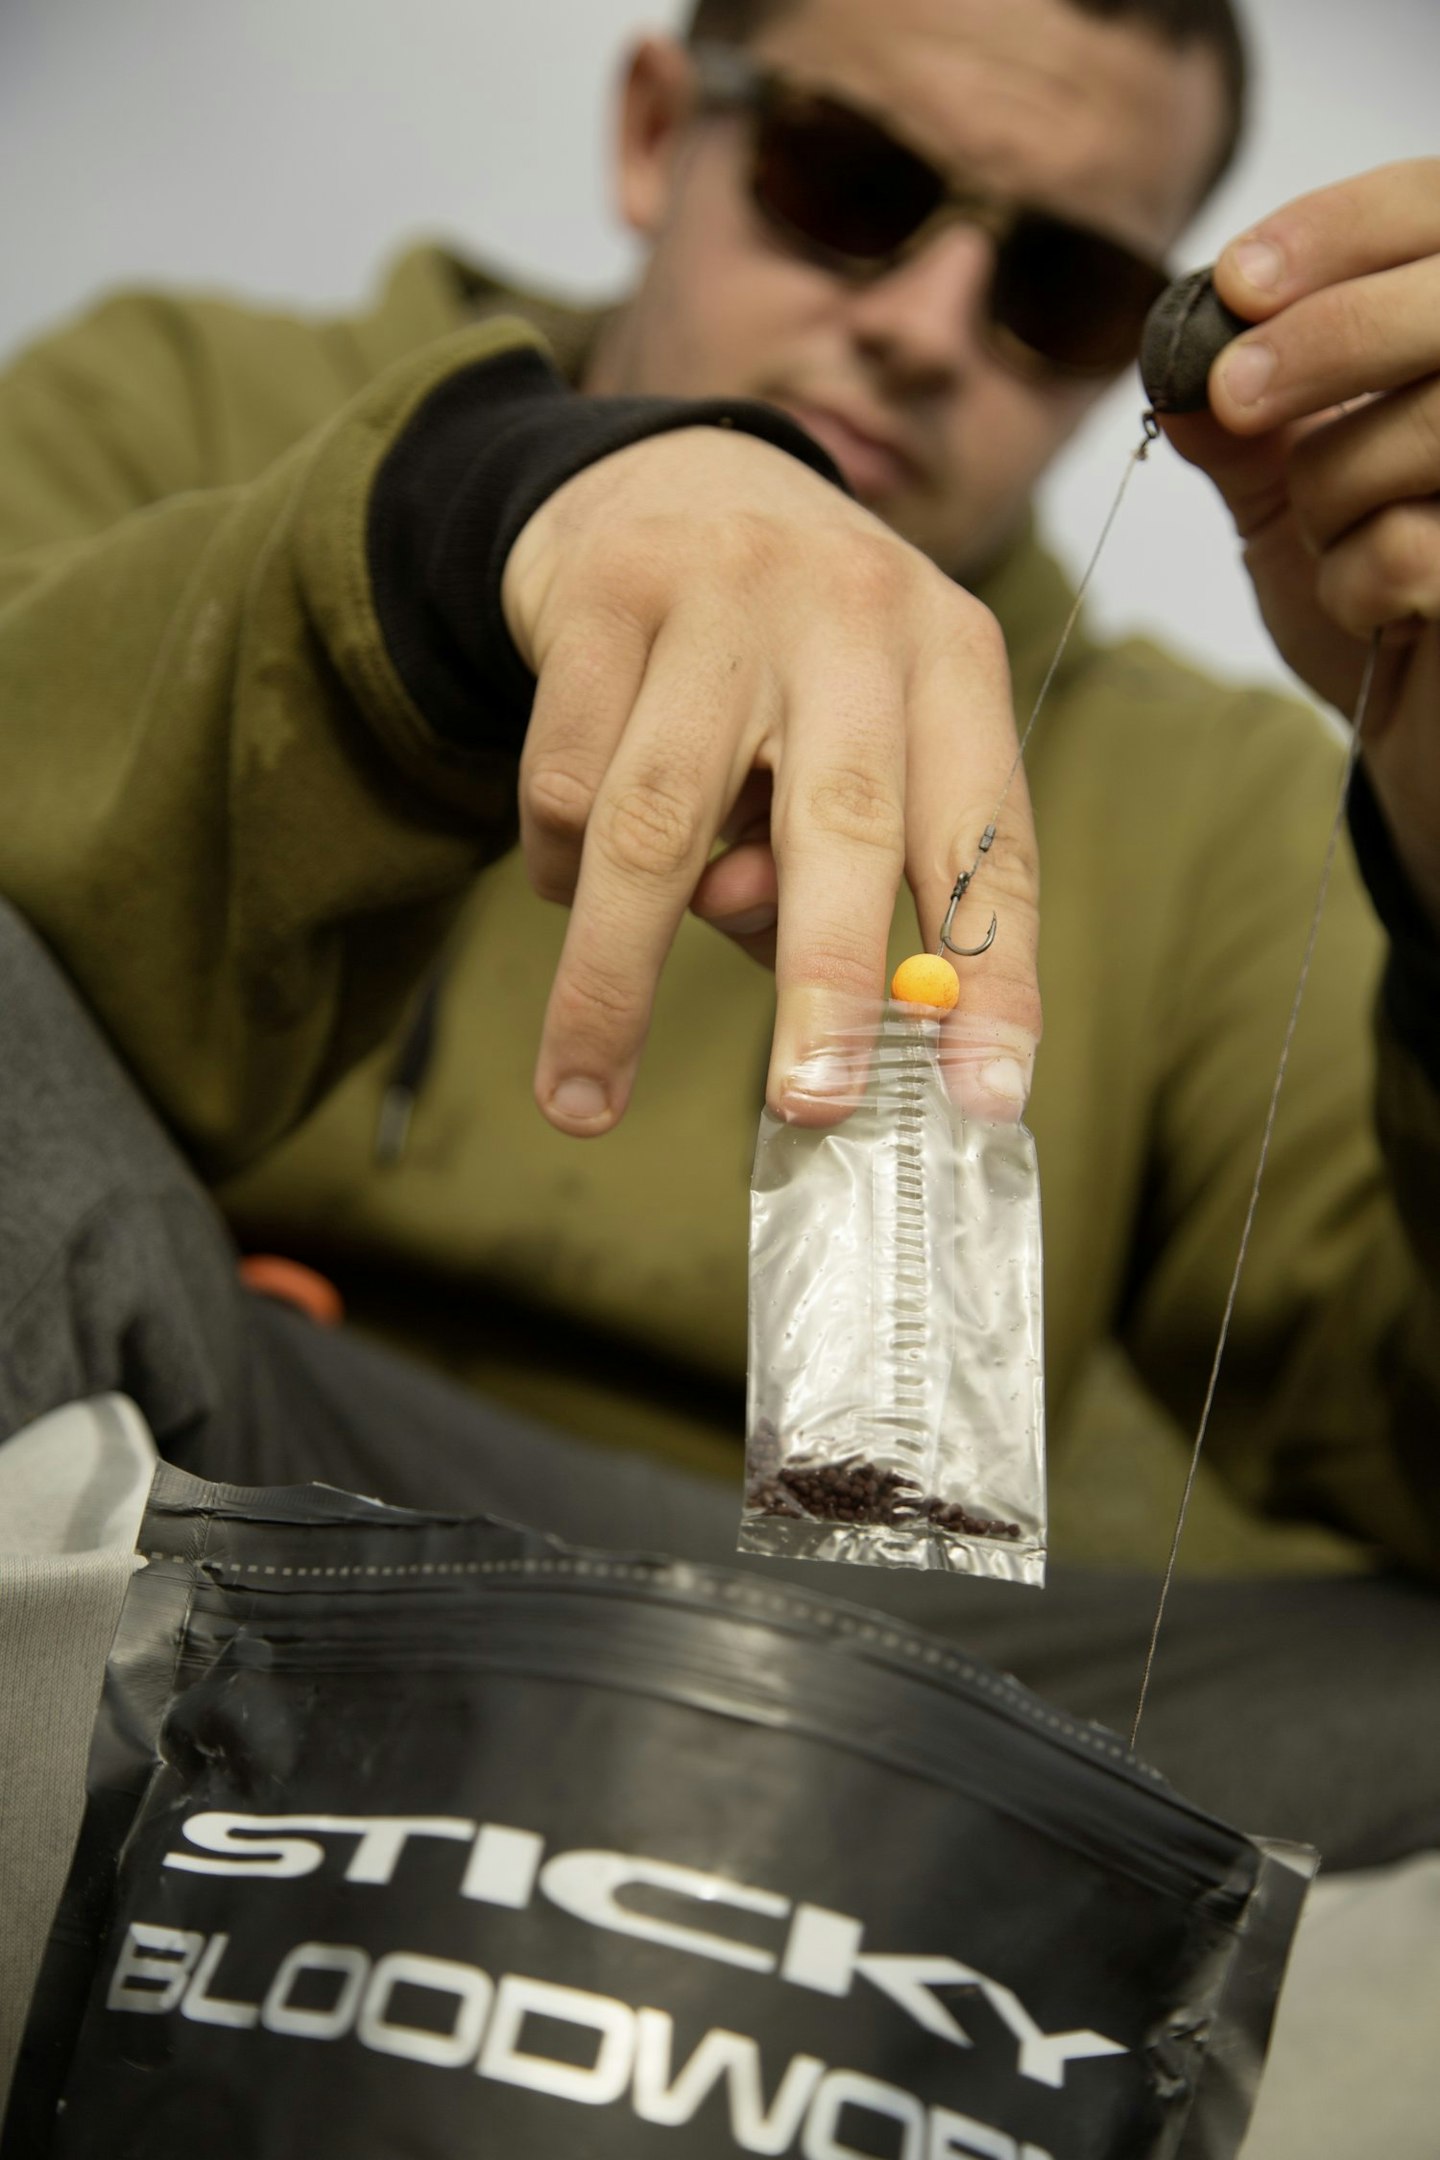
Add a few pellets to the bottom of the bag, then pop the rig and hookbait in to sit on top.
Half-fill with more pellets (or other small items) and then add the lead to the centre of the bag.
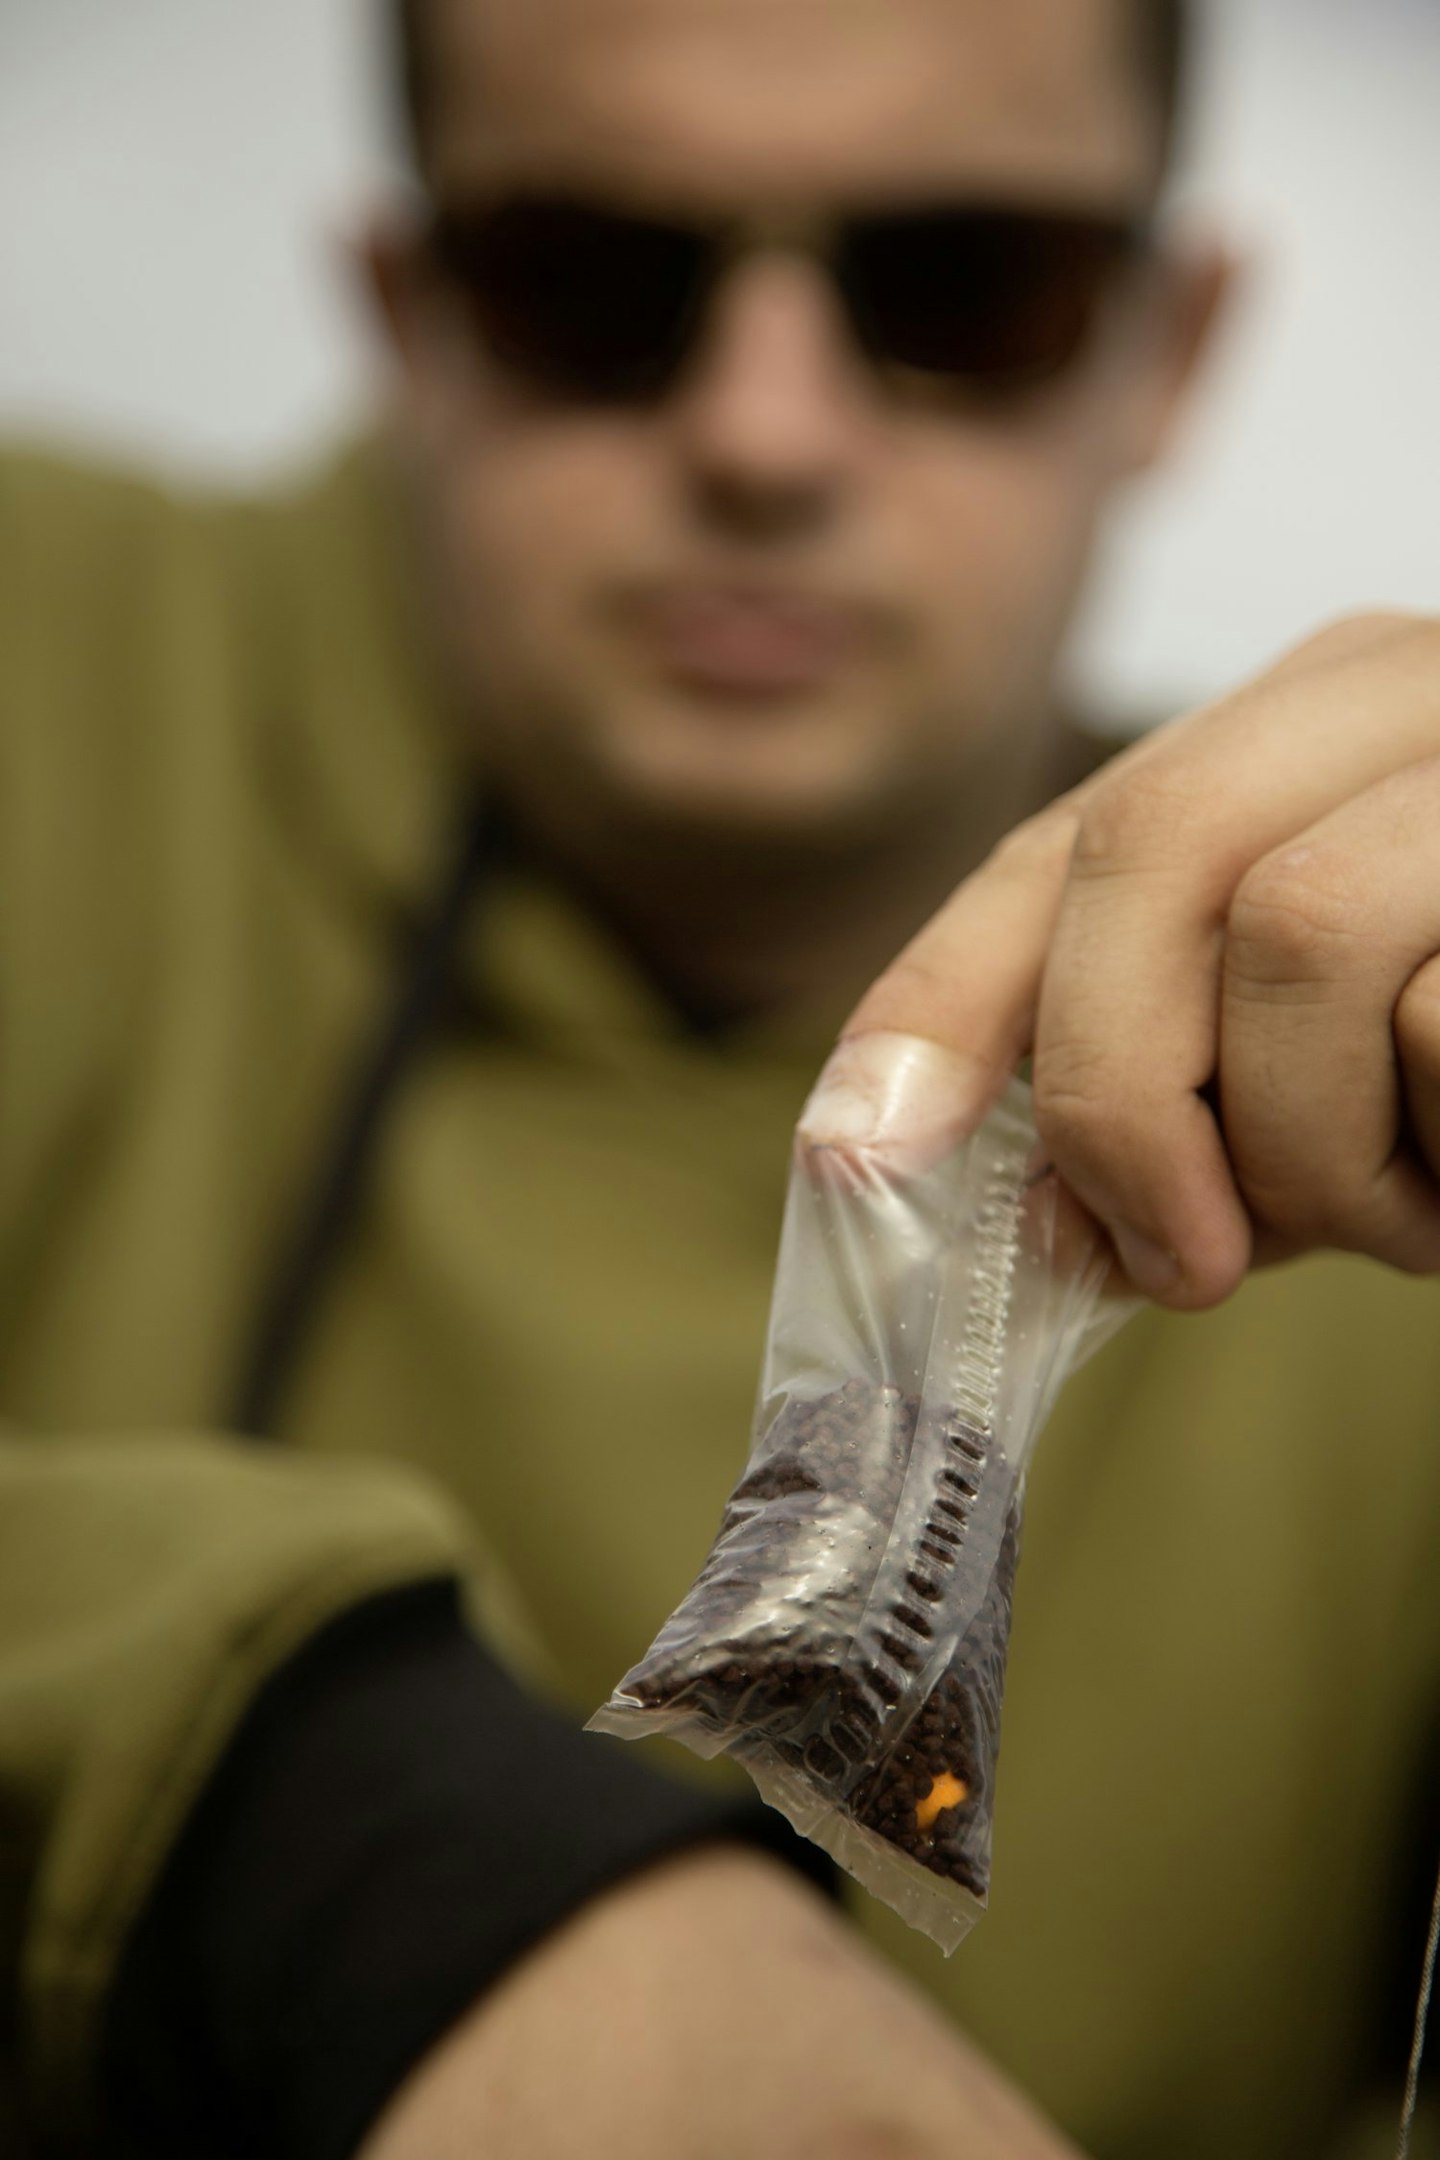
Fill the bag to three-quarters full with more bait items. Don’t overfill it at this stage.

Compact the contents down tightly and then twist the PVA at the top to compress the bag.
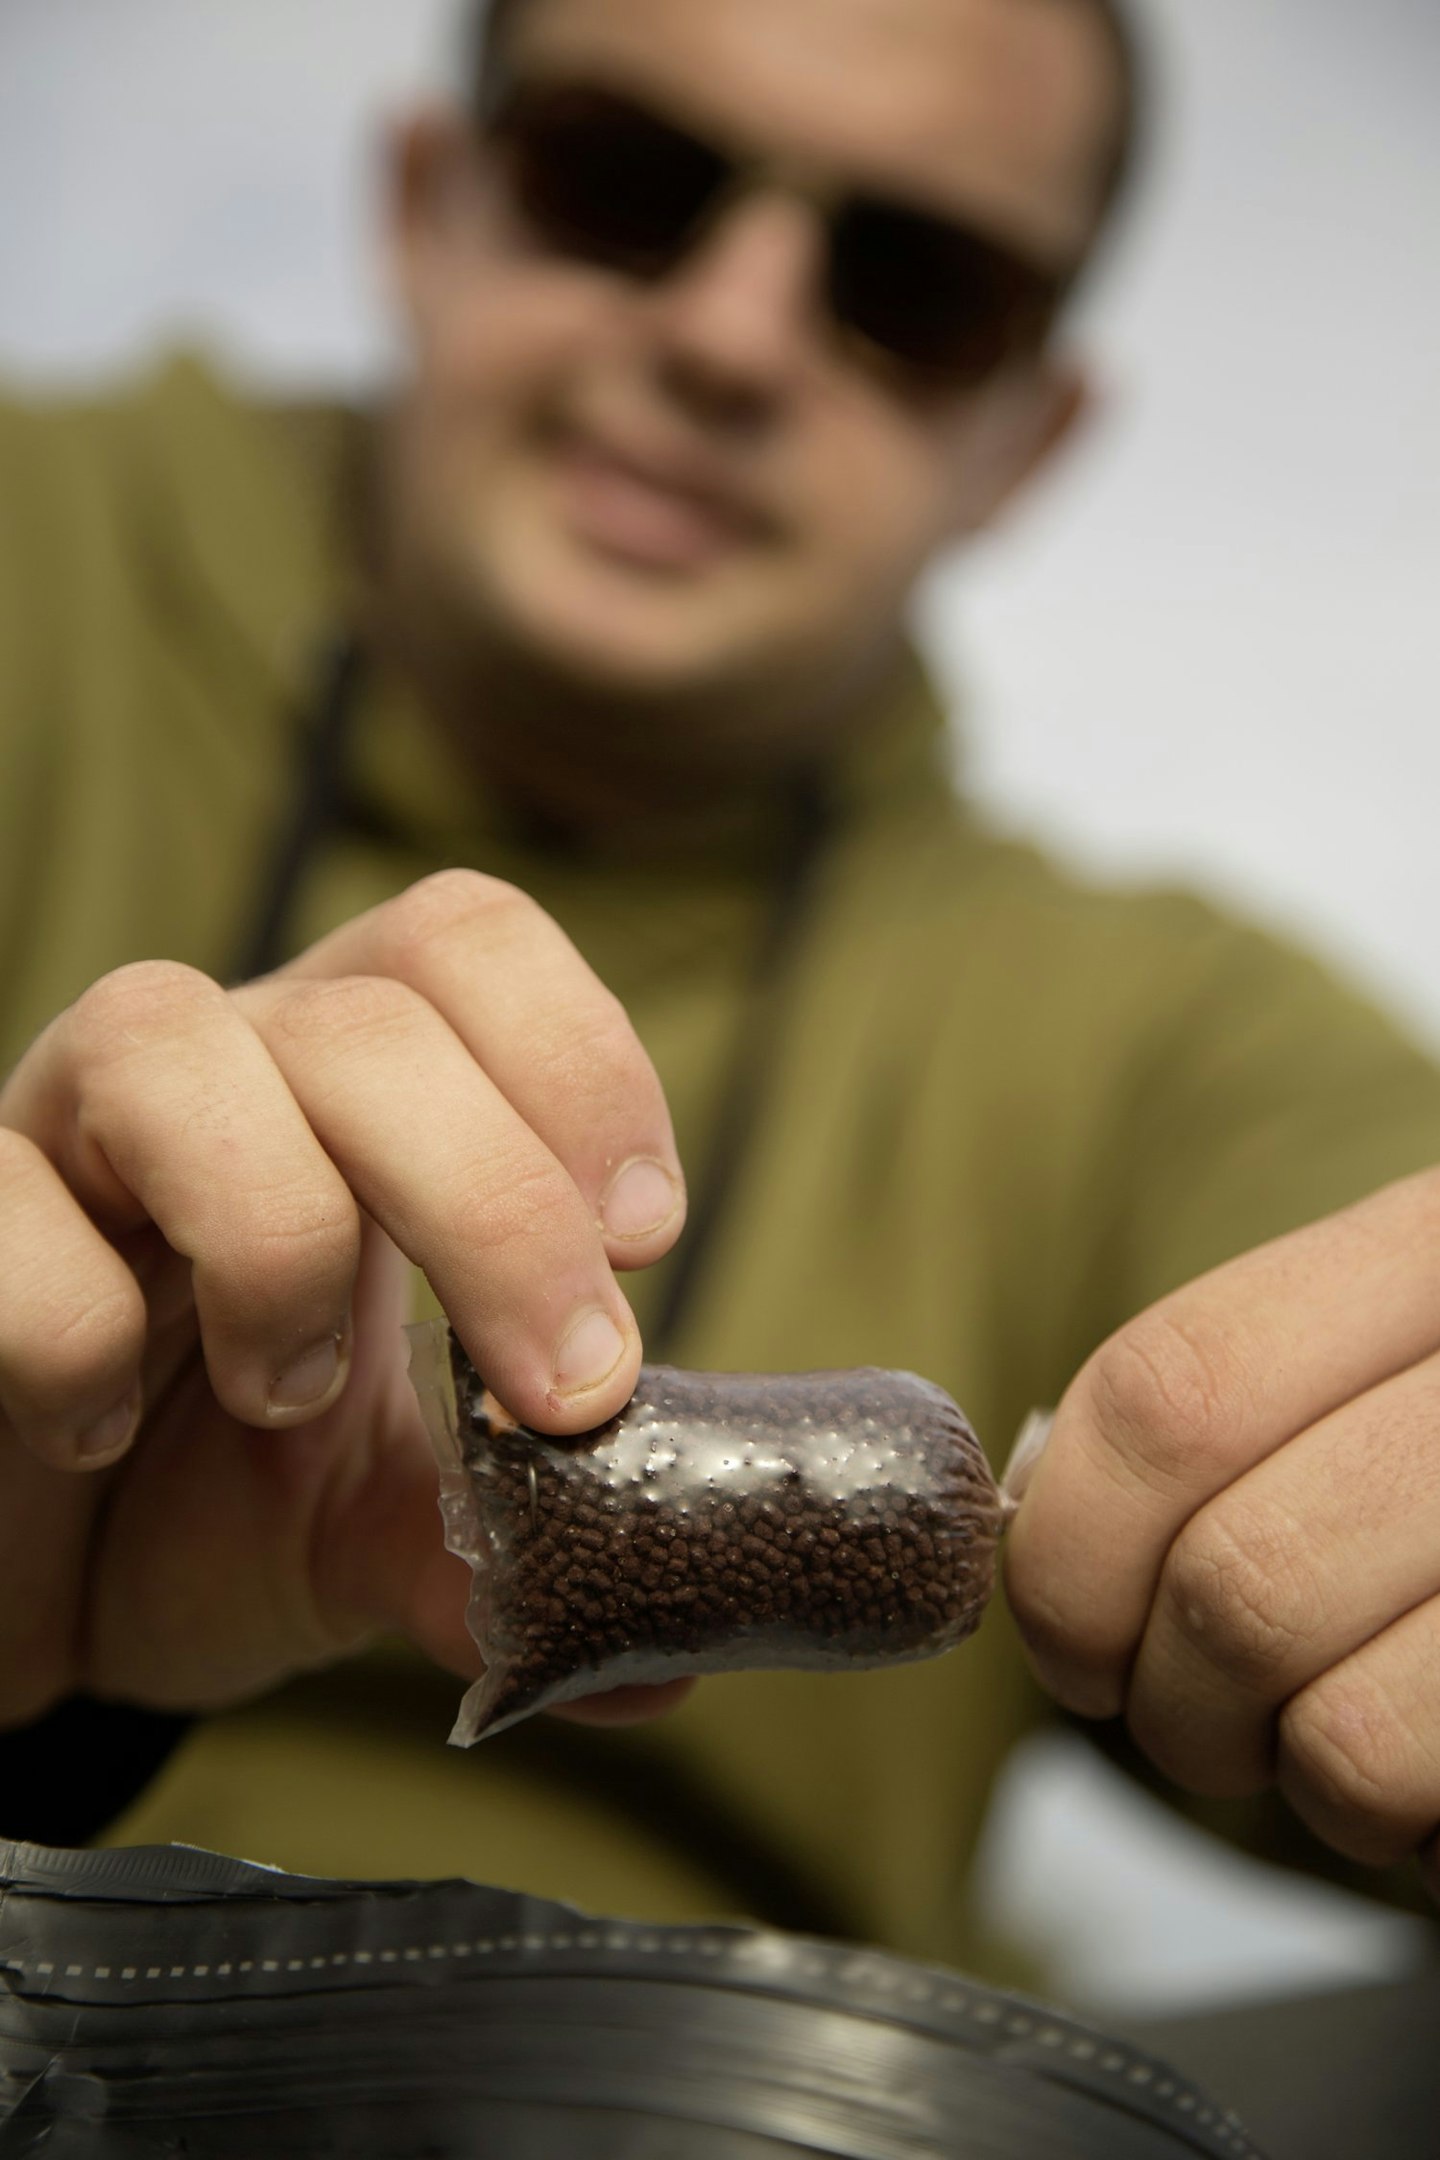
Keeping the contents compact, tie off the top with a short length of soluble PVA tape.
Finally, to make the bag more aerodynamic, lick the corners and stick them to the bag.

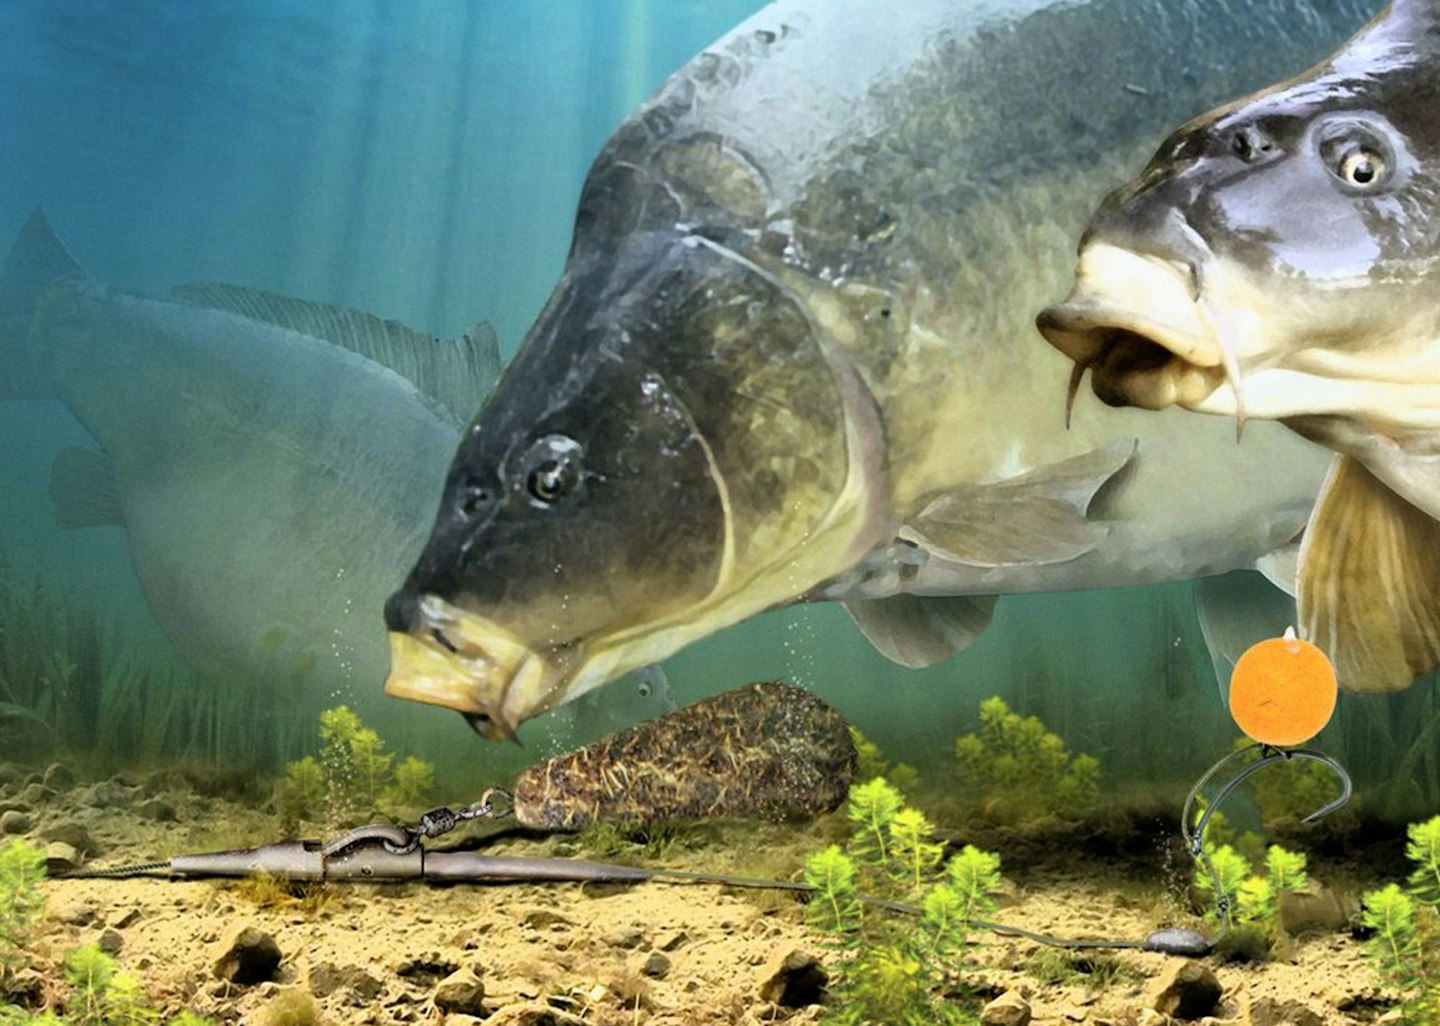
Ronnie rig
BEST FOR: Offering low-lying pop-ups, either as ‘singles’ or over a loosefeed of boilies and/or particles.
The Ronnie rig was kept secret for many years, while those ‘in the know’ used it to catch some of the country’s trickiest carp. It was first ‘revealed’ to the angling public back in 2016, and since then it has rapidly become the most popular pop-up presentation around.
So, what makes the Ronnie so damned good? Well, it combines the best elements of the best rigs of the past few decades. It presents a pop-up close to the lakebed with the superb rotation of a 360 rig, but without the problem of an exposed hook eye which can snag in the mesh of the landing net.
Furthermore, it boasts similar mechanics to the hinged-stiff rig, which is arguably one of the best big-carp rigs ever invented. When tied up correctly, hook-pulls on the Ronnie rig are incredibly rare.
A good tip is to make up several hook sections with the quick-change ring swivel and shrink tubing in advance. Then all you need to do is tie on a suitable boom section, depending on the lakebed or feature you are fishing over, once you arrive for a session.
For example, this could be a longer soft coated braid material with a lead clip when fishing in silt, or a stiffer fluorocarbon on a helicopter arrangement over gravel.
Because of the large hook and the additional weight of the quick-change swivel, it is important to use a highly buoyant pop-up for the hookbait.
Don’t forget to test the rig in the margins to check that it is sitting as you’d like it before you start fishing.
PAIR UP YOUR RODS WITH THE BEST CARP FISHING REELS, CHECK OUT OUR BUYER'S GUIDE FOR SOME GREAT OPTIONS.
Step- by-step
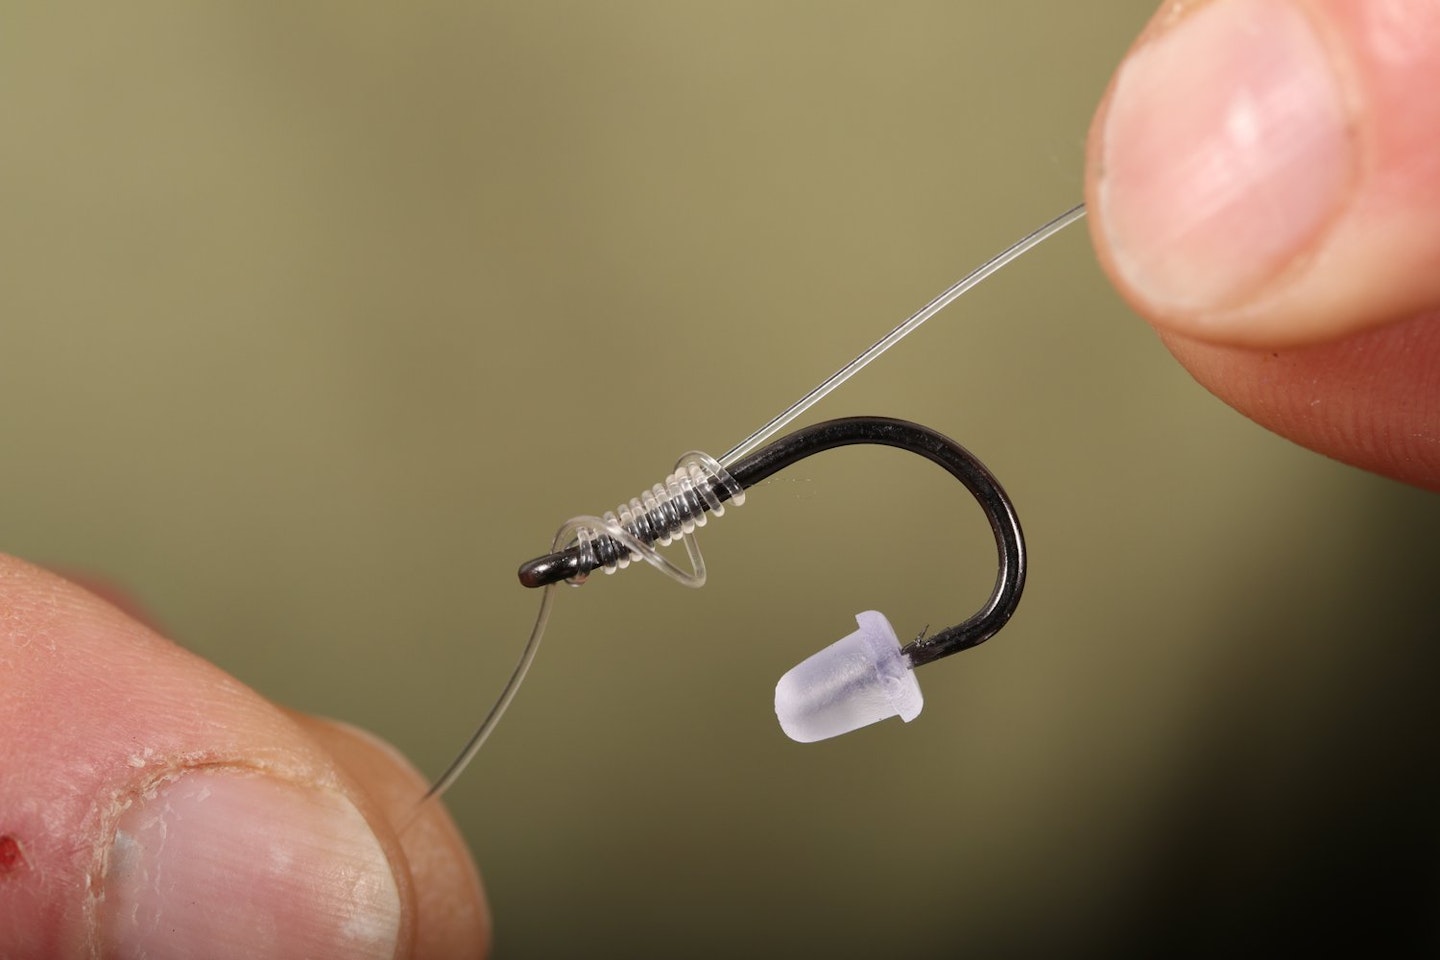
Thread a short length of shrink tubing down the shank of the hook. This one’s a Gardner Mugga.

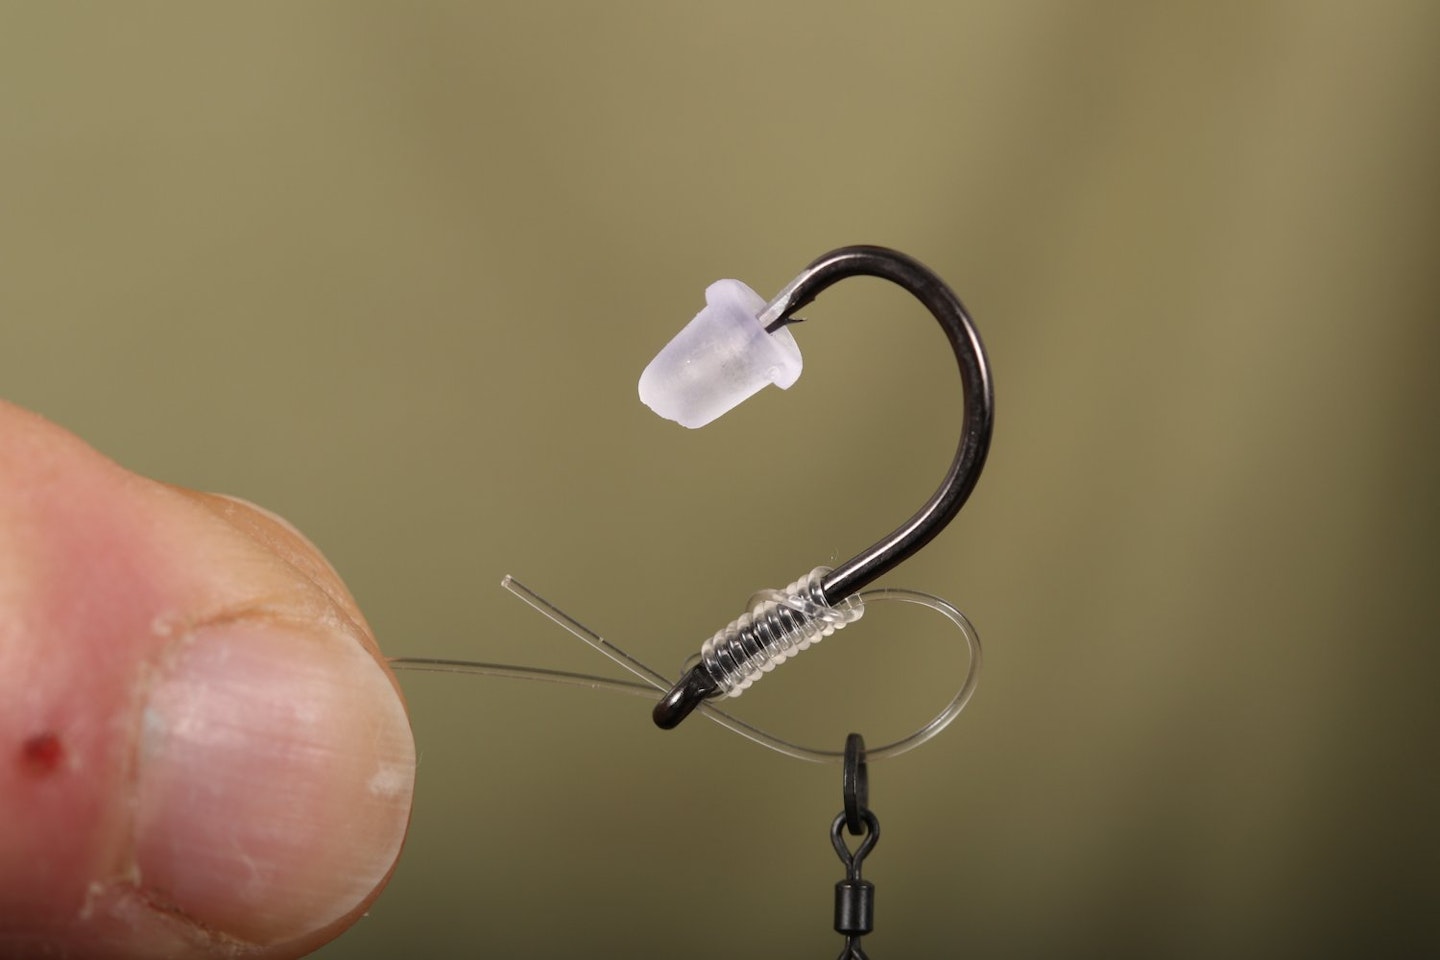
Pull the hook eye onto the crook of a quick-change ring swivel, as shown here.

Close the gape of the swivel crook using pliers, then position the shrink tube over the barrel.
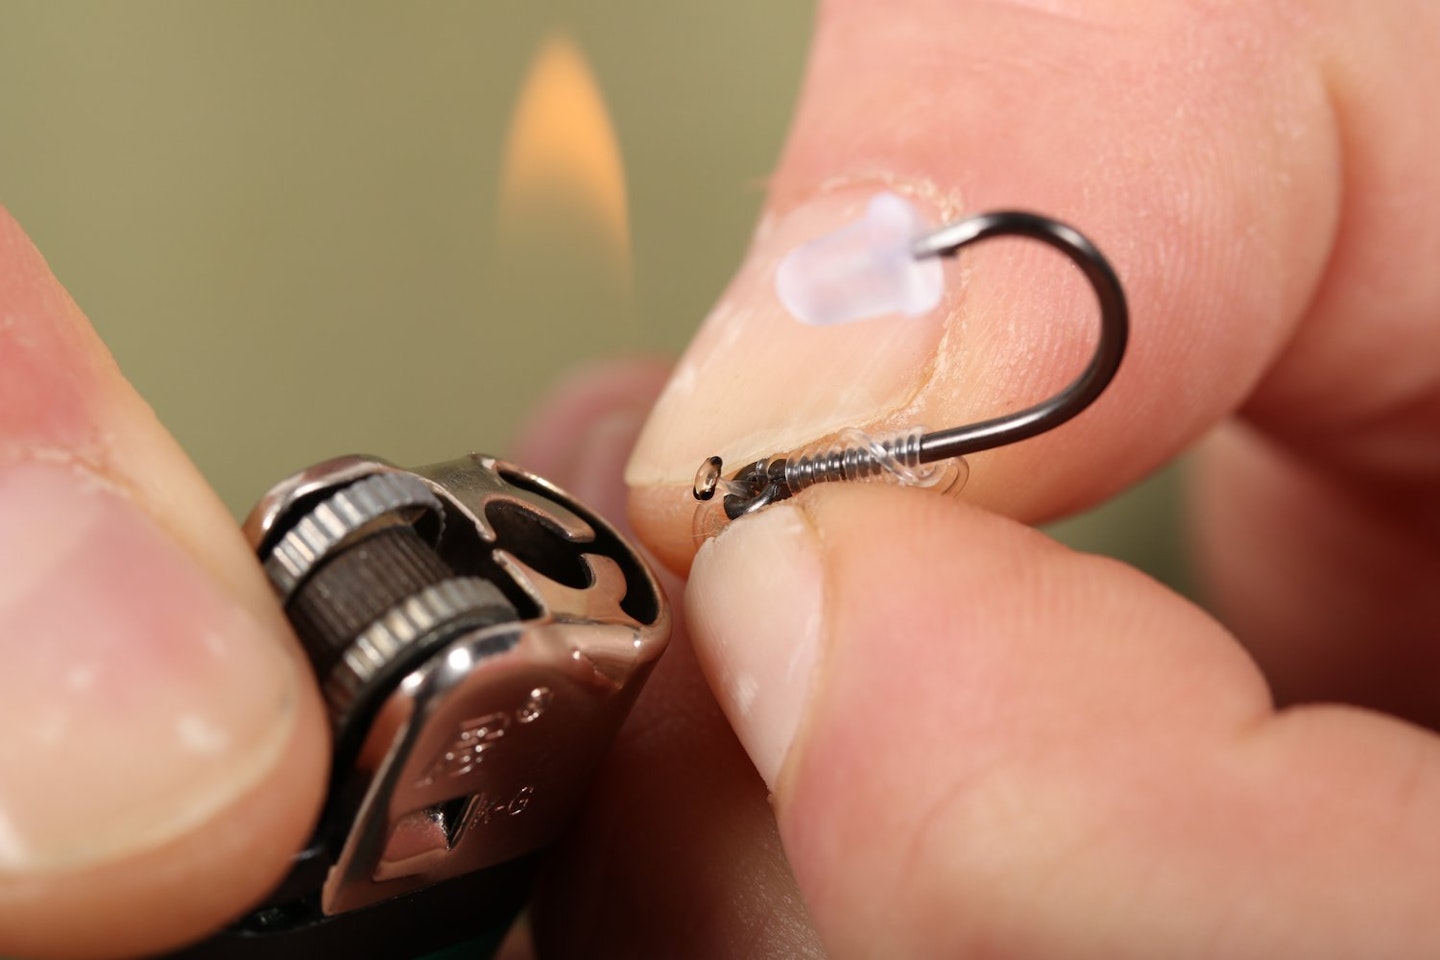
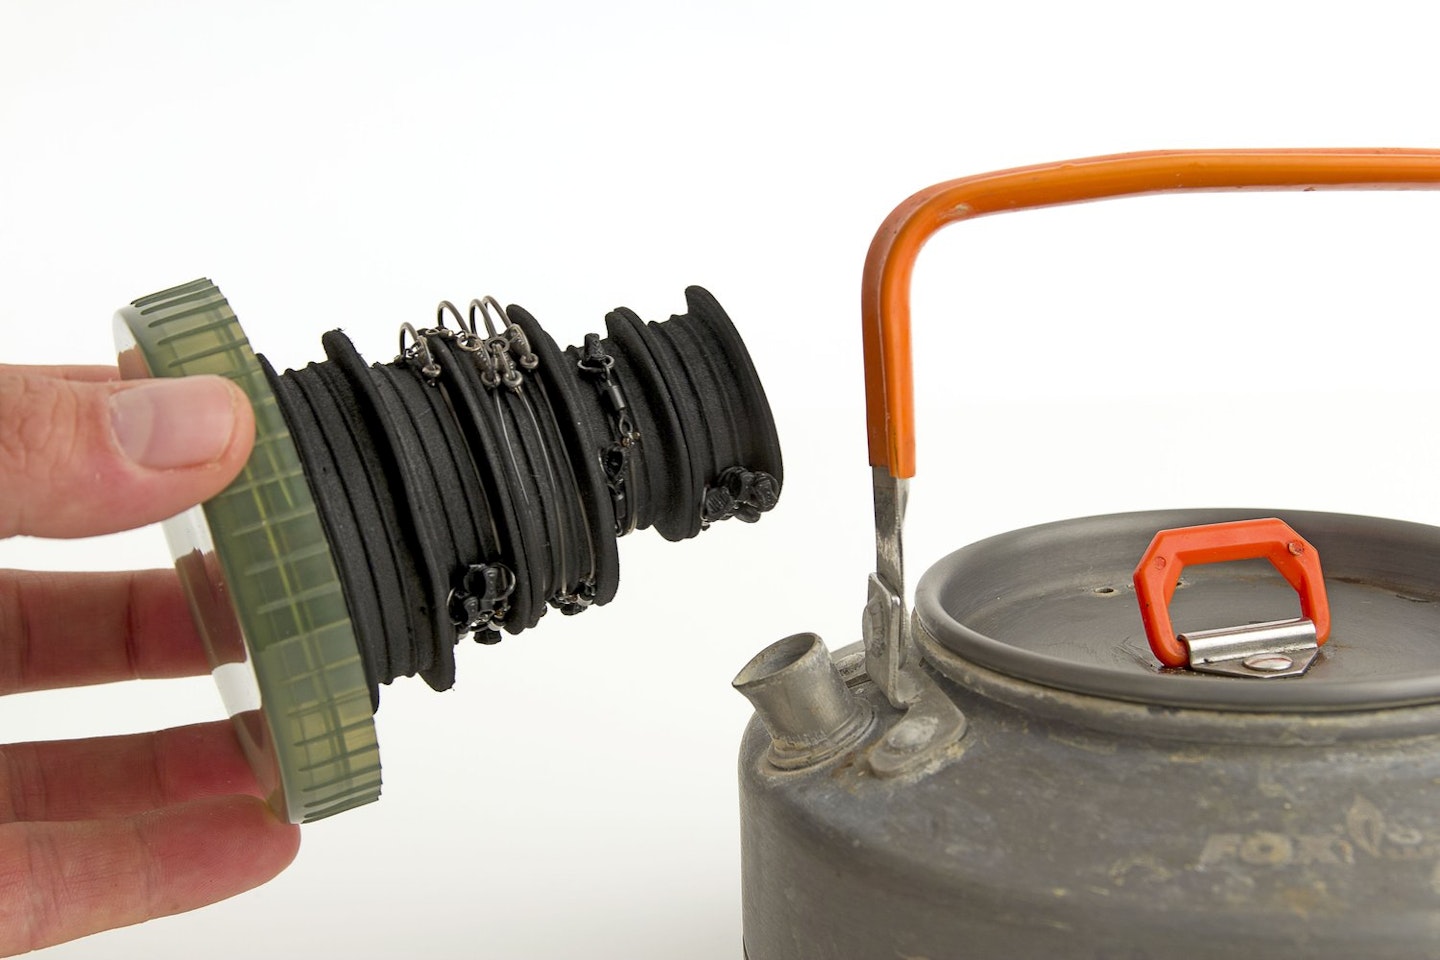
Shrink the tubing down over the steam from a kettle to secure the hook in place. Don’t burn yourself!
Slide a small hook swivel (or rig ring) over the hookpoint. This will carry the hookbait.

Push a hook bead or hook stop over the point and down to a level roughly opposite the barb. Done!

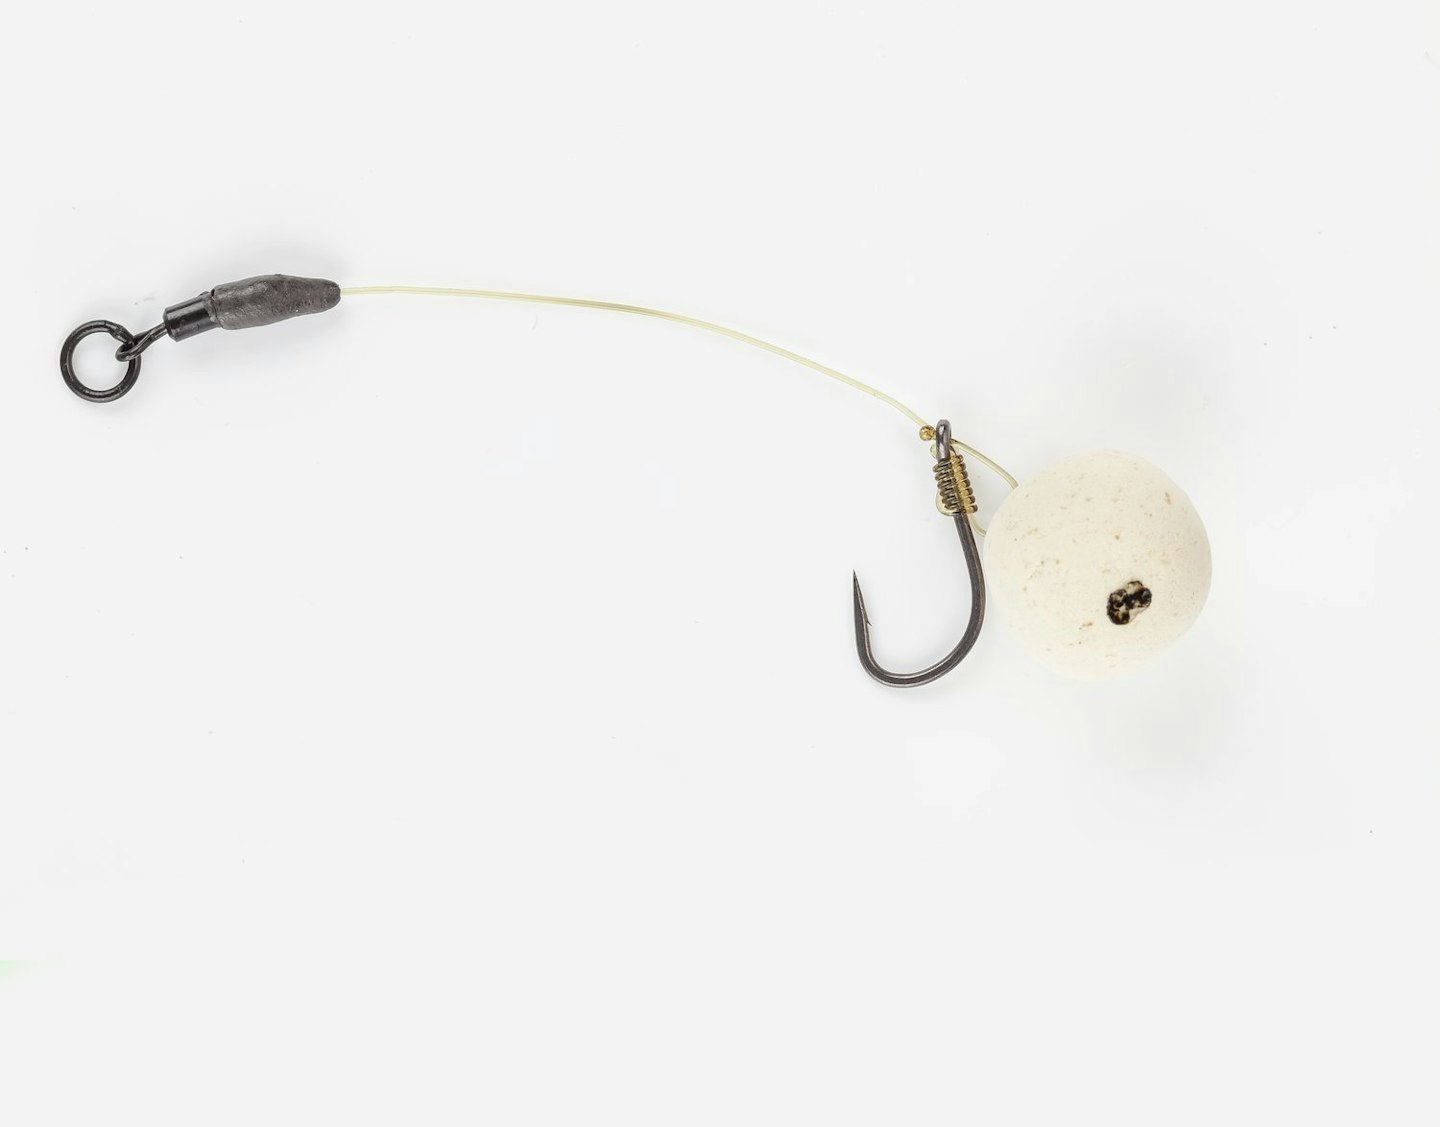
Wafter D-rig
BEST FOR: Presenting critically-balanced hookbaits or bottom baits over matching loosefeed/particles.
Few rigs offer such tangle-free mechanics and consistent presentation as the D-rig.
It’s a set-up that’s simple to tie and, although there’s nothing stopping you from using it as a standard bottom-bait rig, the D-rig really comes into its own when presenting balanced hookbaits tight to the lakebed.
It’s a rig favoured by many top anglers targeting pressured big carp that are perhaps wary of blatant pop-up rigs.
When used with balanced hookbaits – such as wafters, baits with foam plugs or snowman arrangements – the mechanics of the rig and use of the ring swivel on the D-section mean that the hookbait sits directly over the top of the hook, making it nigh-on invisible to the carp. It’s then in the perfect position be picked up by carp browsing close to the deck, sucking and blowing their extendable top lips to sift through debris and separate out feed items.
The D-rig is suited to fishing over particles, or broken/whole boilies and, as the fish inhales the bait, the hookpoint is in prime position to take hold, thanks to the semi-stiff hooklink, which should be made from mono or fluorocarbon.
When tying the rig use a hook with a straight or slightly out-turned eye so that the gape isn’t closed down too much by the stiff hooklink material (as would be the case if a hook with an inturned eye were used).
Finally, when using really short D-rigs, a helicopter set-up is the best arrangement, with a loop (or ring swivel) at the leader end of the hooklink to help it settle flat on the lakebed.
YOU DON'T HAVE TO SPEND A FORTUNE TO GET YOURSELF SOME OF THE BEST BITE ALARMS FOR YOUR ANGLING.
Step-by-step
Start by tying on a hook with an out-turned eye using a knotless knot (8-10 turns is about right).
Thread a small flexi hook swivel onto the tag end of the hooklink that’s left beneath the hook.

Next, create a small ‘D’ by looping the tag end back through the eye of the hook, as shown above.
Trim the tag end back with sharp scissors, leaving about a centimetre above the eye.

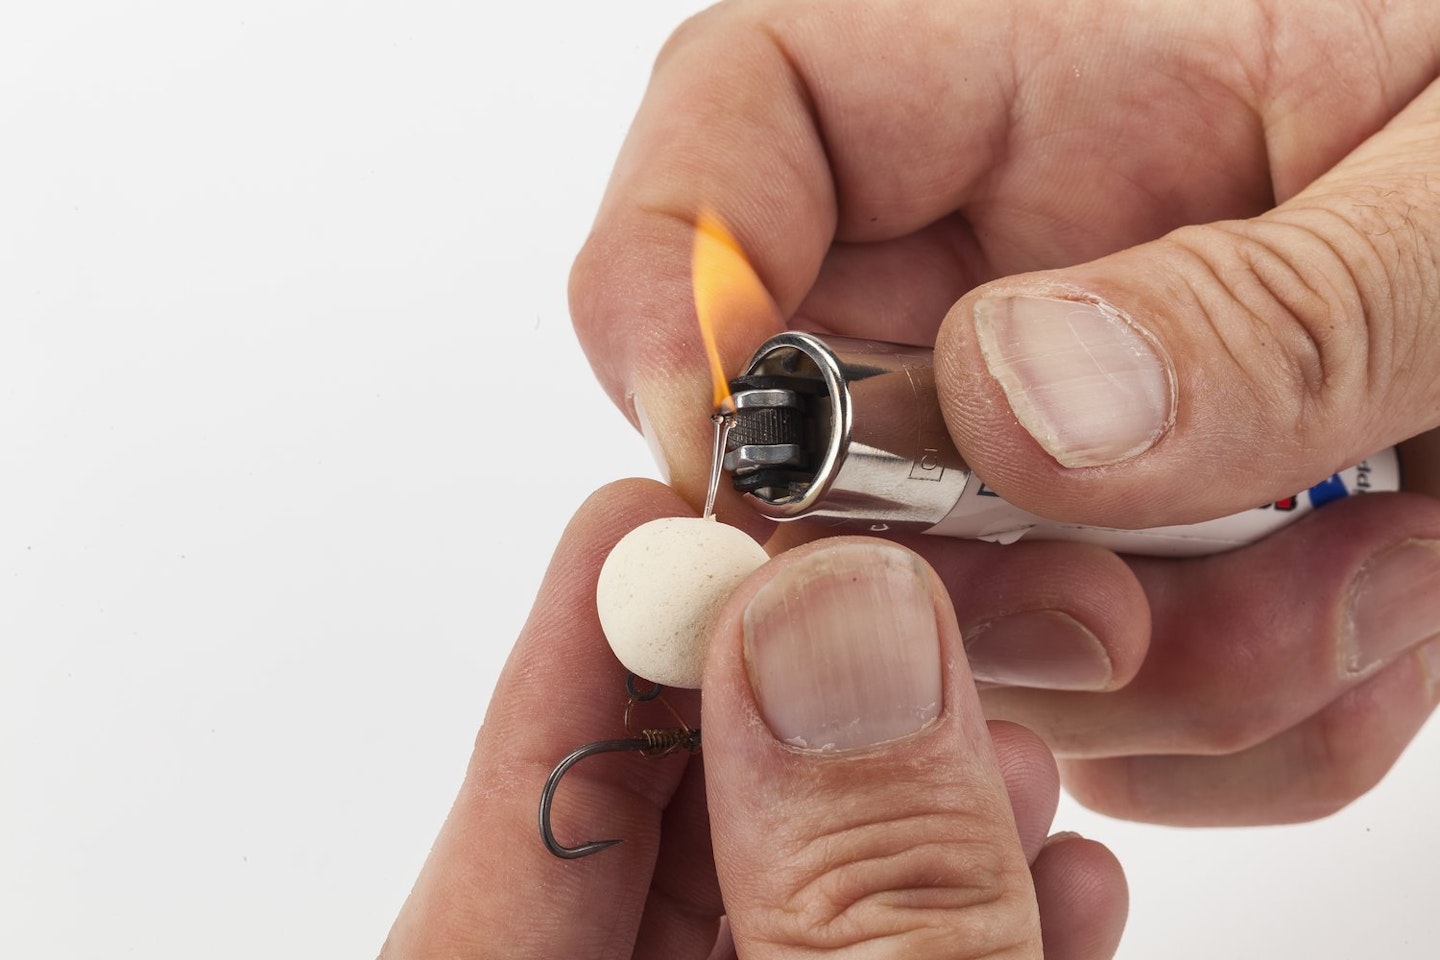
Use a lighter to carefully burn back the tag to create a blob and secure the ‘D’ in place.
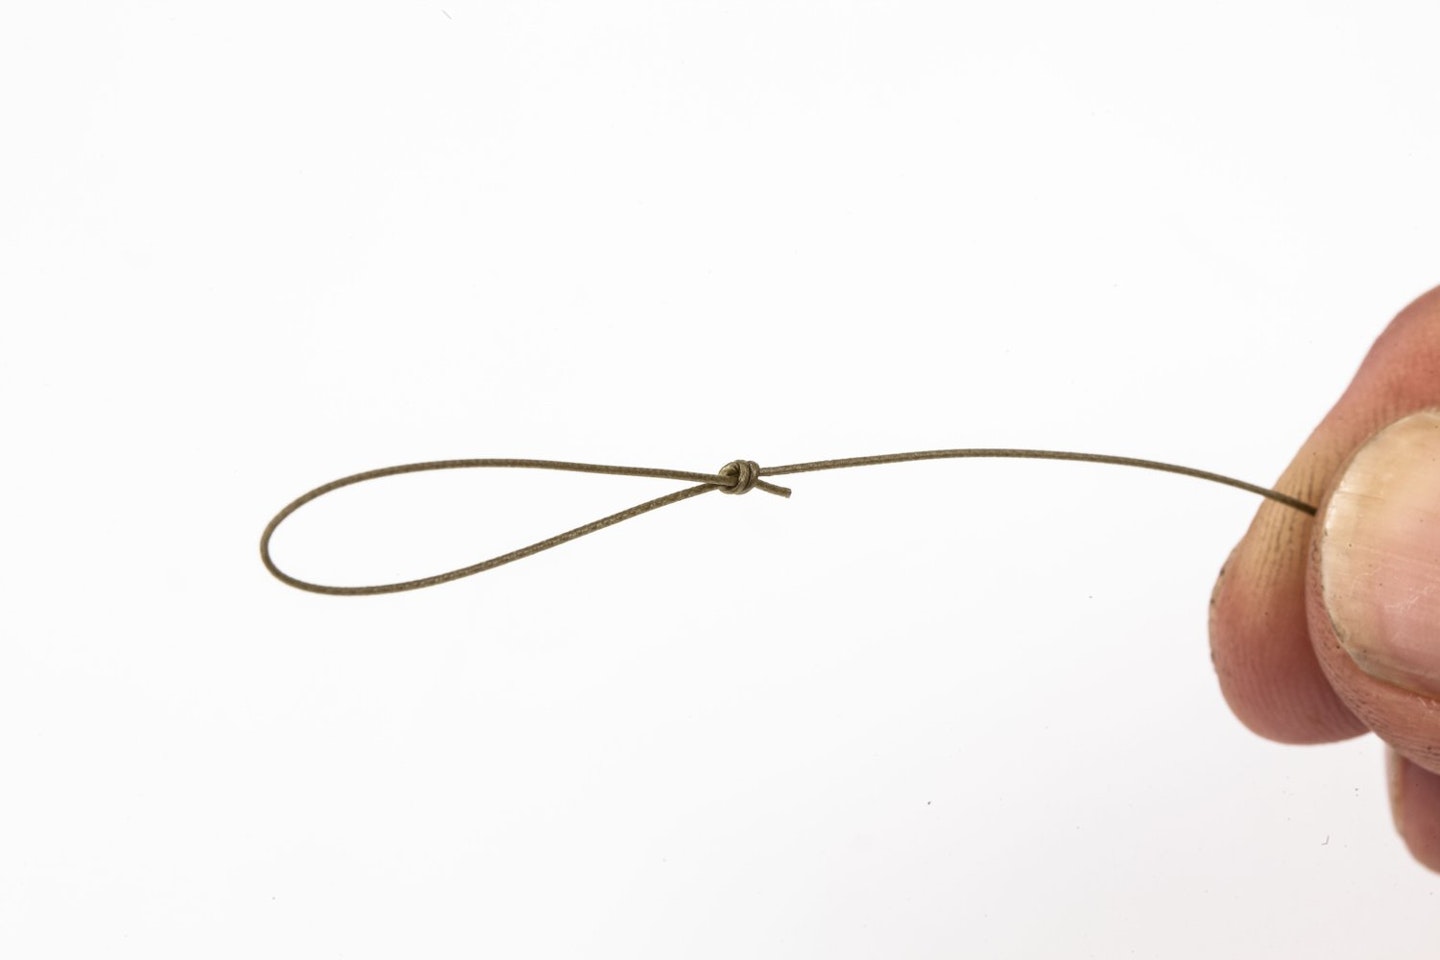
Tie a figure-of-8 loop knot in the other end of the hooklink for quick attachment to swivels and clips.

Adjustable mini zig rig
BEST FOR: Targeting big carp that are cruising in the mid to upper water layers. Effective all year-round.
On sunny spring days when high pressure dominates, it can more productive to target the fish where they are spending most of the day – in the upper layers – than presenting a bait on the deck. The best way to do that is with a zig rig.
Doing so used to mean struggling to cast out long, tangle-prone hooklinks. The length of these was dictated by how far off the lakebed you wanted to present the hookbaits, meaning the hooklink would often be longer than the rod – hardly ideal for casting purposes!
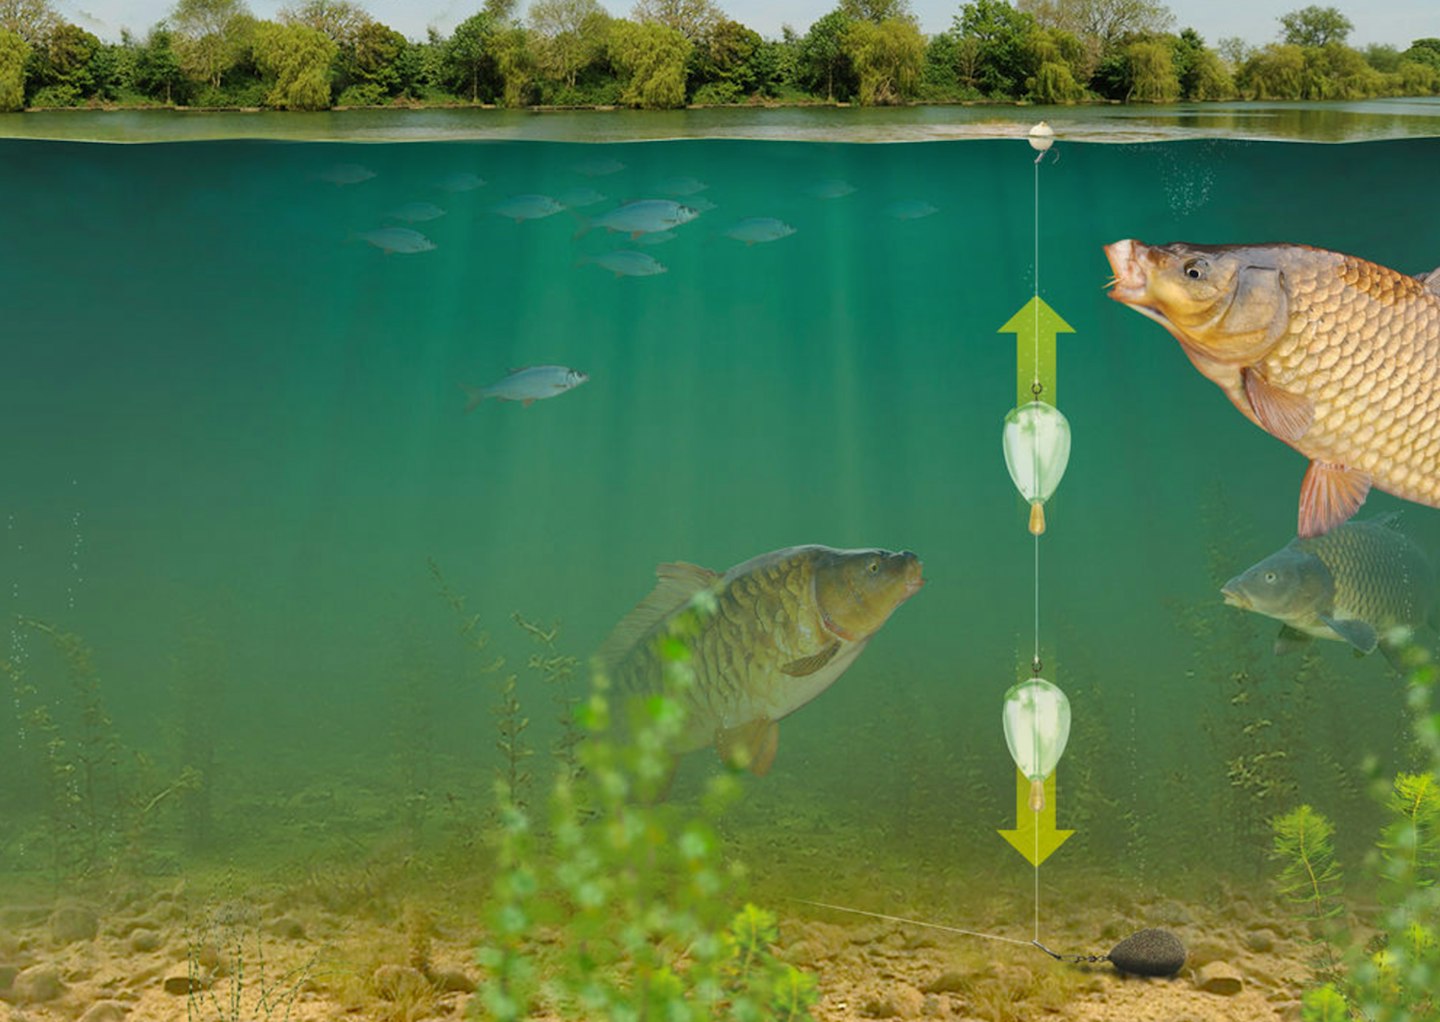
But fear not, salvation is at hand in the form of adjustable zig rigs. With these, the hooklink can be tied as short as 2ft or 3ft, and is attached to a ‘sub float’.
Beneath that is a lead with a swivel, through which the mainline runs. The set-up is easy to cast out – thanks to the short hooklink – and rarely tangles.
After casting out, the lead is felt down to the bottom, and there are then two ways of adjusting the rig so the hookbait sits at the desired depth.
First, you can peel line from the reel in 1ft increments; so, if the hooklink is 3ft long and you peel off 3ft, you know that the hookbait is sat 6ft off the bottom.
The second way is to let the hookbait rise to the surface, then wind it down in one-foot increments until you are at the required depth.
Don’t be afraid to experiment with hookbaits and colours. Small pieces of foam work really well, but small boilies and ‘zig bugs’ also have their place. You are only limited by your imagination!
USING THE BEST CARP FISHING LINES WILL MAKE YOUR ZIG FISHING FAR LESS STRESSFUL.
Step-by-step
Use a 12-turn knotless knot to tie on the hook. The bait should sit tight to hook on a short hair.

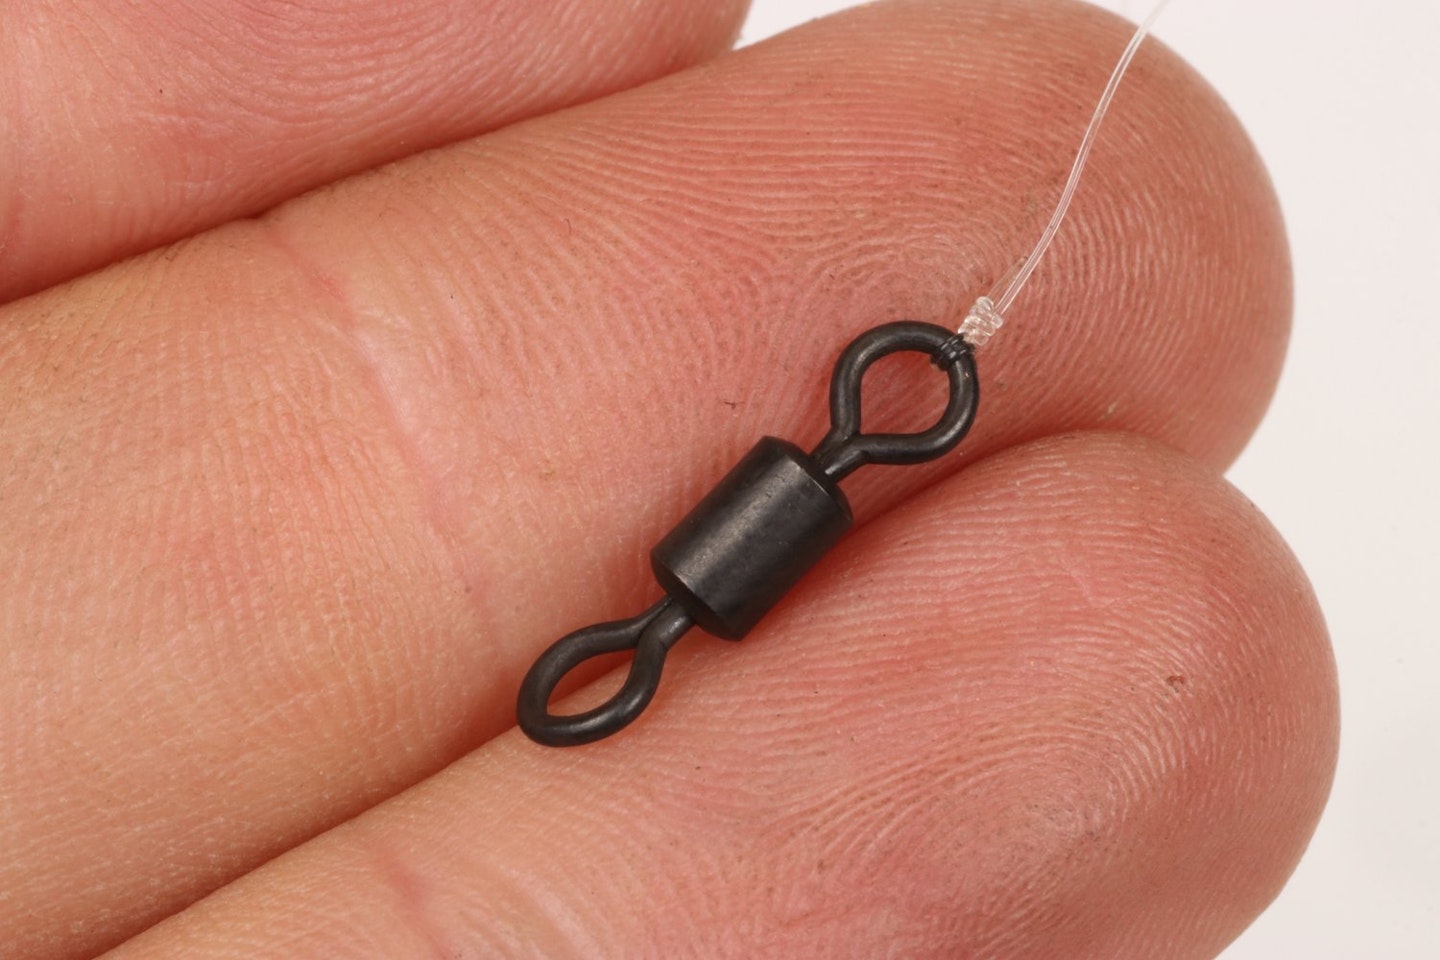
Tie a rig swivel on to the end of the hooklength using a four or five-turn grinner knot.
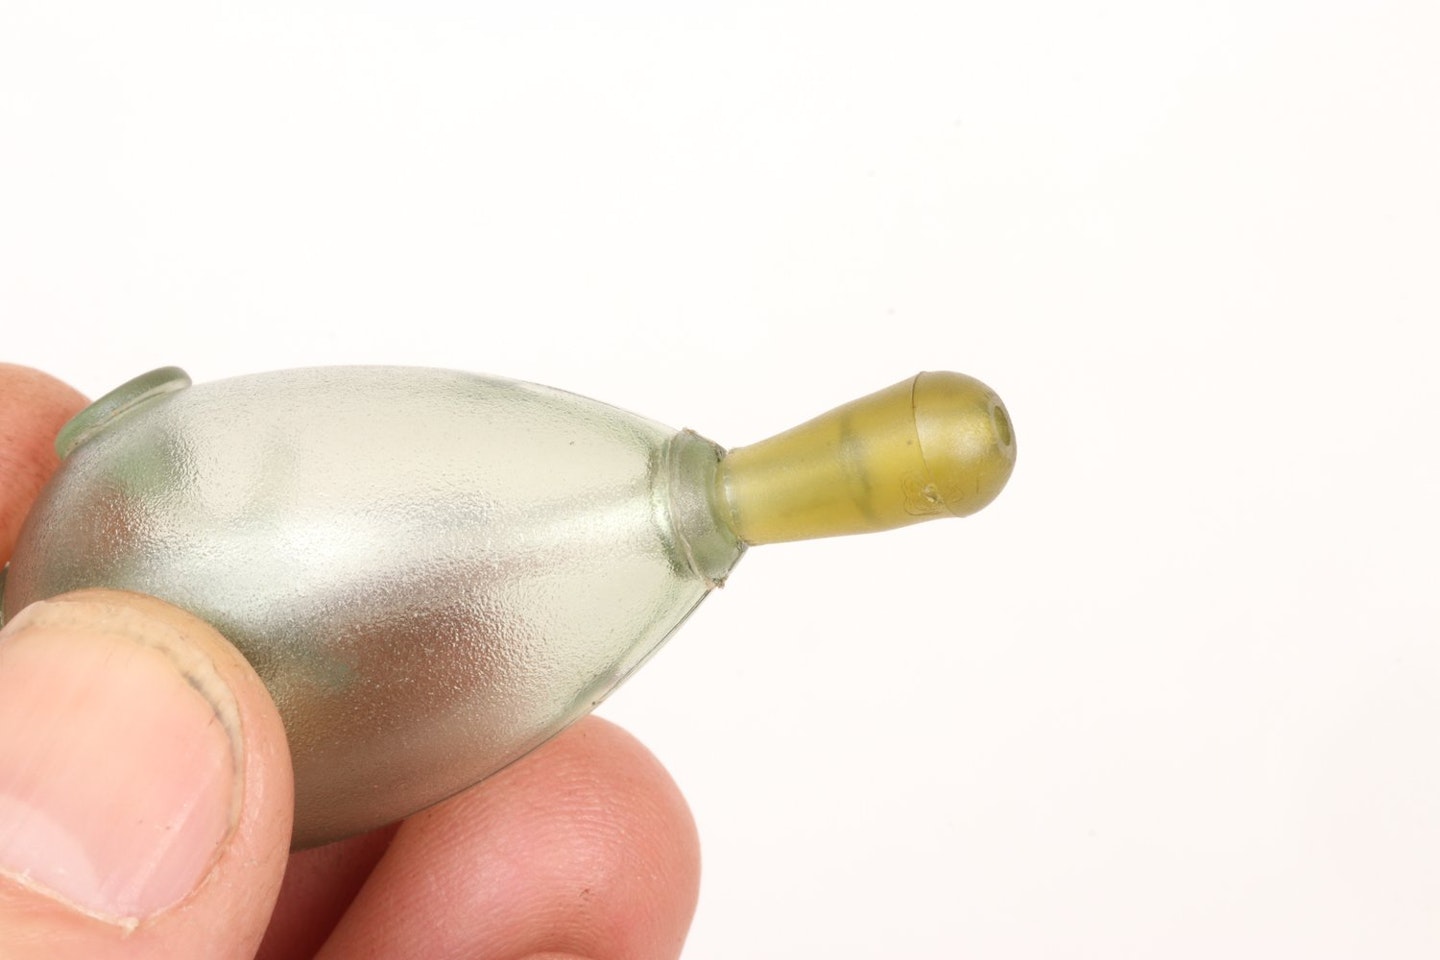
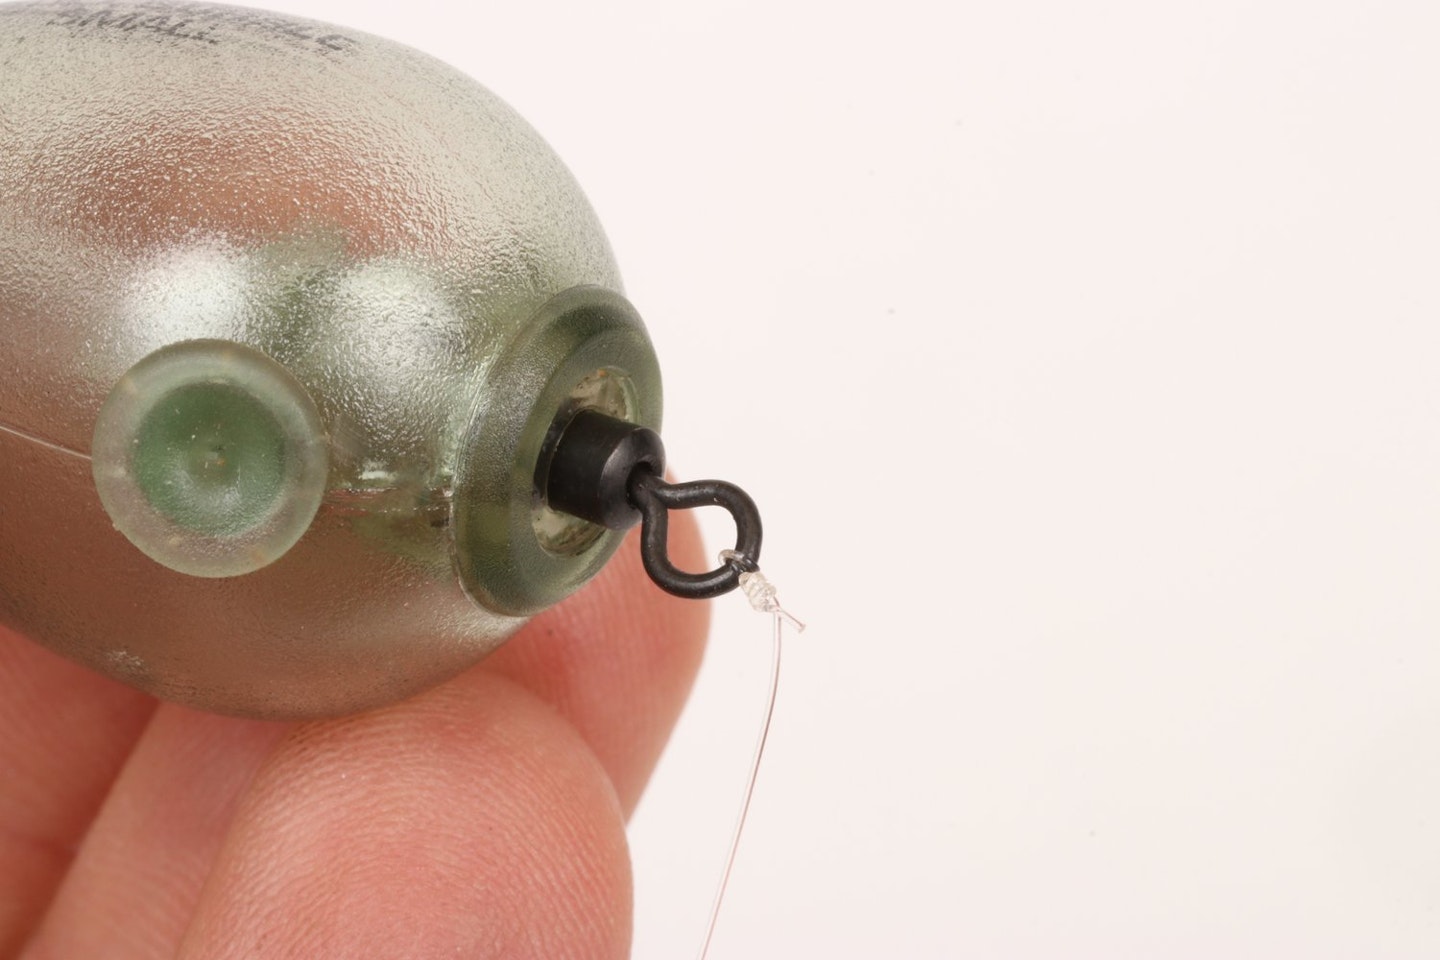
Remove the tail rubber from the bubble float and replace it with a buffer bead, as shown here.
Thread the lead on to the mainline. A minimum 1.5oz weight will give a solid anchor.

Thread the bubble float on to the end of the mainline with the buffer bead uppermost.
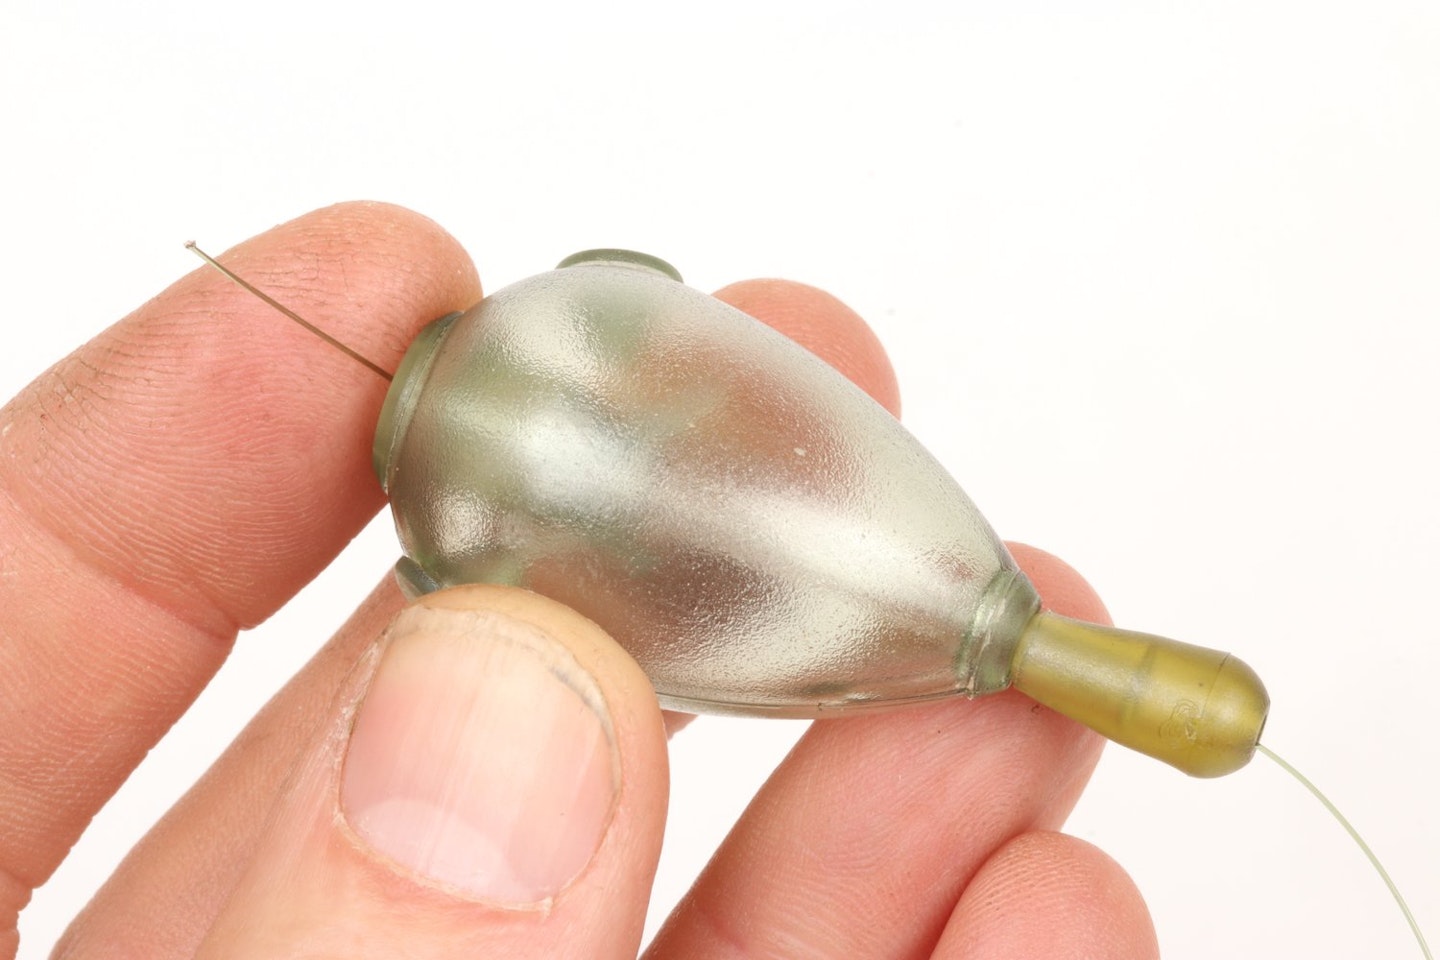
Finally, tie the mainline to the rig swivel using another grinner knot, and insert into the float.
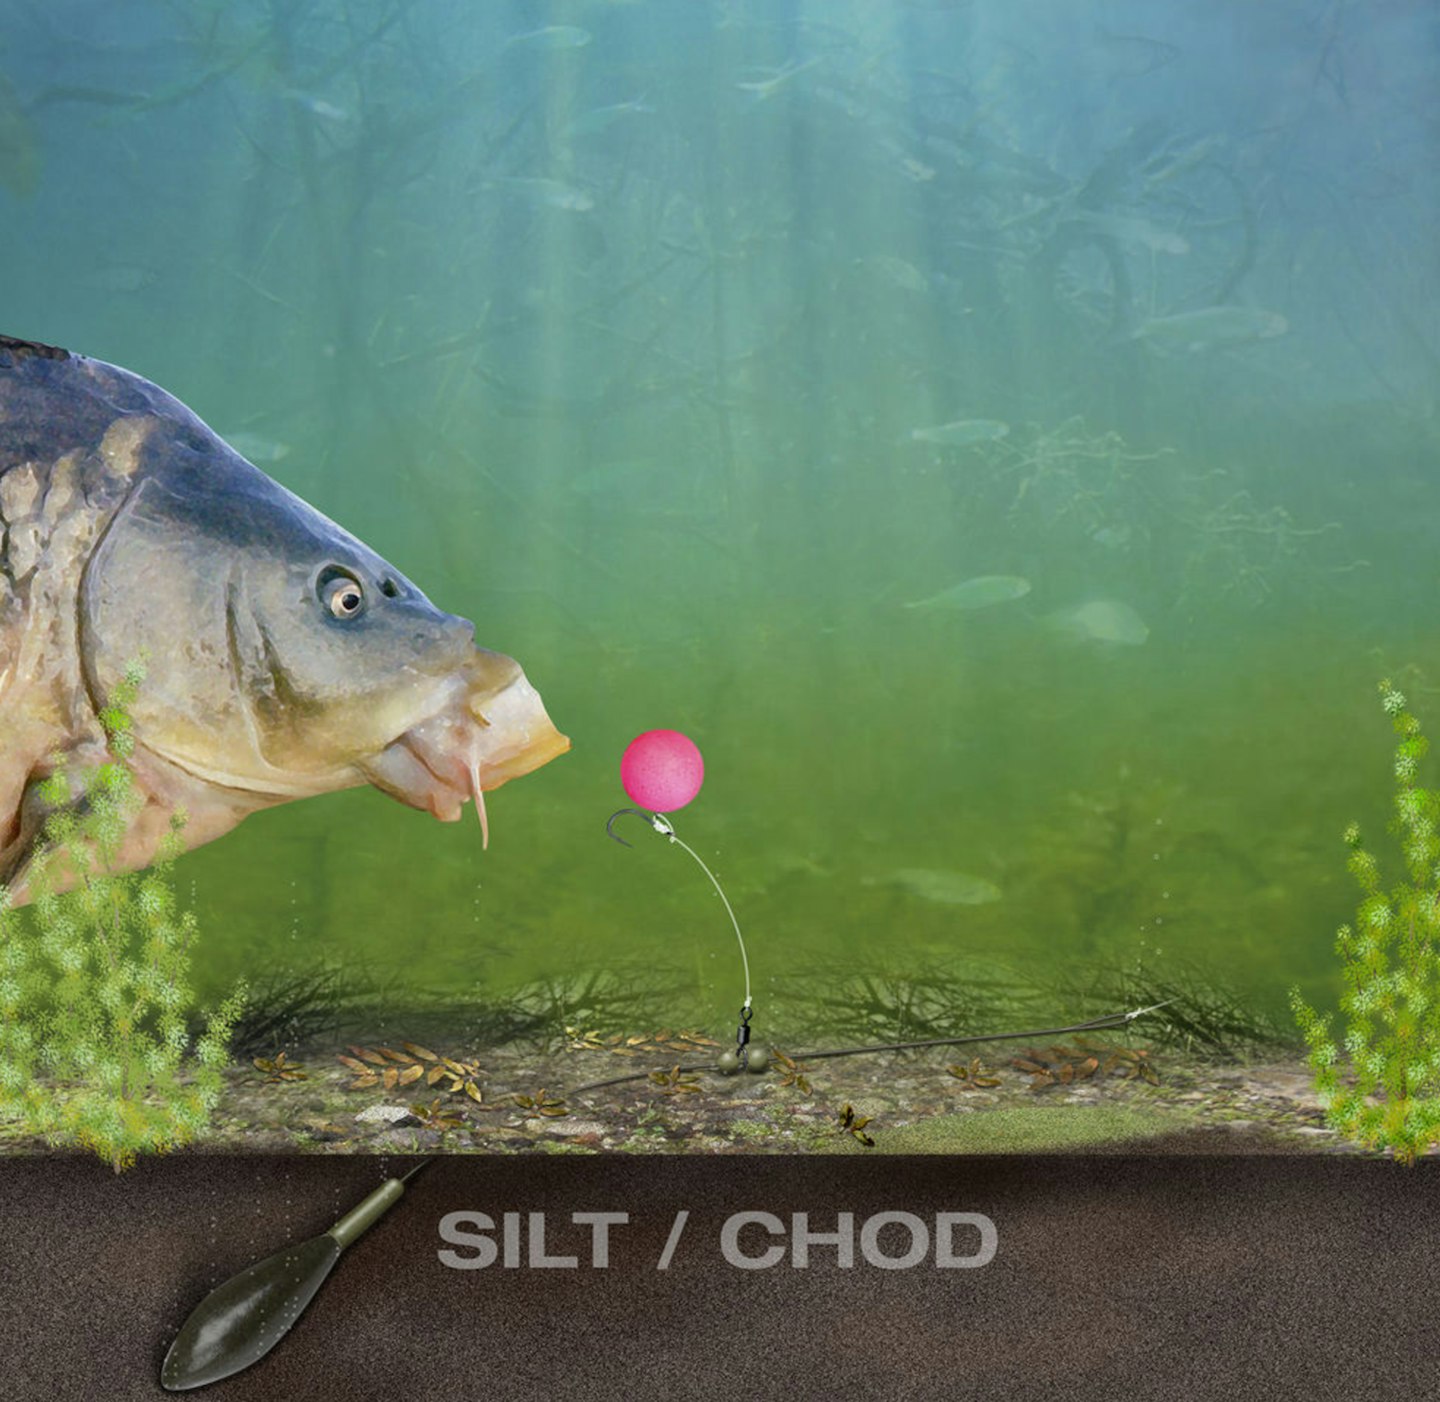
Chod/Naked chod rig
Best for: Fishing pop-ups over weedy or choddy lakebeds (or casting ‘blind’)...or for flinging baits at showing fish!
When it comes to rigs that can be cast anywhere, safe in the knowledge that the hookbait will be well presented, the chod rig has no equal.
Invented in the late 1990s, until relatively recently it was the most popular pop-up rig. It has since been overtaken in that respect by the Ronnie rig, yet still finds favour with many anglers. Its beauty lies in its versatility. The rig can be cast just about anywhere, with the guarantee that the hookbait will be sitting pretty above any detritus or weed there may be on the bottom.
As such, it’s a great rig for casting at ‘showing fish’, when you don’t want to get the marker rod out and test the make-up of the bottom. If the area is known to be particularly weedy, it’s a simple case of moving the top bead up the leadcore (or mainline, if using a ‘naked chod’ rig), so that the hook section can ride up the leader and sit against the bead, thereby not getting pulled down into the weed.
The chod rig is most commonly used with leadcore (or lead-free alternatives). It can also be used without the leadcore, with the chod section running on the mainline instead – a ‘naked chod’.
One technical necessity of this rig is that the hook section, which is made from stiff thick mono, should be fairly short and manipulated in the fingers until it is slightly curved. This helps it to spin round when mouthed by a carp, and grab hold. Try it this season – it’s certainly no back number!
WANT TO TRY CARP FISHING BUT AREN'T SURE WHERE TO START? CHECK OUT OUR EXPERT BEGINNER'S GUIDE FOR SOME FANTASTIC TIPS.
Step-by-step
Attach the hook with a six-turn knotless knot. Leave the tag long and add the rig ring, like so.

Thread the tag end back through the eye of the hook, trim the excess, then blob with a lighter.

Tie the other end of the hooklink to the swivel using a two-turn blood knot. Blob with a lighter.
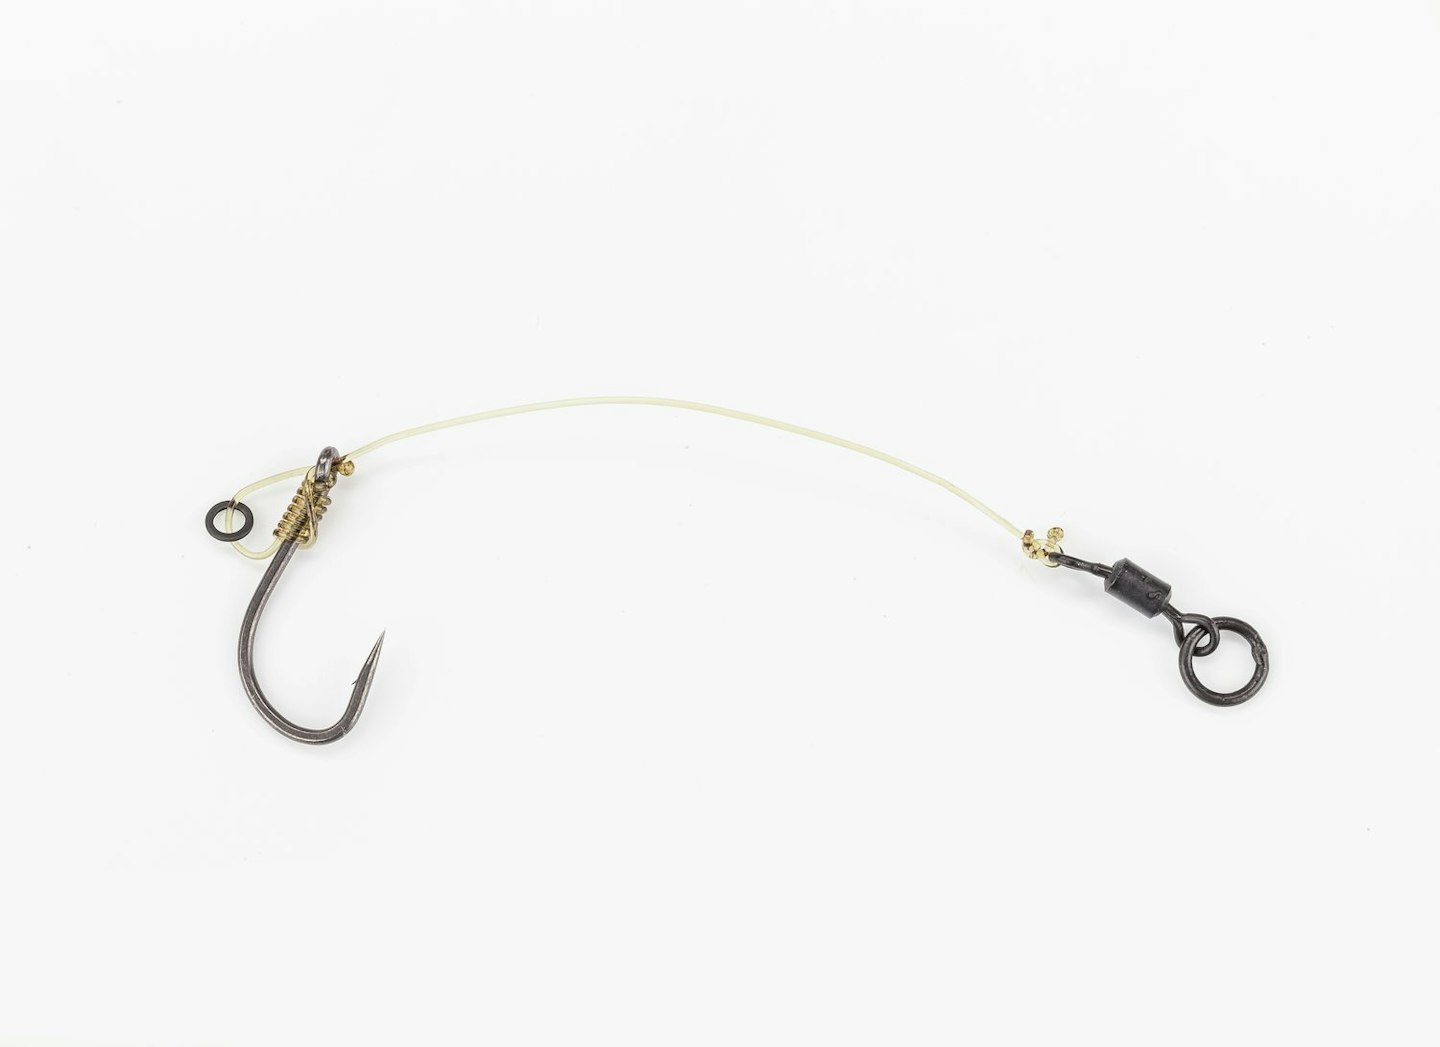
Thread floss through rig ring, pull through the hookbait, and then blob with a lighter to secure.
Add a little tungsten putty over the swivel knot. This is to ensure the leader doesn’t lift up.
A foam rig winder can be used to steam the perfect curve into the hooklink section.
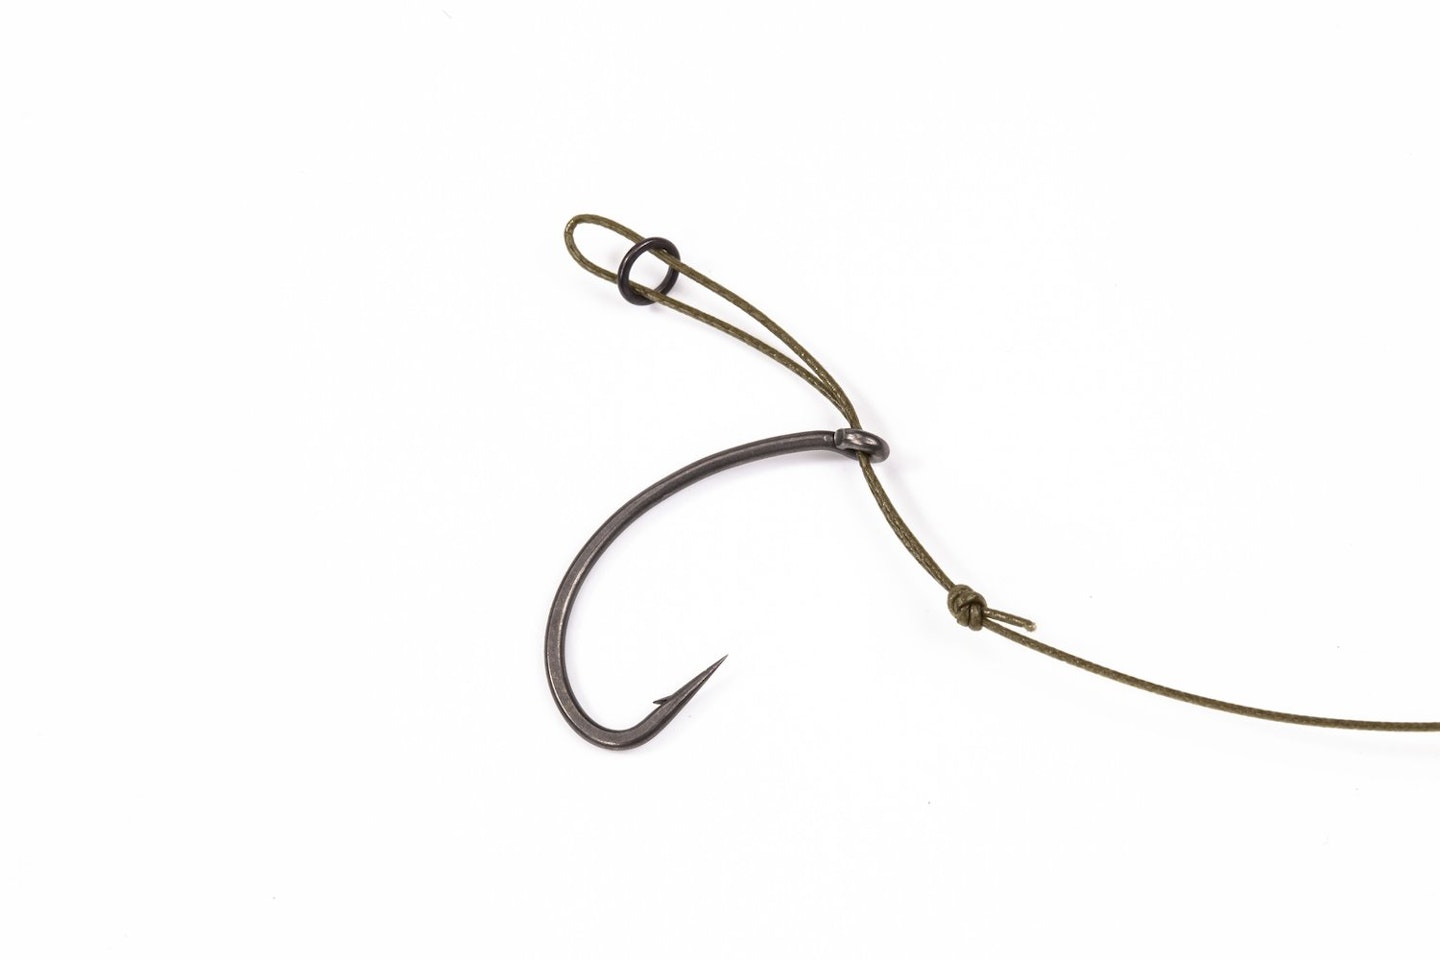
Multi rig
Best for: Presenting low-lying pop-ups. Particularly useful on runswaters, when you might need to change the hook regularly.
Although predominantly used for presenting pop-up hookbaits, the multi rig can also be used to present bottom baits or snowman presentations, and can be tied using a wide range of different materials and terminal tackle configurations.
It can be used with just about any terminal set-up – lead clip, running rig or helicopter – and can be tied to any length to suit the type of lakebed being fished over.
However, perhaps the biggest selling point of the multi rig is the fact that it allows you to change the hook if the point becomes blunted, without having to re-tie the whole rig.
All you have to do is push the hooklink loop back over the end of the hook and back through the eye, swap the hook, then repeat the process to re-attach the new hook.
It sounds a lot harder than it is, and in reality the hook can be changed in well under a minute.
As you can see from the sequence provided here, the bait itself is attached using a small rig ring or a small hook swivel, which is free to run along the length of the doubled-over section of hooklink.
The Multi is an incredibly versatile rig that every carper should have in his locker!
WANT PLENTY OF ACTION? OUR WHERE TO FISH GUIDE HAS SOME EXCELLENT RUNSWATERS YOU CAN TRY NOW.
Step-by-step
Tie an overhand knot about two inches long in the end of the hooklink material (coated braid).
Thread the end of the loop through the eye, and push a small rig ring over the doubled-up loop.
Next, pass the hookpoint through open the end of the loop, and position the ring like so.
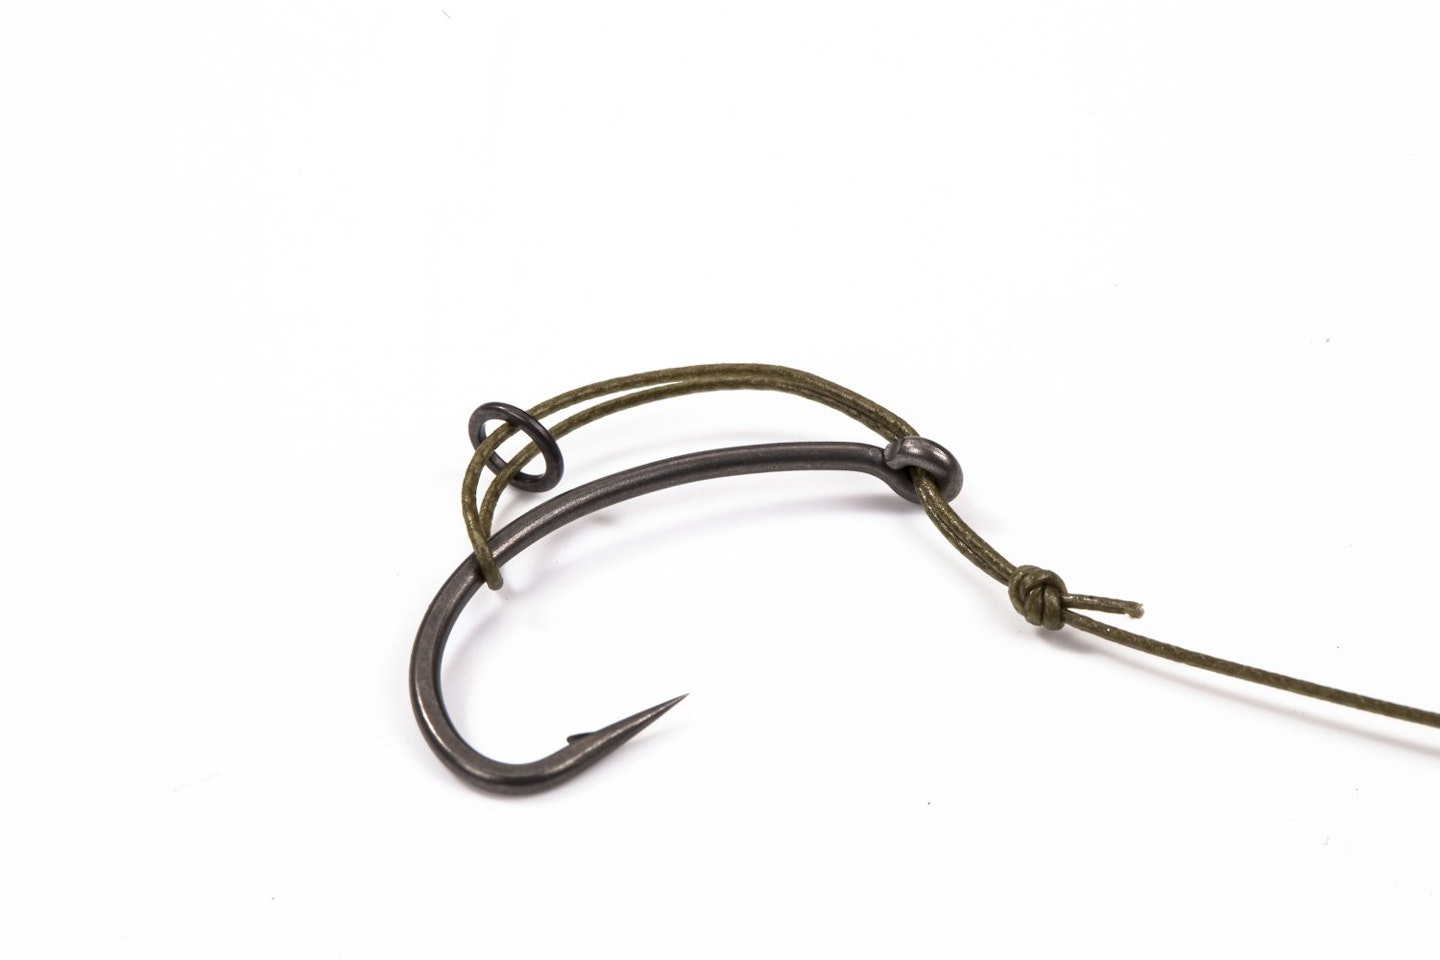
Break the coating on the braid below the knot to form a ‘hinge’, and then add a blob of putty.

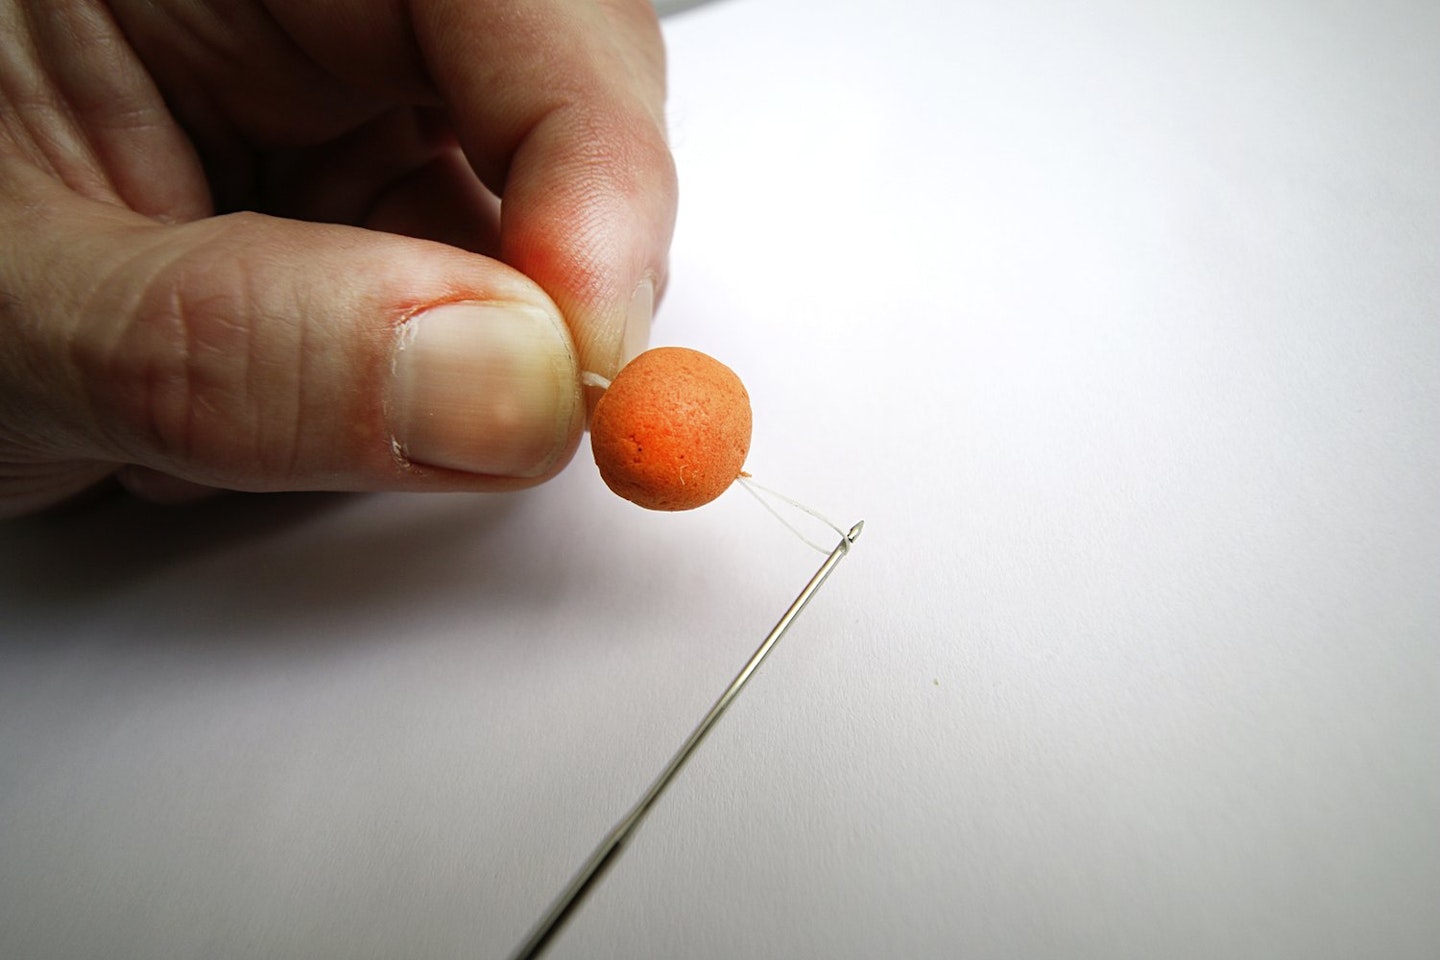
To attach a bait, pull doubled-over bait floss through it, add a bait stop to the loop, then tie to the rig ring.
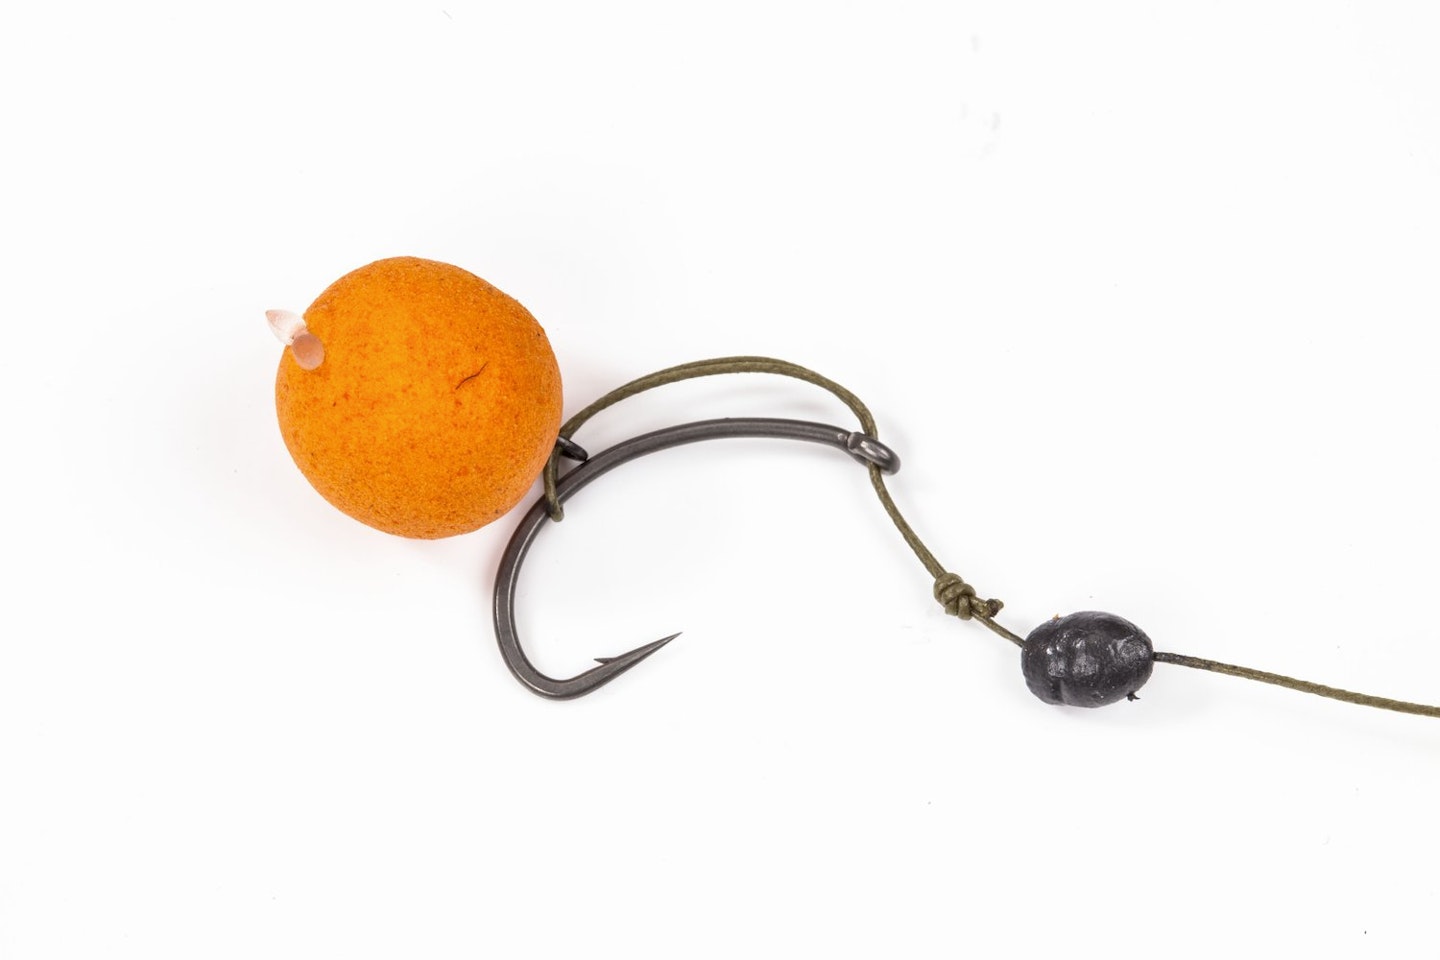
The finished rig. Simple, incredibly effective and the first choice of many big-carp anglers.
This page is a free example of the amazing content Angling Times Members get every single week. Becoming an Angling Times Member gives you access to award-winning magazine content, member rewards, our back issue archives, bonus content and more! Join our fishing community and find out more today!