A marker float helps you to map out the water in front of you, and tell you the exact composition of the lakebed
A marker float is your underwater eyes and allows you to ‘see’ the lakebed and choose the exact spot to place your bait.
In the beginning markers were really only used as a target when spodding – hence the name – or to find the depth. Then anglers began to use braid on their marker set-ups and a whole new world opened up to them. Just like watching an underwater video, people were able to see the lakebed via the ‘feel’ transmitted through the zero stretch braid.
Now is a great time to be out with a marker set-up, learning about your local water. Face it, not everyone wants to sit for hours struggling to catch in freezing cold at this time of year.
So while the banks are quiet and you aren’t disturbing other anglers or the carp you would normally be fishing for, get out and learn your lake. A couple of hours’ work can result in a mountain of carp in the spring and summer.
Have a feel around in every swim, so you’ll not only discover the depths and features, but also what type of bottom is out there.
Make some simple notes that will guide you at a later date to anything you may find. Then, when you arrive to fish, you will be able to position your baits accurately without the risk of spooking the fish.
Setting up your marker is now simplicity itself. Lots of companies produce purpose-designed kits that will get you started in seconds. In fact, most of them even have diagrams of how to do it. Then all you’ll need is a rod and a reel loaded with braid. If you are only fishing small waters a carp rod and freespool reel will be fine.
For larger waters, more specialised equipment will be needed and will make life easier.
The technique couldn’t be more simple. Cast out the set-up and sink it on a tight line. Keep tension on the float so that it is sitting next to the lead, and then release a foot of line at a time until the float rises to the surface – that will give you your depth. Next, reel the float down again and gently pull the whole set-up across the lakebed. This is the point where you’ll gain your underwater eyes.

As the lead drags across the bottom the ‘feel’ will be transmitted through the braid back to the angler. If it crosses gravel you’ll get a very distinct ‘tap, tap, tap’ as the lead bounces off the small stones.
Silt will be a steady constant pressure, and you’ll watch the rod-tip bend slightly before the lead starts to move.
The last major thing you’ll look for is weed. When you start moving the lead it will hold, then suddenly jolt forward as it passes through a clear area or sparser weed. The harder the lead is to pull back, the denser the weed.

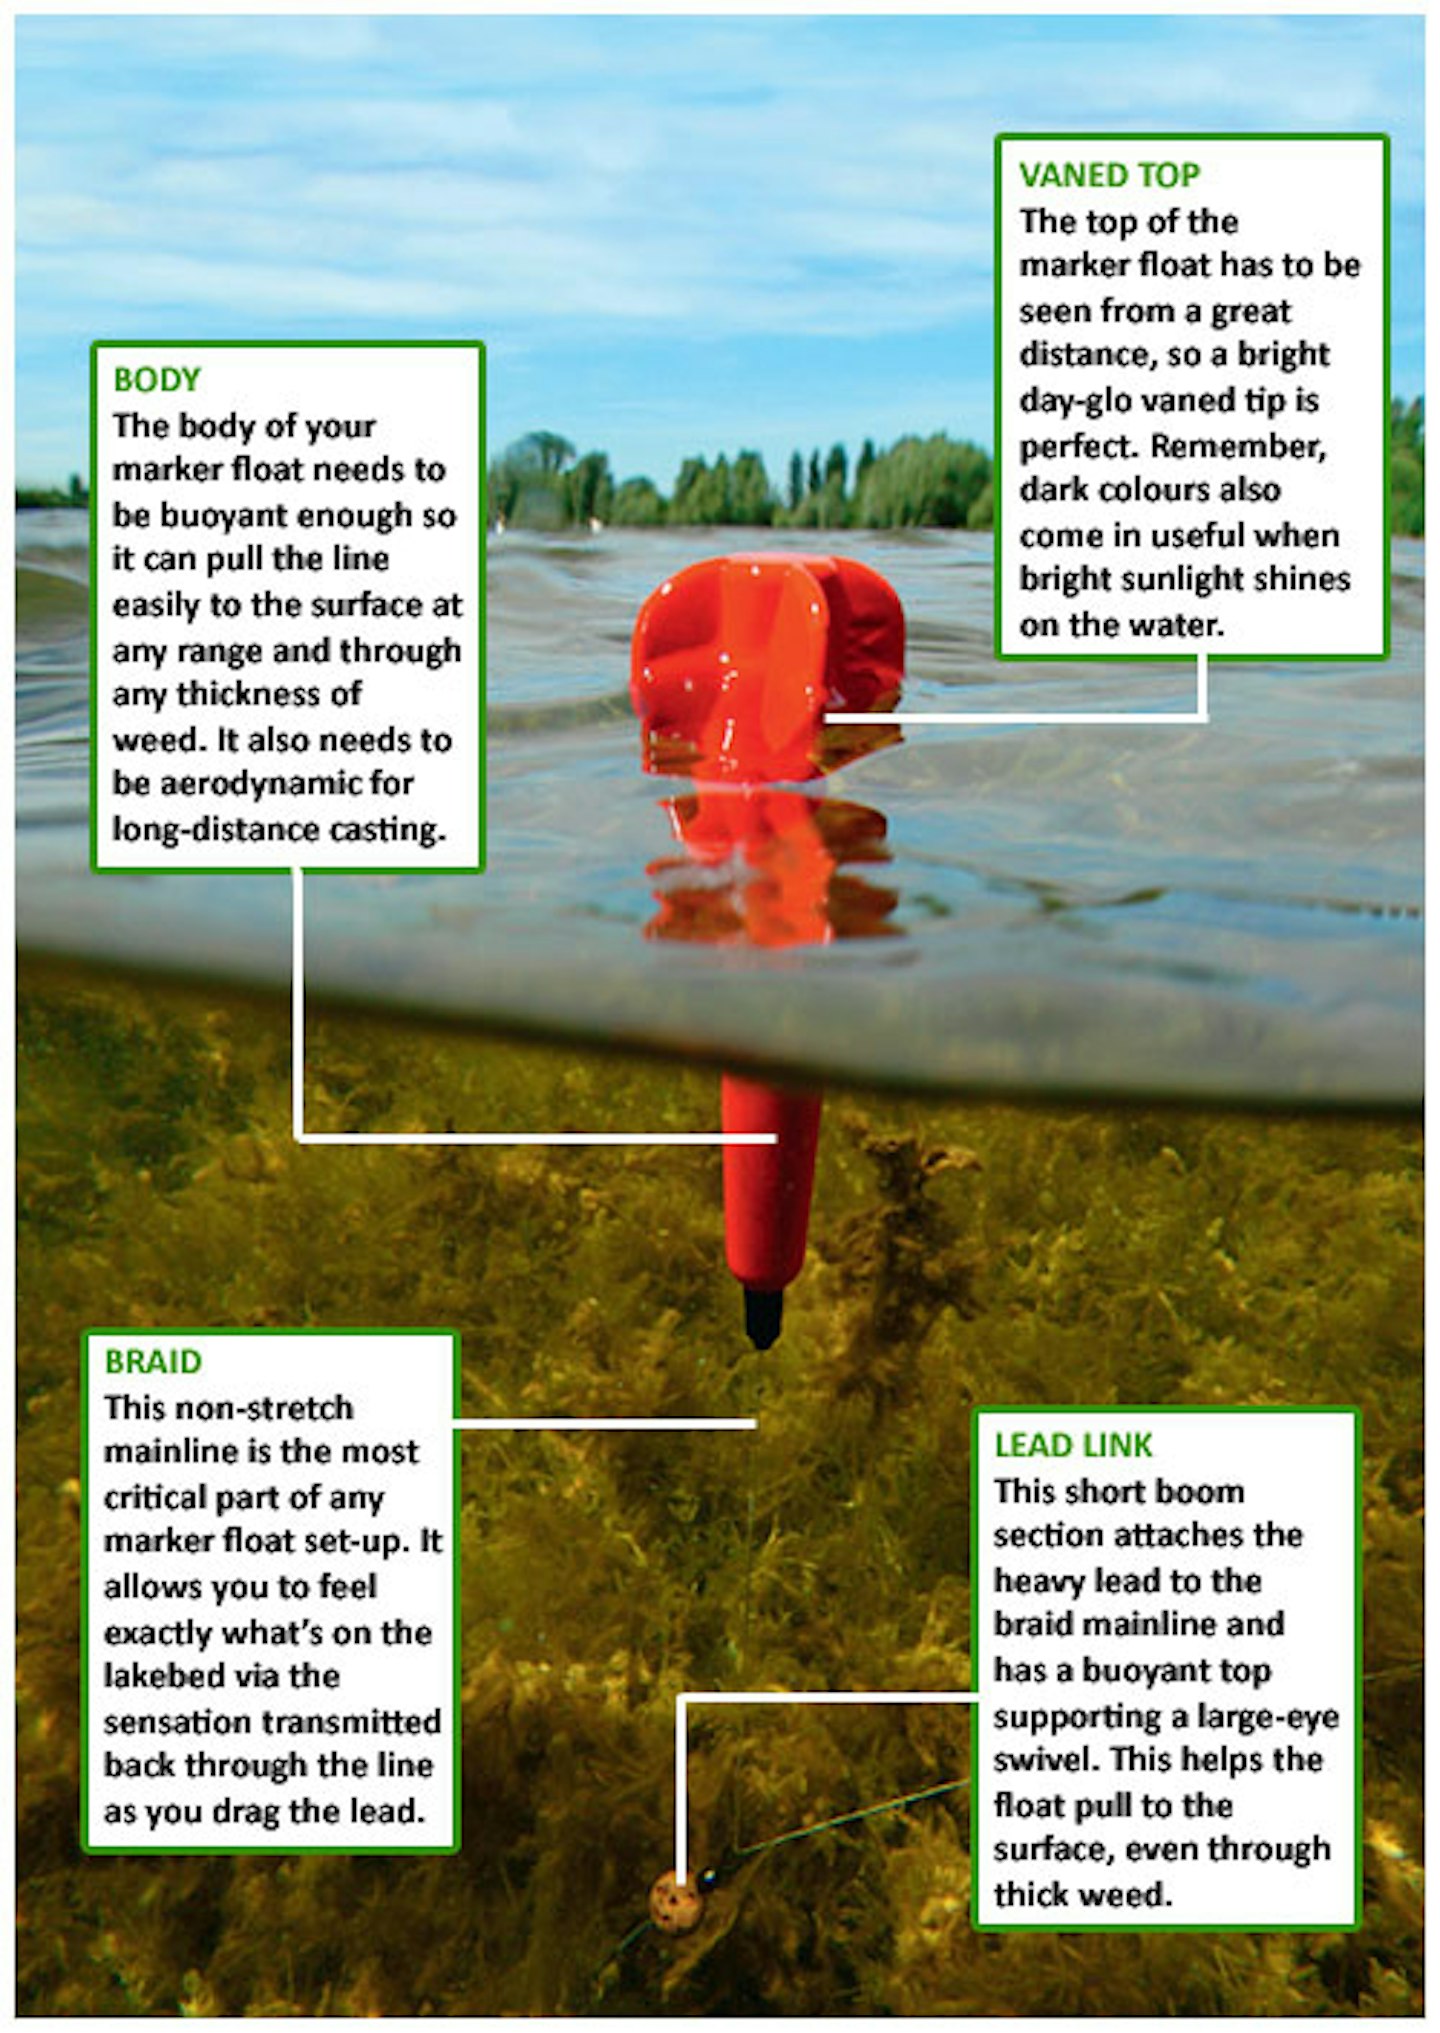
HOW TO SEE UNDERWATER
Left to right
So there you have it – a quick fix to get you started, and your easy way of gaining your underwater eyes. Now go and ‘see’ your lake for possibly the first time.