Gardner tackle's Lewis Rhead walks us through the rig of the moment and how to tie it...
There are rigs and then there is the "Ronnie rig". Some rigs stand the test of time and work year after year. Others are more transient in nature, their tangible benefits are the figment of a twisted mind, and they don’t offer any real advantage in terms of catching carp or being easy to tie!
This one, however, is very special. It’s a rig that’s been used successfully on the quiet for a few years now, being deployed as a tool pivotal in catching some phenomenal big carp from a number of waters. But now the word is out and everyone want's to know how to tie this amazing rig
How to tie the Ronnie rig
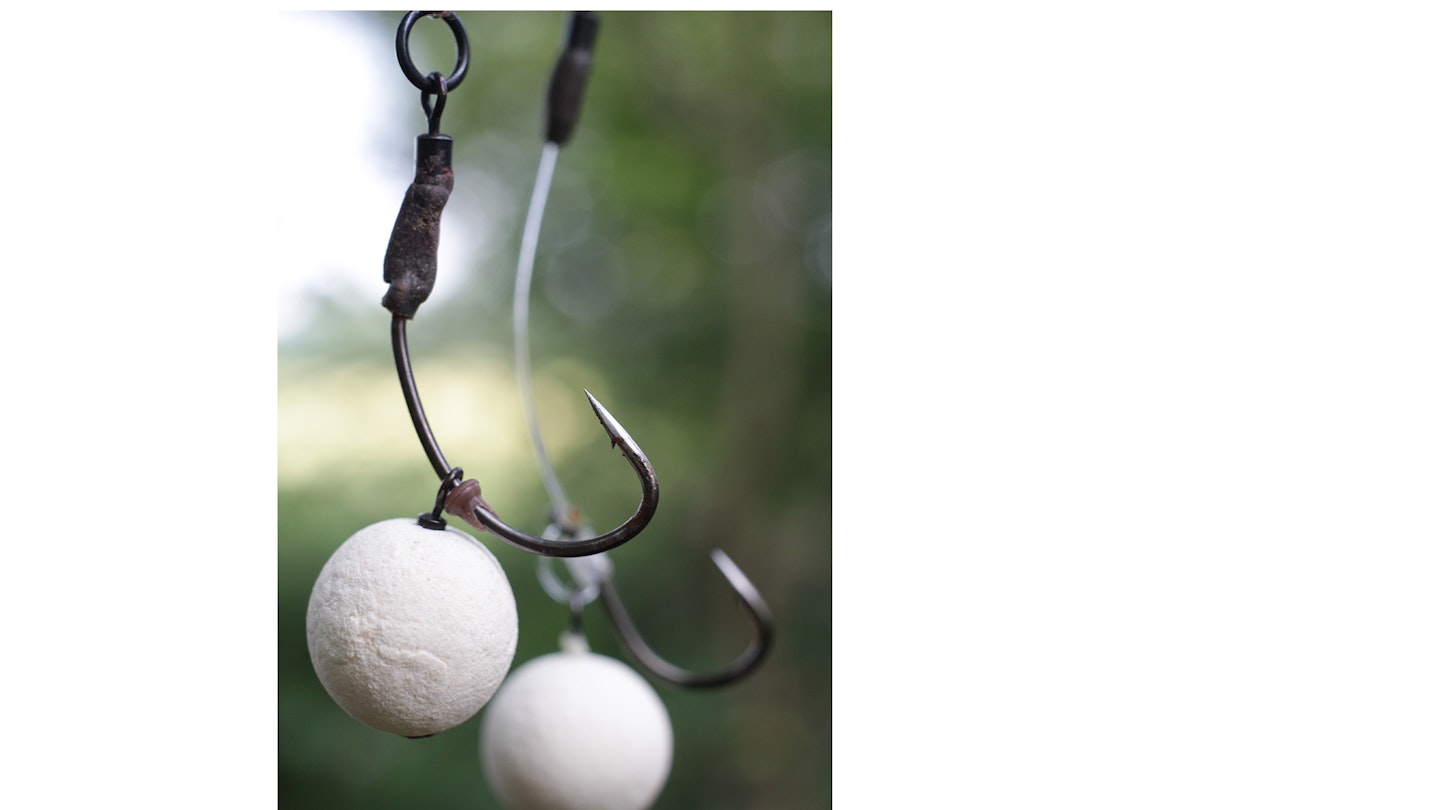
The Ronnie rig is easy to tie and offers the benefits of a super-consistent low pop-up presentation, fished the height of a hook and a swivel of off the lakebed, but without the issues of a naked hook eye that has the potential to snag in landing-net meshes (one of the main problems associated with the original 360-style rigs).
It offers all the advantages and awesome rig mechanics of the hinged stiff rig, but without the need to trying to fish it low to the lakebed, which isn’t the optimum arrangement. When it’s tied right, those of us that have used it extensively have pure unadulterated confidence in it because hook-pulls are almost non-existent. I can’t remember pulling out of a single fish with the Ronnie rig.
Luckily, it’s amazingly simple to construct thanks to the use of a size 12 Covert Kwik-Lok Flexi Ring Swivel mounted on the eye of the hook. That, combined with a Gardner Mugga hook, offers a highly aggressive, fast-reacting presentation that is ruthless in the extreme!
It’s also extremely versatile. I always have a number of pre-prepared hook sections ready to go, and I tailor the hooklink material to suit the lakebed or the lead arrangement.
That could mean a lead clip with a long, supple, skinned hooklink such as Ultra Skin in silt, or a helicopter-style arrangement and a Subterfuge fluorocarbon boom on clean sand and gravel.
Personally, I think balancing it like a hinged stiff rig works best – so the hookbait is slow to sink. Why? If you overbalance the hook by moulding putty around the shrink tube, the hook has a tendency to lie over further and this inhibits it from twisting and turning as quickly as it could (the same drawback you get with a hinged stiff rig).
Realistically, mounting the swivel through the eye means you need to use a ‘nice’ sized hook, and the size 4 Mugga or Continental Mugga are both perfect. You know, some rigs work with some hooks better than others, and this is the one. The Mugga’s curved swept shank and 20-degree inturned eye complement and enhance the mechanics, lining up the shrink tube naturally in a way that gives maximum ‘twistiness’.
Variants of some rigs come and go, but the Ronnie rig is one that I know will stand the test of time. Like all presentations, it isn’t the panacea of all things riggy, but what it is is the best low pop-up rig that I have used.
Now it's time to show you how to tie this amazing rig so you can go out and use it for yourself!
HOW TO TIE
STEP 1)
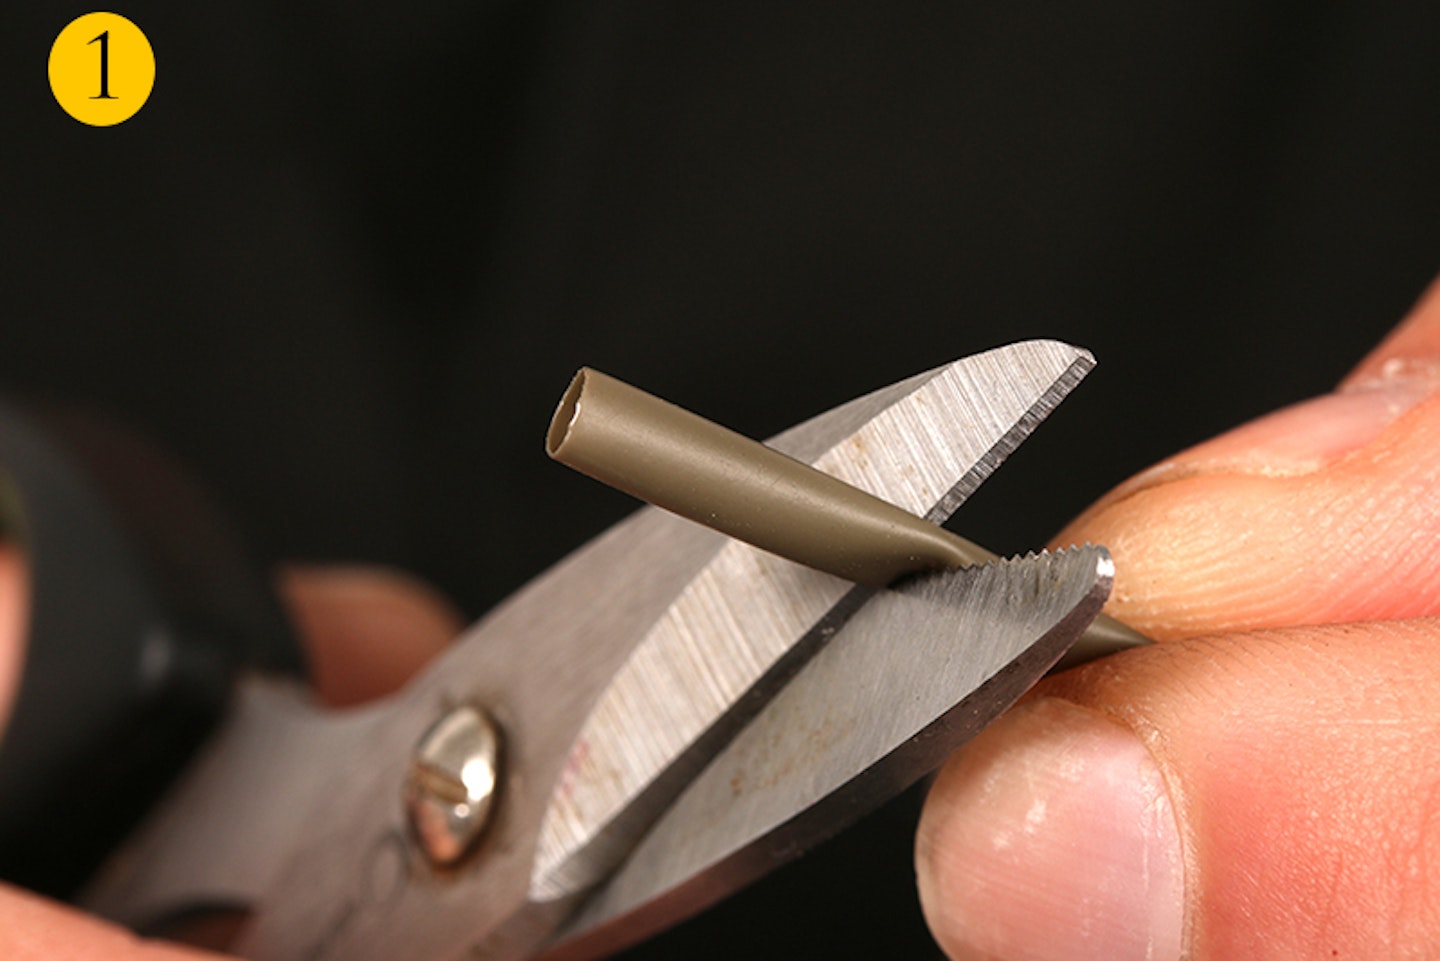
Start by cutting a 1cm length of large Covert shrink tubing.
STEP 2)
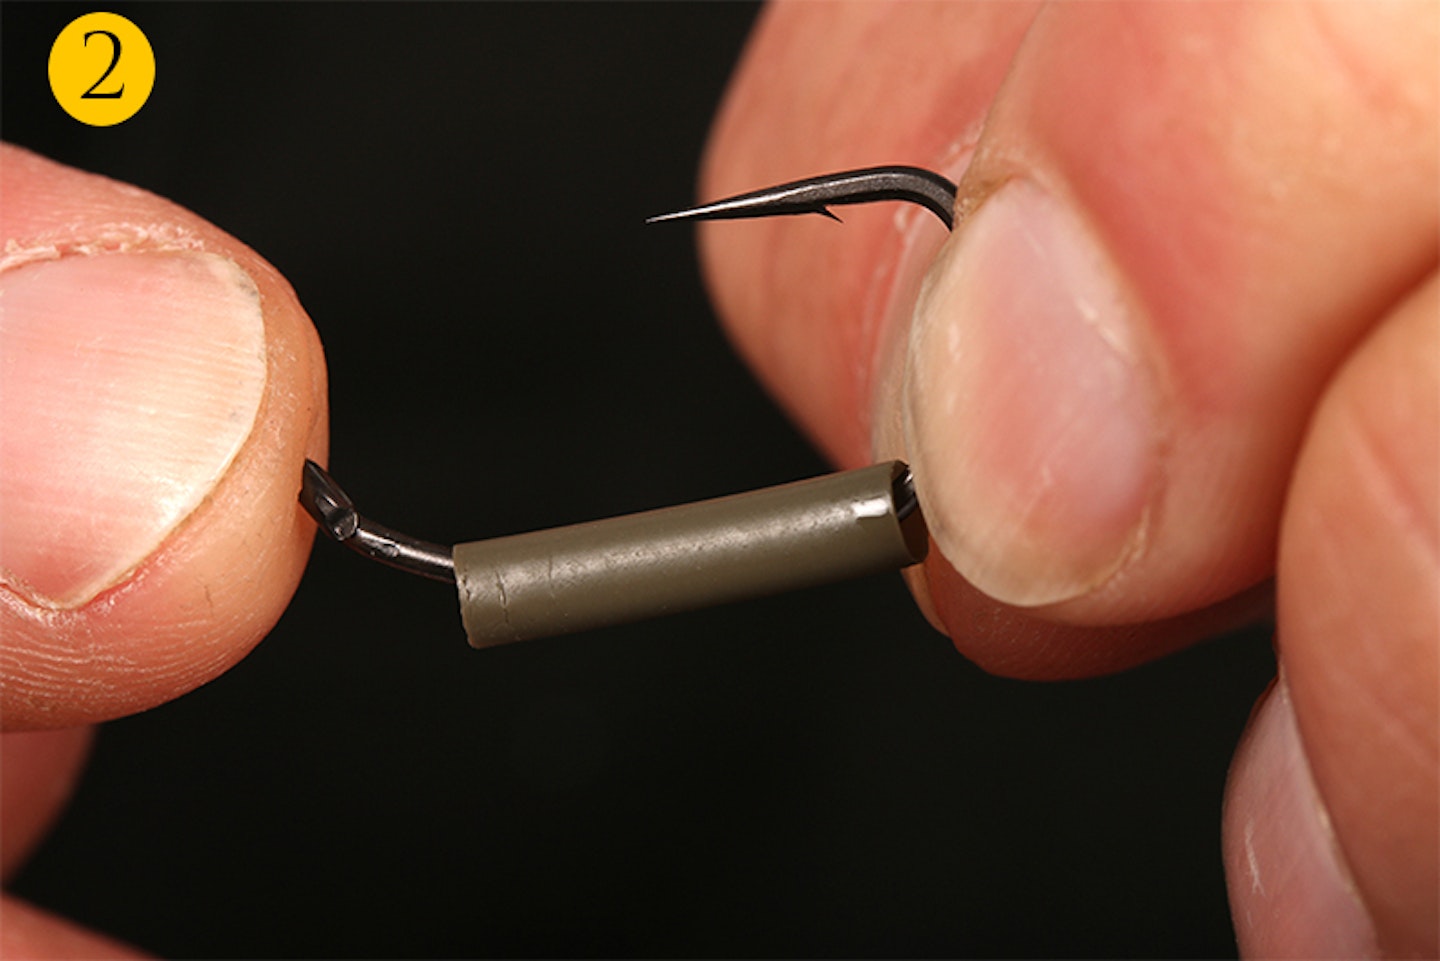
You then position the shrink tubing on the hook shank.
STEP 3)

Attach the hook to a size 12 Kwik Lok Flexi Ring swivel.
STEP 4)

The crook will distort slightly as it is opened up.
STEP 5)
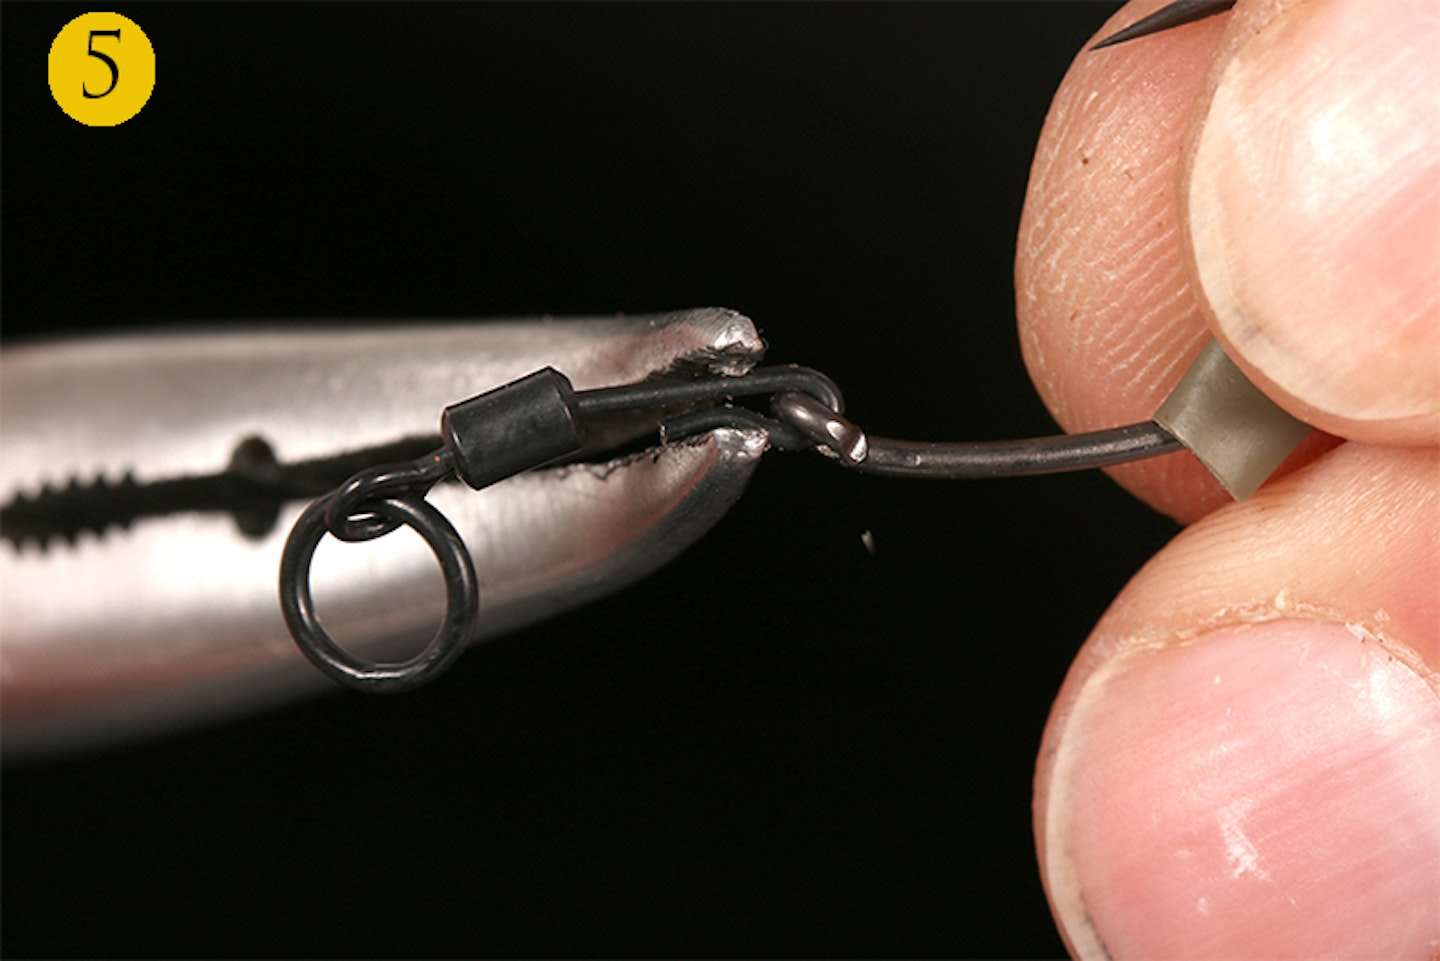
So once the hook eye is in place squeeze the crook closed with pliers.
STEP 6)
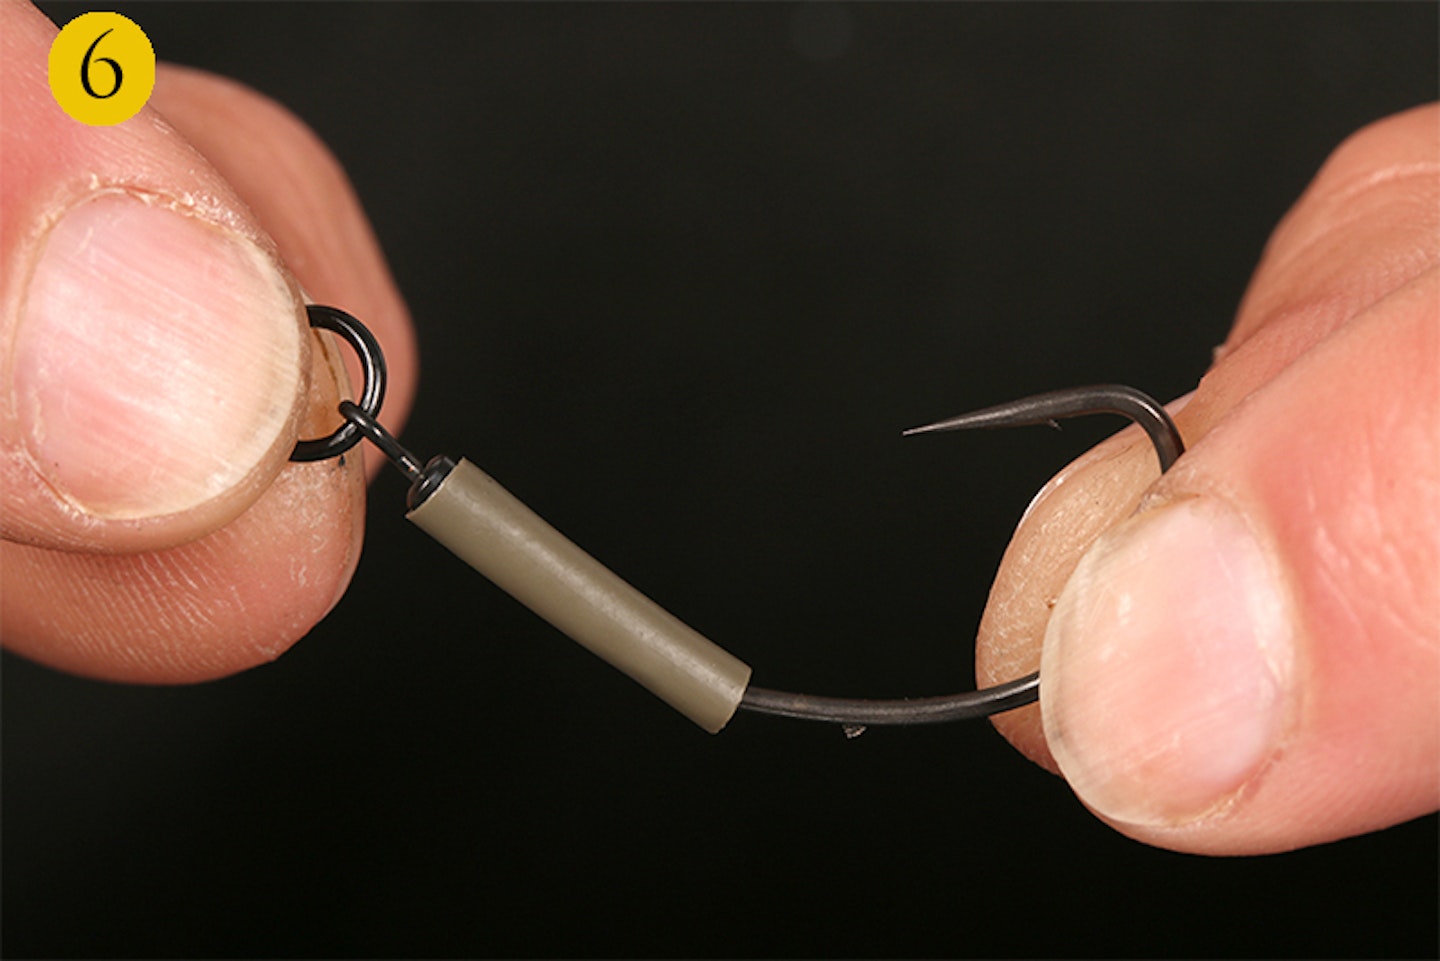
Now bring the shrink tubing back down the hook to this position.
STEP 7)
Carefully shrink the tubing down using the steam from a kettle.
STEP 8)
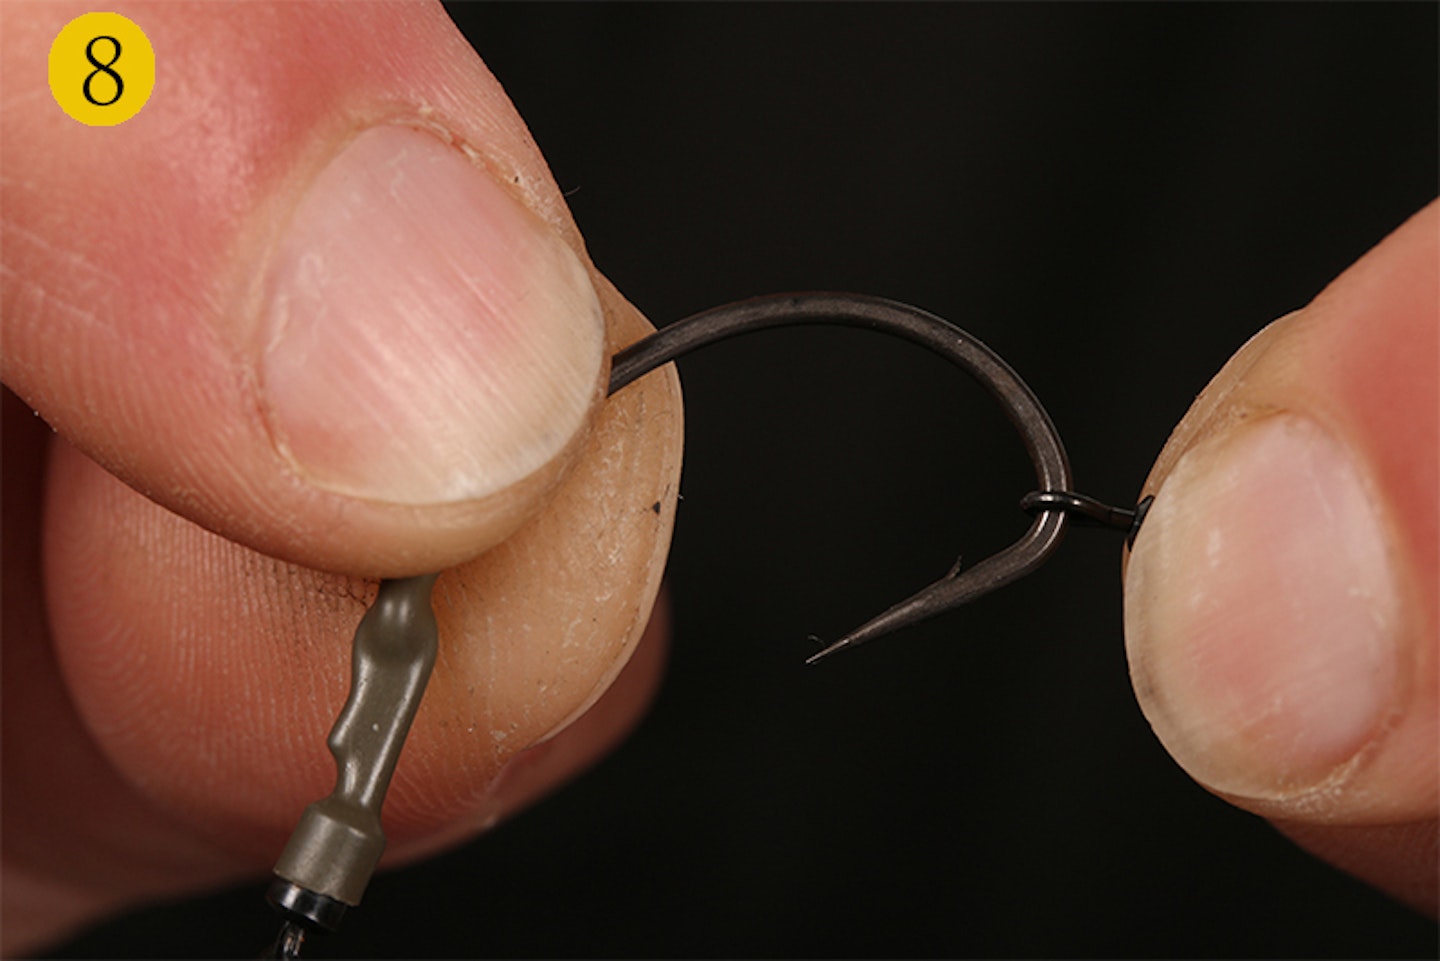
Now you can slide a size 20 Target Swivel on to the hook.
STEP 9)
Follow this with a hook stop to keep the swivel in place
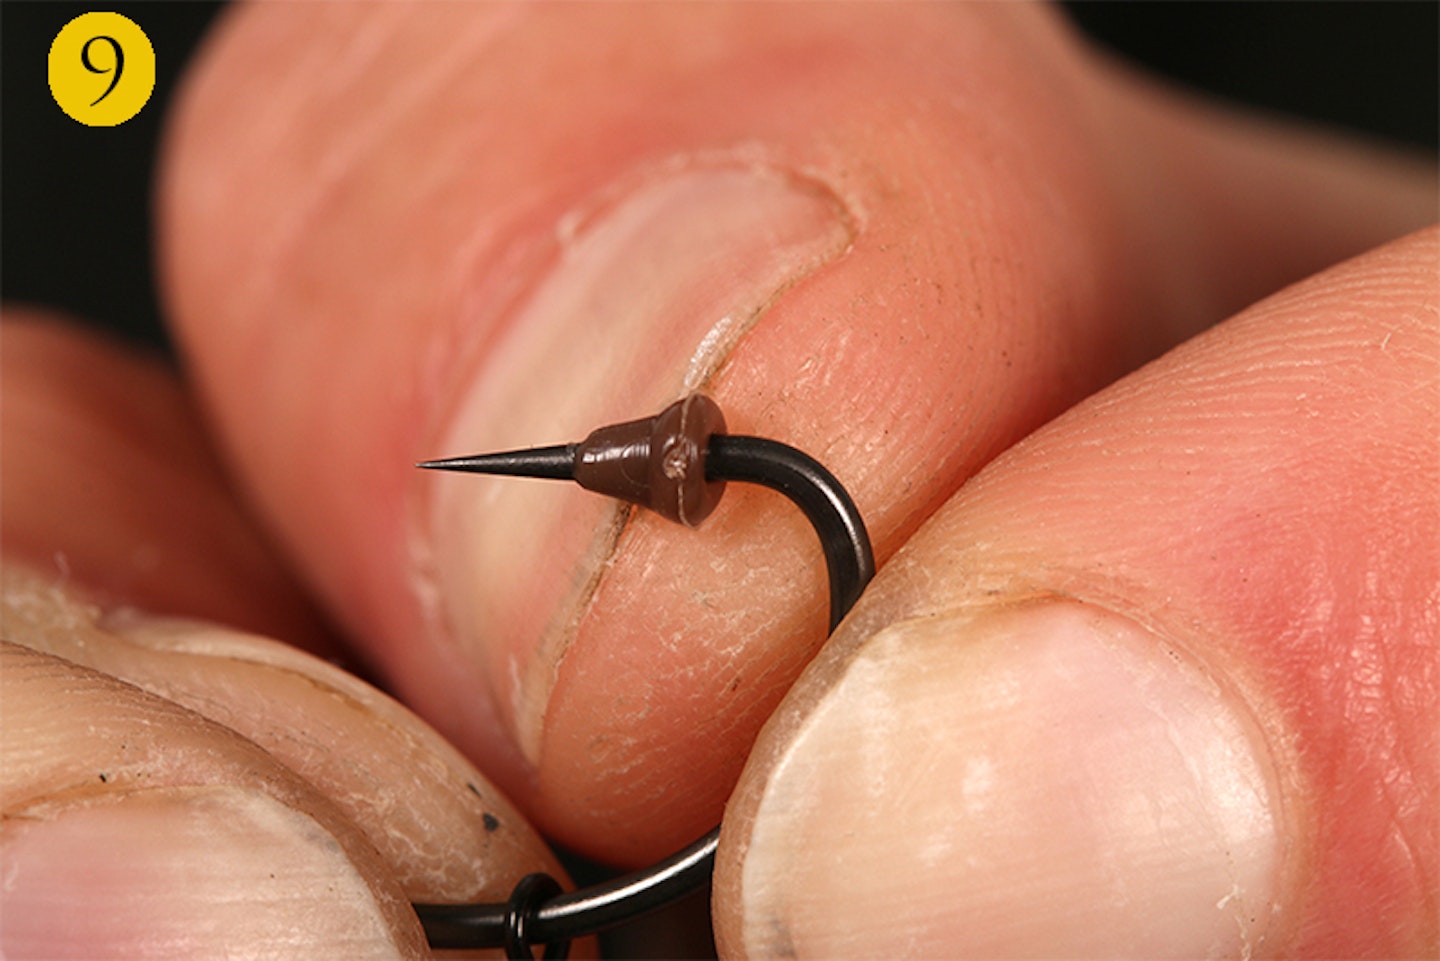
STEP 10)
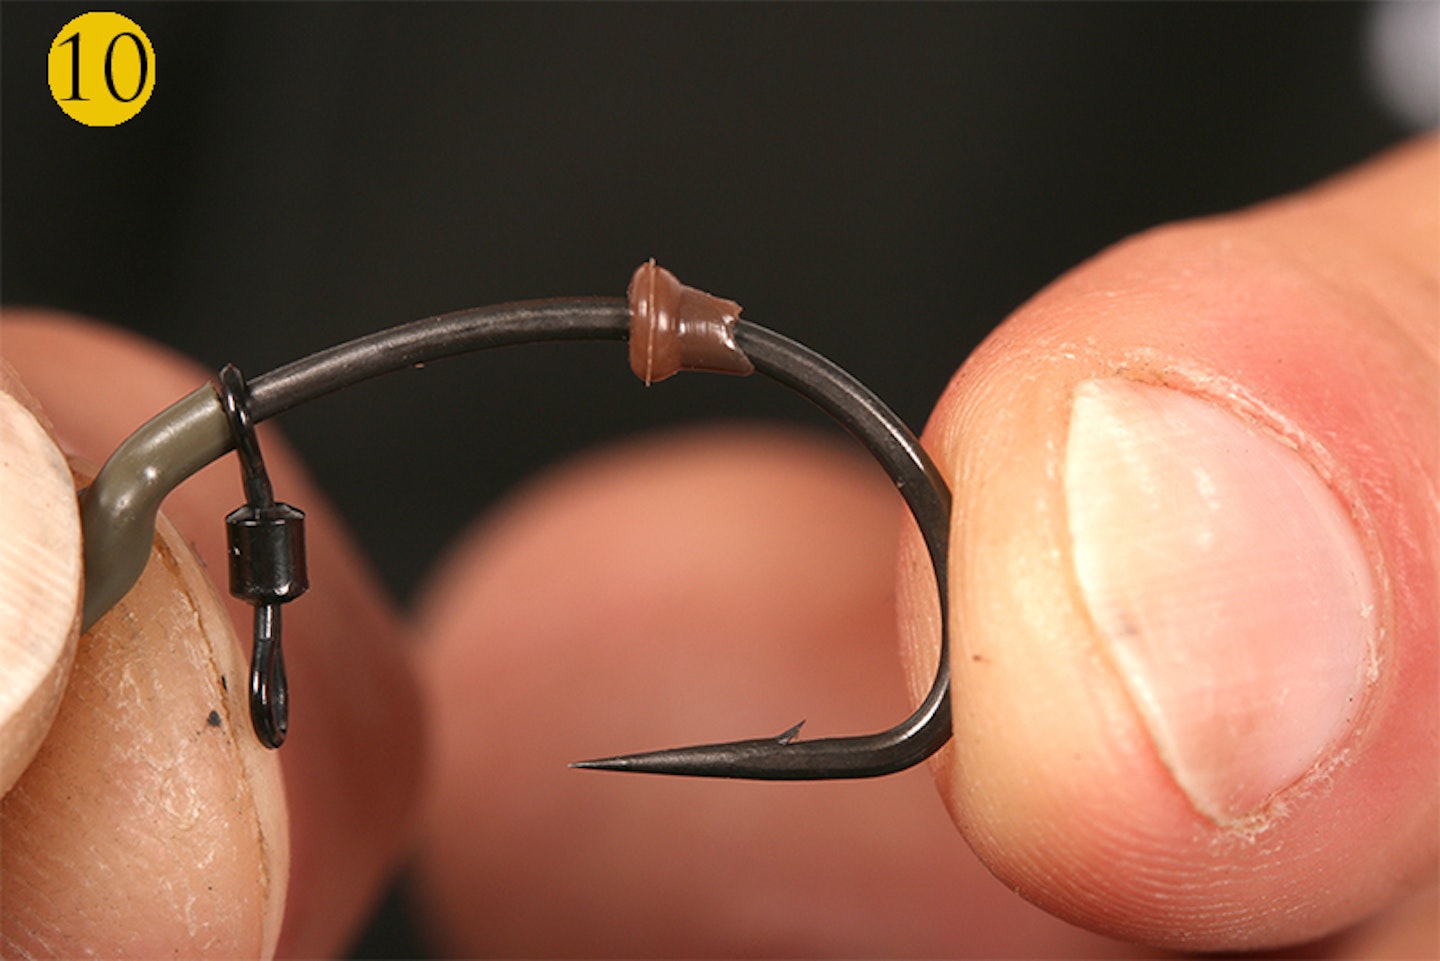
Position the hook stop opposite the barb as shown here.
STEP 11)
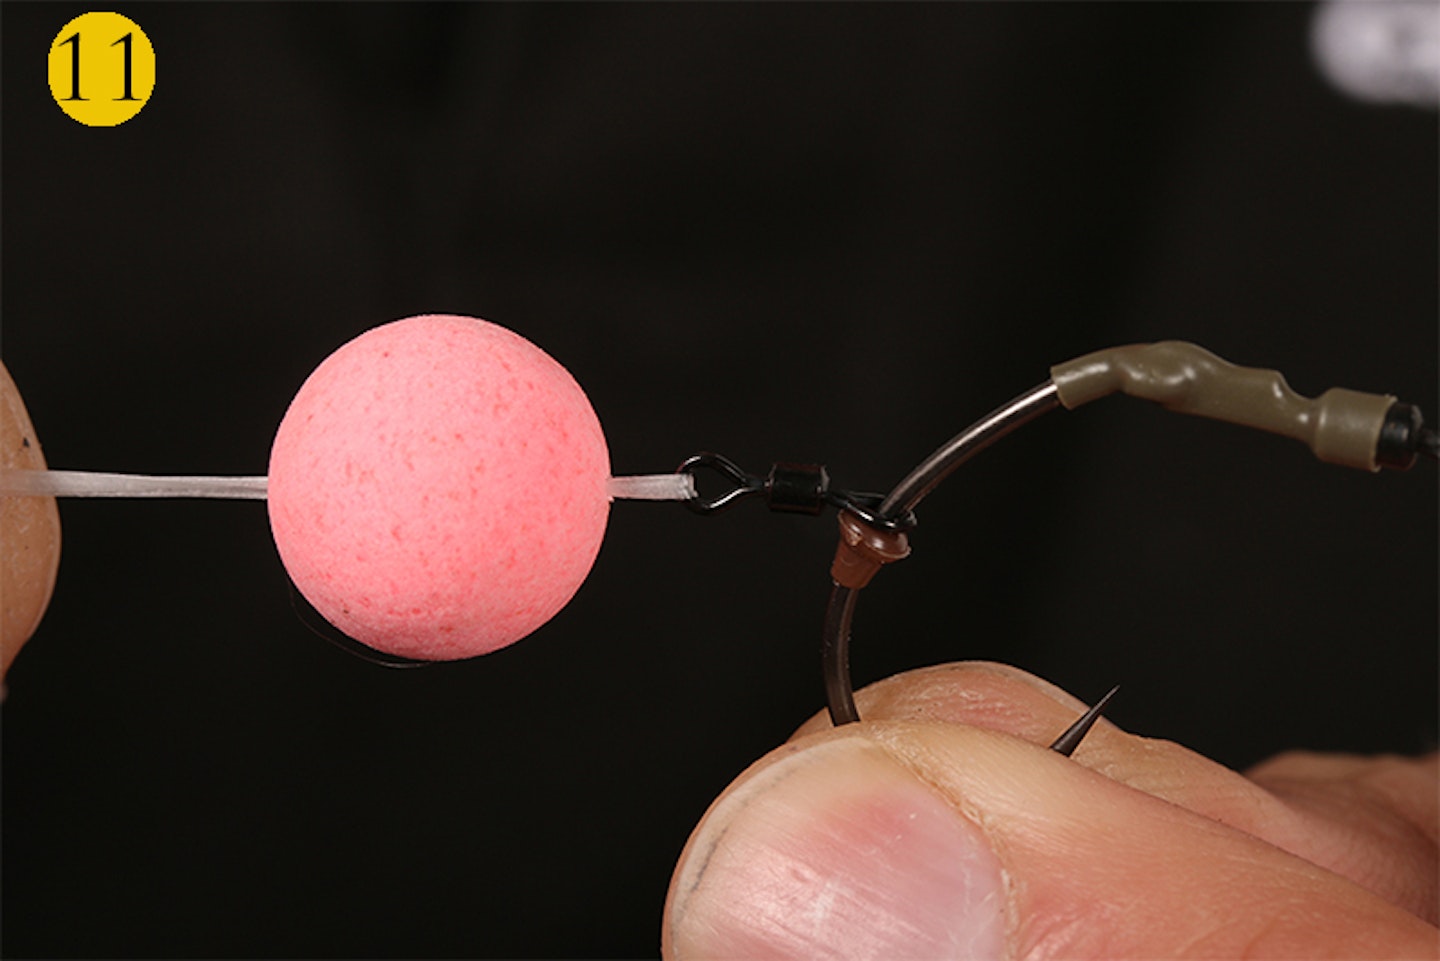
Attach your pop-up hookbait with some bait floss.
STEP 12)

Mould some tungsten putty around the shrink tube to balance the bait.