Fishing knots are crucial for every angler, regardless if you’re a beginner or a seasoned pro. Mastering the art of tying strong, dependable knots can make the difference between catching a fish or losing one. In this article, we will explore five fundamental fishing knots that every beginner should learn. These knots are straightforward to tie and will meet most of your fishing knot needs, so, grab your line, and let’s get tying.
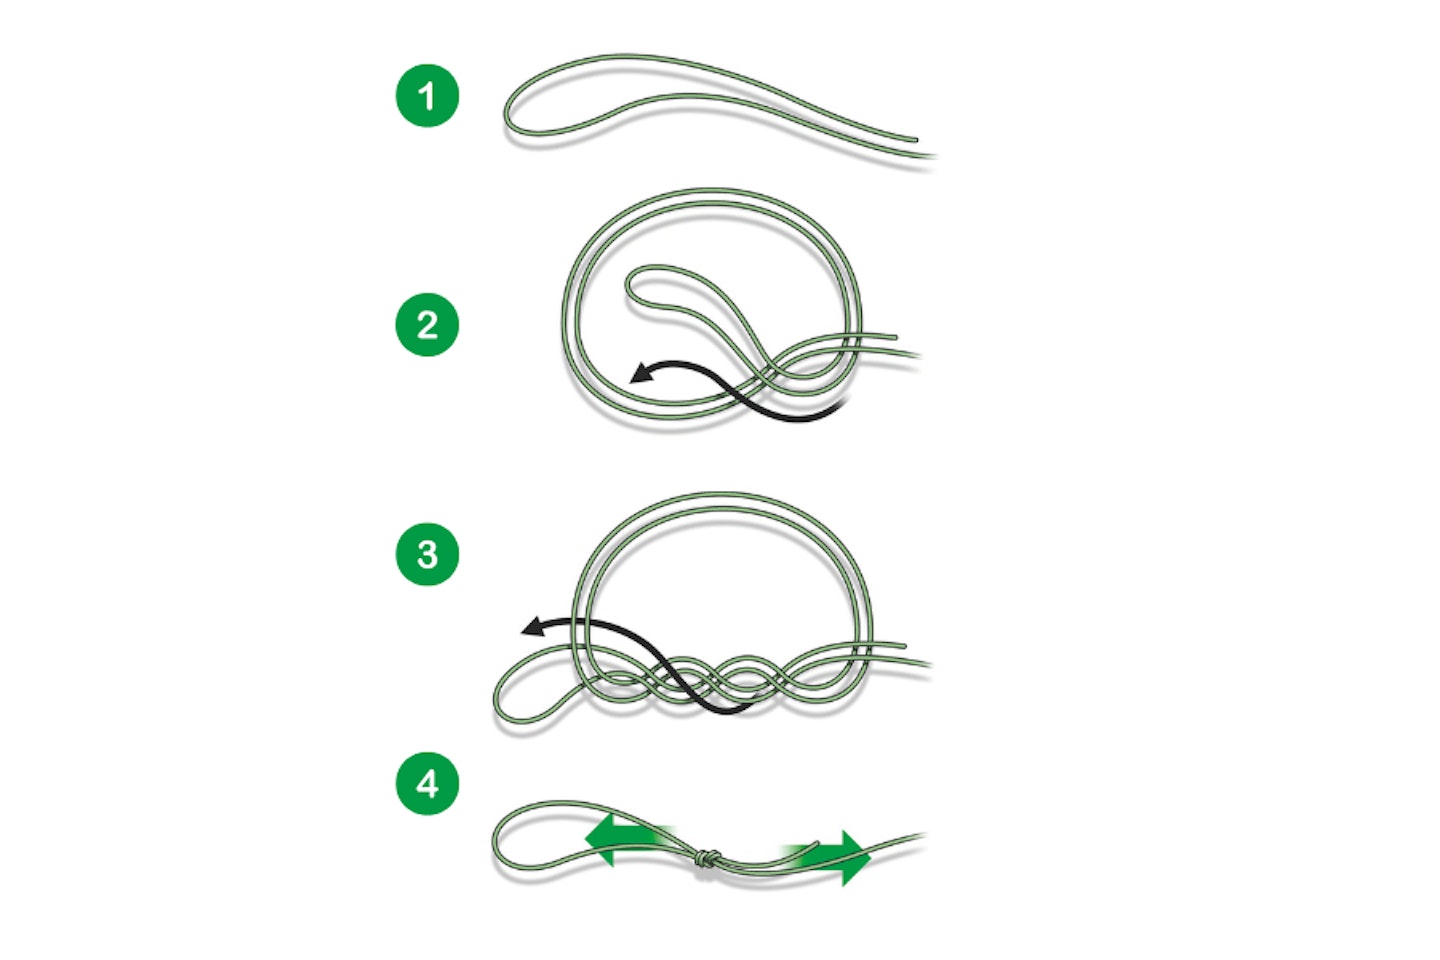
Overhand loop knot
There are various methods to create a loop in your line, and you can even get gadgets designed for this purpose. Here’s a simple technique to do it by hand. Utilise this knot for the top of pole rigs or any situation where you require a loop at the end of your line
-
Create a loop of line that is sufficiently long for your work, but not so lengthy that you need to trim off a lot later.
-
Form a basic overhand loop and thread the end of the line through it.
-
Ensure that the end of the line passes through the loop twice.
-
Pull the loop tight and cut off any excess line. Moisten the knot slightly with saliva before tightening it for a secure hold.
STARTING CARP FISHING? HERE'S EVERYTHING YOU NEED TO KNOW.
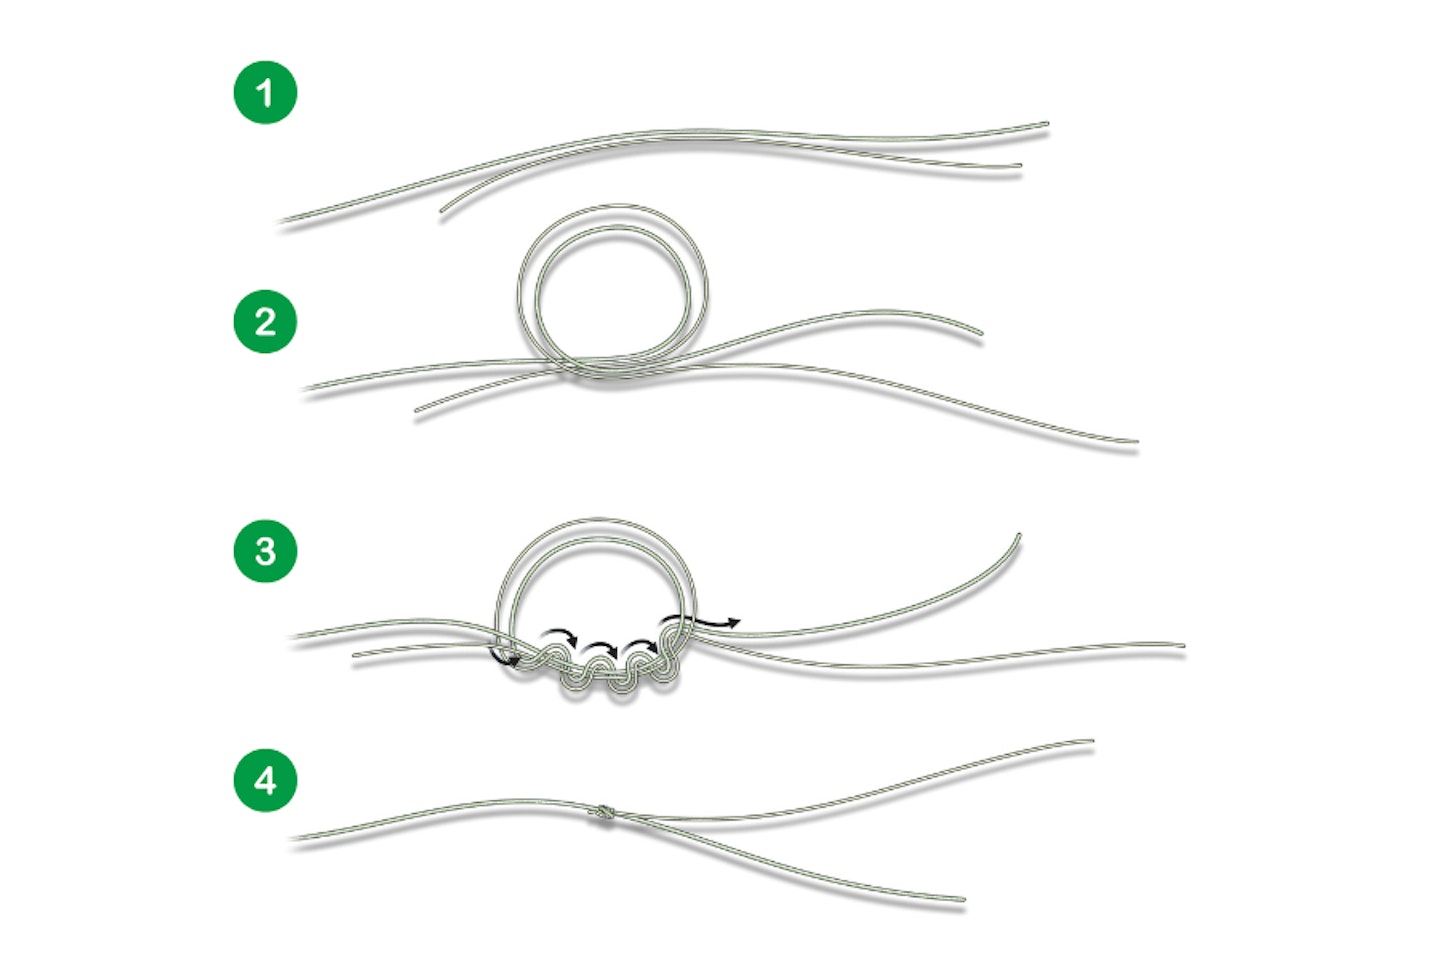
Four turn water knot
This knot is an excellent choice for connecting two lines of varying diameters, making it ideal for applications like hook lengths or paternoster rigs.
-
Position the two lengths of line you wish to connect side by side.
-
Create a loop in both lines, ensuring you have enough line to work with.
-
Thread the two free ends of the lines through the loop four times.
-
Moisten and gently tighten the knot, ensuring it tightens neatly. Finally, trim the tag ends to fit your rig.
GET THE BEST LINES FOR CARP AND FEEDER FISHING IN OUR LATEST BUYER'S GUIDES.
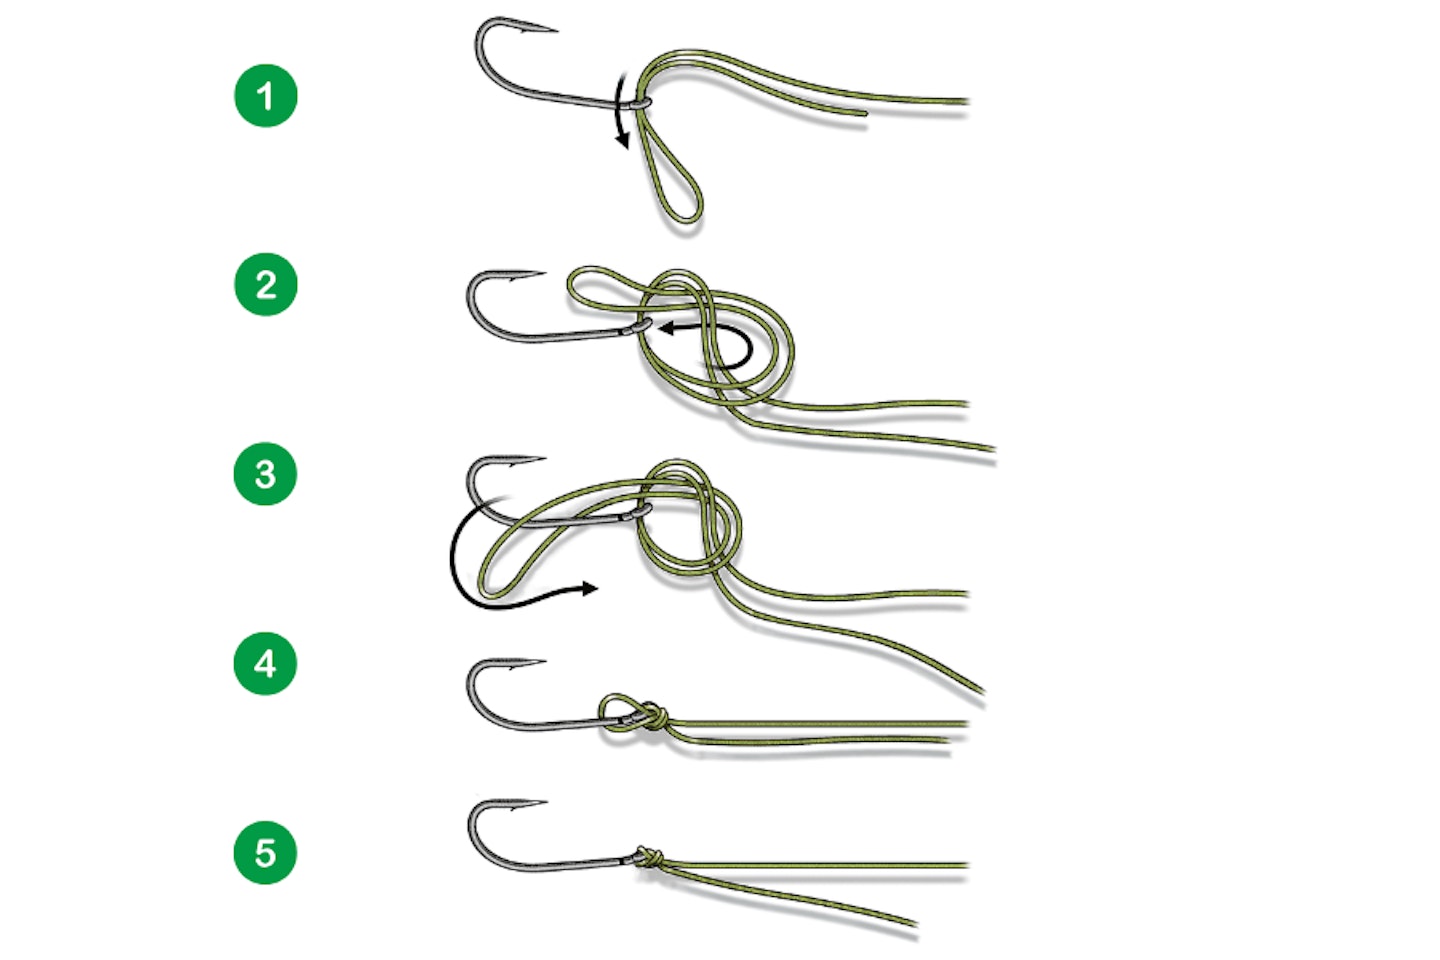
Palomar knot
A simple yet sturdy knot that is highly recommended for attaching eyed hooks or swivels, particularly when using fluorocarbon line.
-
Take a double length of 6 inches of line and thread it through the hook eye.
-
Create a single overhand knot in the loop.
-
Thread the hook or swivel through the loop.
-
Moisten the knot and pull it tight, making sure the line is tidy.
-
Once the knot is secure, trim the tag end.
CHECK OUT OUR PICK OF THE BEST FISHING RODS FOR BEGINNERS IN THIS BUYERS GUIDE.
Grinner knot
This knot is specifically designed for use with swivels and eyed hooks. In this situation, it's advisable to use this knot instead of the half-blood knot.
-
Another knot which is designed for use with swivels and eyed hooks. Use this one rather than the half blood knot in this sitation.
-
Create a loop by passing the end of the line through the eye of the hook or swivel.
-
Thread the end through the loop four to six times.
-
Moisten the knot and pull it tight, ensuring it’s neat by tugging on the tag end.
-
Finally, pull on the mainline to position the knot against the eye, and trim any excess.
THINKING ABOUT GIVING MATCH FISHING A GO? SEE OUR GUIDE TO HELP YOU PREPARE FOR YOUR FIRST MATCH

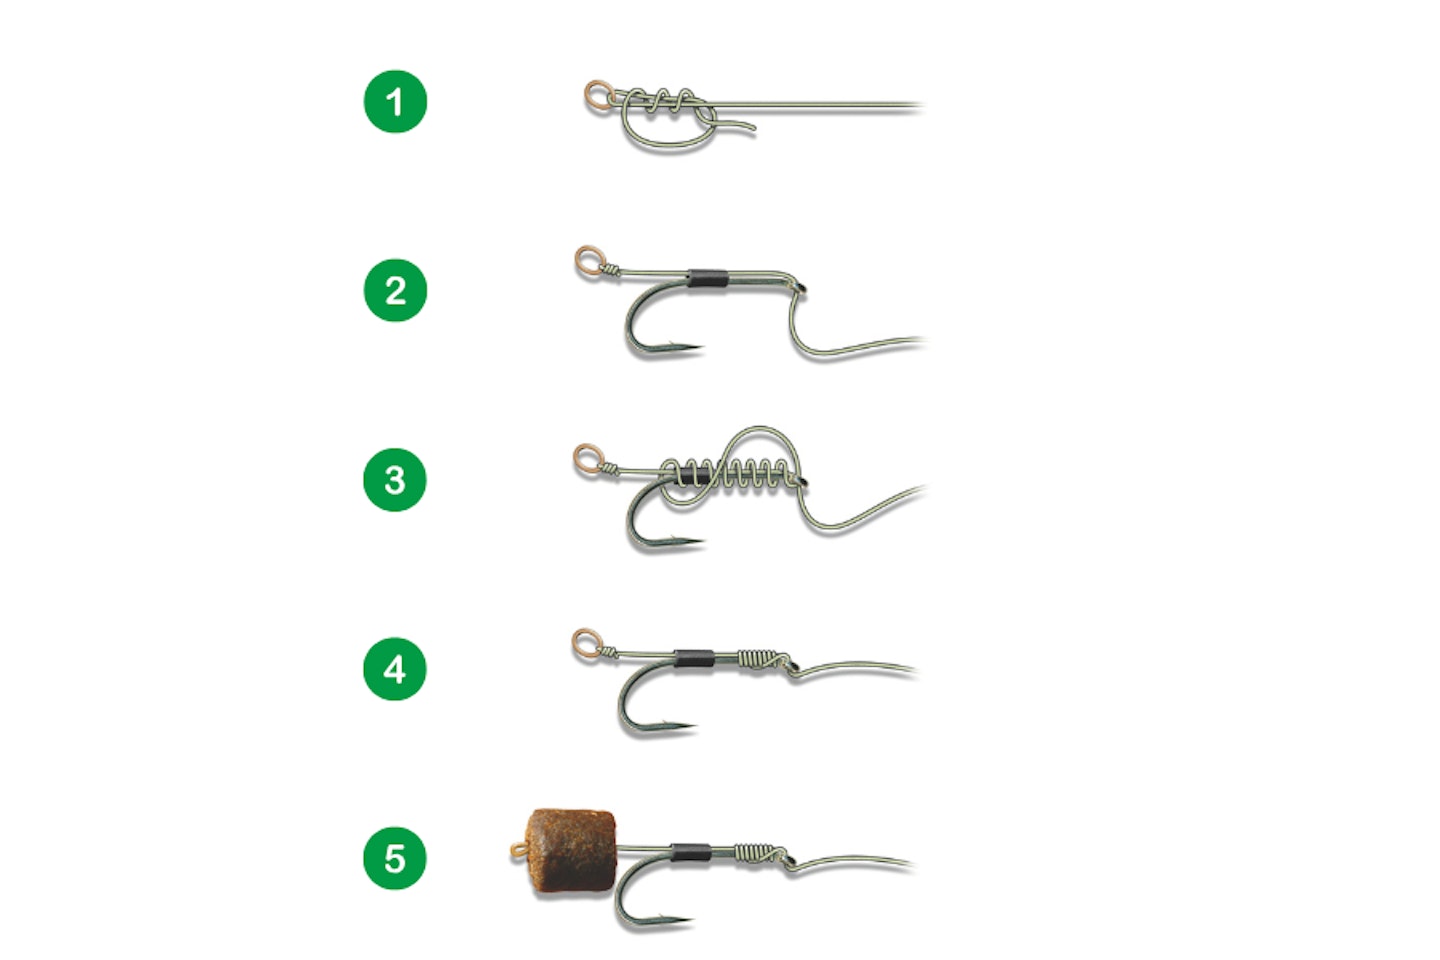
Knotless knot
Perfect for tying hair rigs, a knotless knot is easy to tie and simplifies achieving the correct hair length. Ensure to always whip away from the eye to prevent any potential damage to the line. Ensure that the line exits the eye from the point side of the hook.
-
Create a bait band or loop for your hair rig at one end of the line. The two-turn grinner knot is perfect for fishing with a pellet band.
-
Next, thread the opposite end of the line through the back of the hook's eye and pull it out through the front. Placing a small piece of rig tubing on the shank will help keep the hair straight (optional)
-
Take the loose end and wrap it around the hook shank several times. Then, wind the end over the shank and push it through the eye.
-
While holding the loop end in the desired position, pull the free end tight, working the wraps up to the eye of the hook from the back.
-
Finally, pull on the end of the line to completely tighten the knot.
GET YOURSELF THE BEST FISHING REEL WITH THE HELP OF OUR BUYERS GUIDE.