Matt Hayes reveals the feeding tactic that will revolutionise the way you fish for tench forever...
There was a time when tench fishing was all about being by the water at dawn watching a float sitting next to a bed of lily pads. Baits were simple, maggots, worms and sweetcorn was the menu, and you fished in hope (rather than expectation) that a tench would pay you a visit.
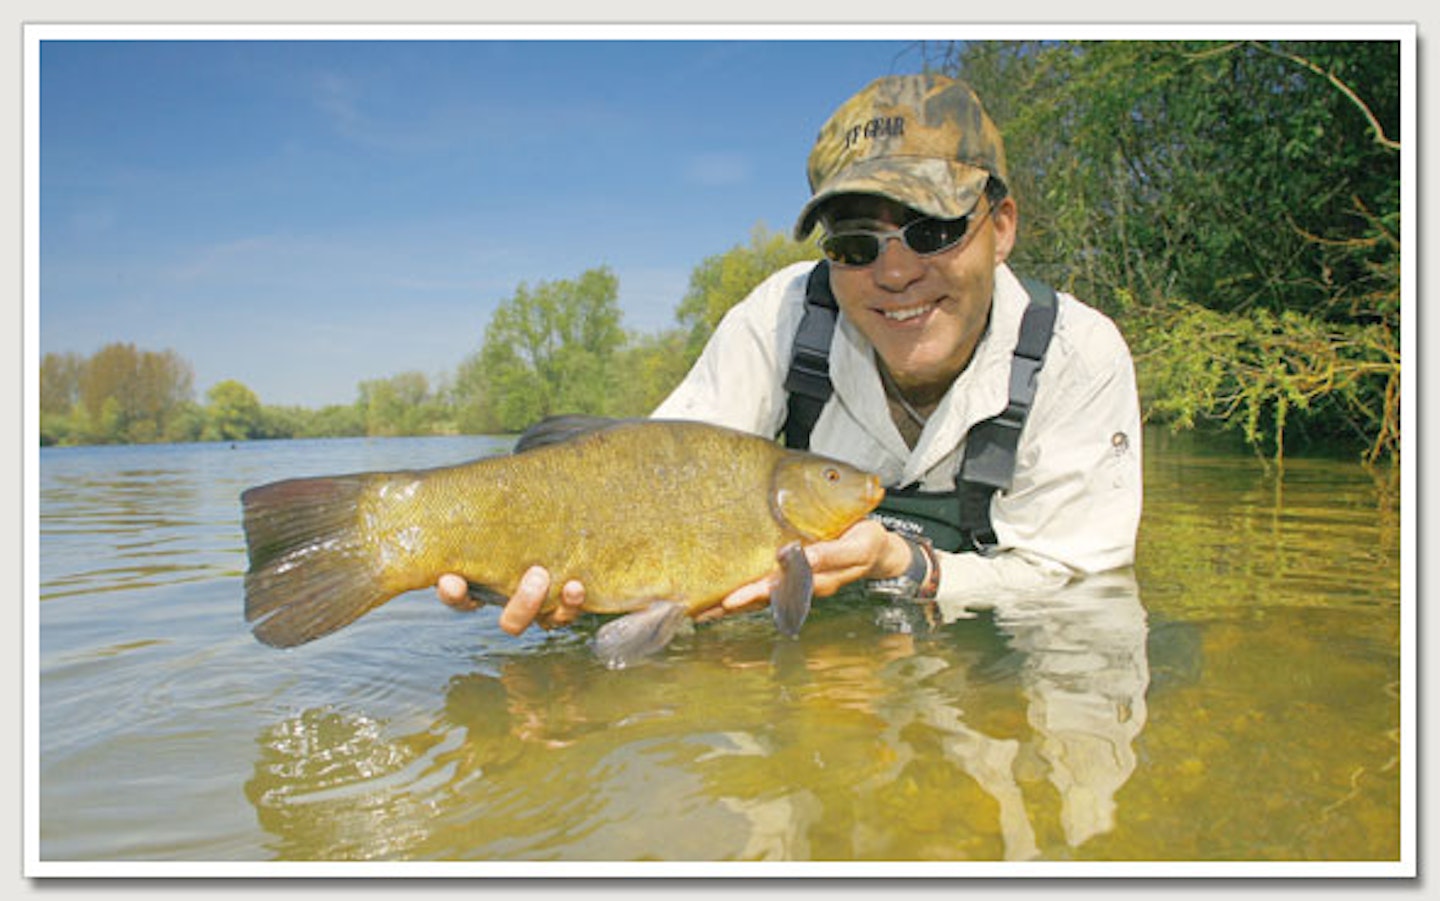
As a kid growing up in the West Midlands, tench were rare beasts for me - I didn’t catch one until I’d been fishing for a decade!
That first fish, all 2lb of it, had read the fishing text books. It fell to floatfished sweetcorn cast to the marginal lily pads at Himley Hall Lake, near Dudley.
Himley tench kept the same time clock as those across Britain, you had to be fishing at dawn because by 8am the fish totally switched off until late evening.
Fishing at dawn and dusk was the concrete rule.
But in 1980 I got a hint at what was to become a revolution in tenching methods.
Cheesed off with not being able to bag a tench after the dawn period, I began using the swimfeeder, by casting close to clumps of weed beyond the margins I managed to catch a few daytime tench.
Taking this knowledge to another water near my Shropshire home, in 1983/84 I fished the picturesque Dudmaston Hall estate lake.
Casting a feeder beyond the usual floatfishing spots brought me some huge hauls of tench and some 5lb ‘giants’ that regularly featured in the weekly angling press.
With the record then about 9lb (today it is 15lb 3oz!) these tench were national news!
The reason for telling you all this is that I want to stress how much things have changed in the last 15 to 20 years.
Yes, you can still catch tench on floatfished corn near a bed of lilies, but on many waters the swimfeeder has taken over.
This month I’m going show you how to catch these fish on the swimfeeder, using what I call the ‘Bait and Wait’ method.
Originally developed for use on large gravel pits, a nice side-effect of this tench revolution is that anglers trying the technique on estate lakes and club lakes have discovered that much older populations of tench are also partial to the baits and tactics I’m about to explain.
Make no bones about it, these modern tench fishing methods are extremely productive on a cross section of stillwaters and to help you catch them I’ve created a six step guide to success...
STEP 1 - LOCATE THE FISH
Many anglers visiting a big gravel pit or estate lake for the first time are daunted by the scale of the water facing them.
All I can say is don’t worry about the size of the lake.
If you mentally break the lake up into smaller chunks you’ll find it’s far easier to explore one small piece of water at a time.
Start your attack on any lake by picking one or two areas with ‘form’ for tench. Chat to bailiffs, water owners or regular anglers and I’ll bet any money that certain swims will consistently get a mention. Start there.
STEP 2 - FIND THE HOTSPOTS
In most gravel pits and lakes you’ll encounter numerous depth changes as the undulating lake bed gives you a variety of shallow bars, flat plateaus and deep channels.
So, where do you fish?
The first place to look is right at your feet. Tench like feeding on or just over the marginal drop off and I’ve caught some huge gravel pit fish less than a rod length out from the bank.
.jpg?auto=format&w=1440&q=80)
But the reality on most lakes these days is that the bankside disturbance is likely to drive the tench away from the margin.
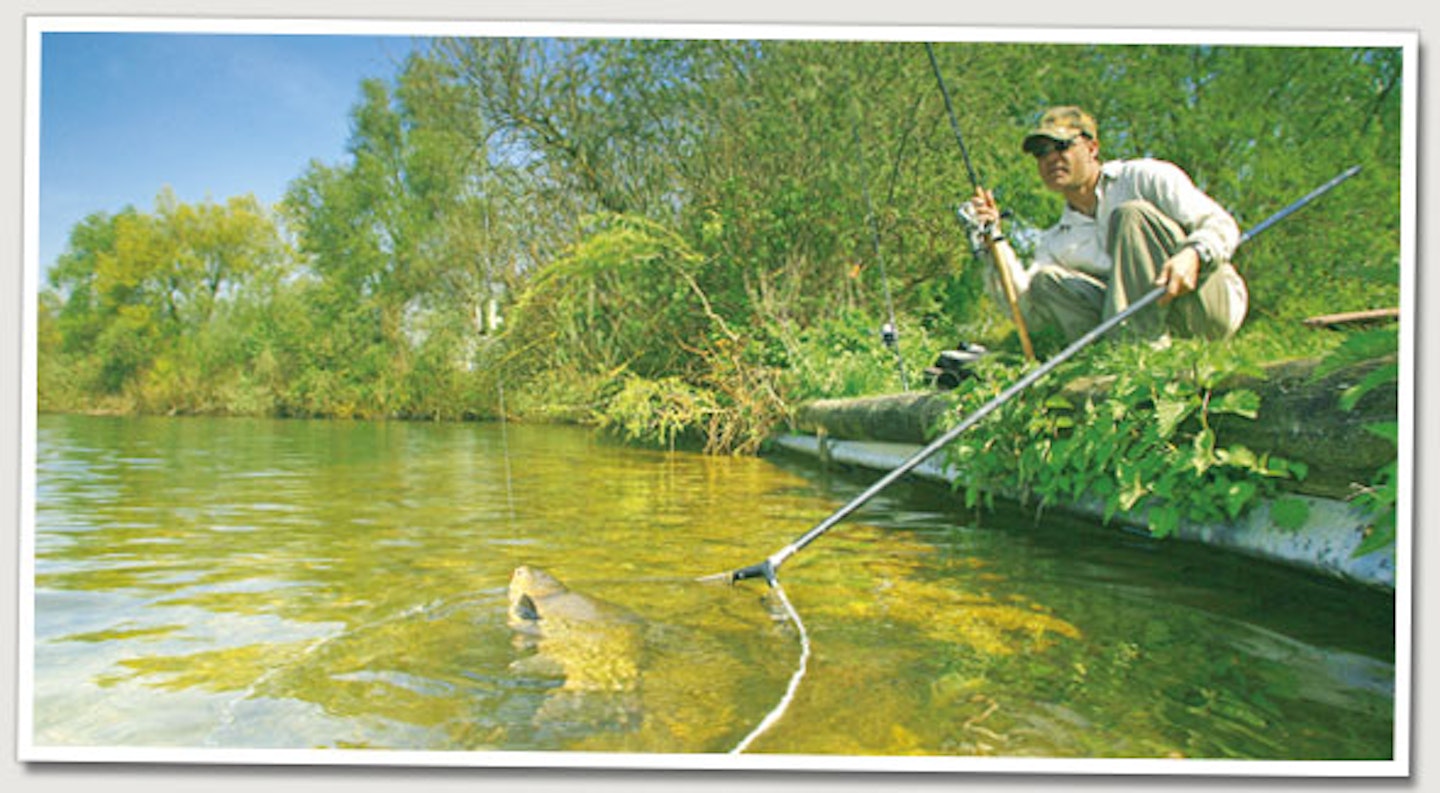
This means you’ve got to fish further out and it is vital that you map out the various depths of your swim - the tackle for the job is a marker float set up. The photo (right) shows how simple it is to set up a marker float.
Tie a 3oz leger and a large sliding ring to either end of a short length of 15lb-plus monofilament. Leave around eight inches of line between the leger and the ring.
Slide this leger link onto your mainline, (I prefer 20lb braid) then tie a fat bodied, marker float on the end of the line.
That’s it. You’ve done the supposedly difficult job of setting up a marker float – how easy is that?
As the diagram (below) displays, all you then do is go to your chosen swim and cast out the float.
When it hits the water, slowly wind in all the slack line to pull the float down to the leger until it hits the ring. You’ll feel the float jam against it and the line goes solid.
Next, slacken the drag on your reel and pull a foot of line at a time off the spool. Count how many feet it takes for the float to reappear on the surface - that’s the depth of the water.
By casting across your swim you’ll map any depth variations and underwater features that are attractive to tench.
By inching the leger across the lakebed you’ll also discover the thickness of any weed. Thick weed will grip the float, whereas in areas of sparse cover you’ll feel the leger bounce across the hard bottom, or pluck against occasional strands of weed.
Ideally, I look for a swim where an area of sparse weed is surrounded by thick weed.
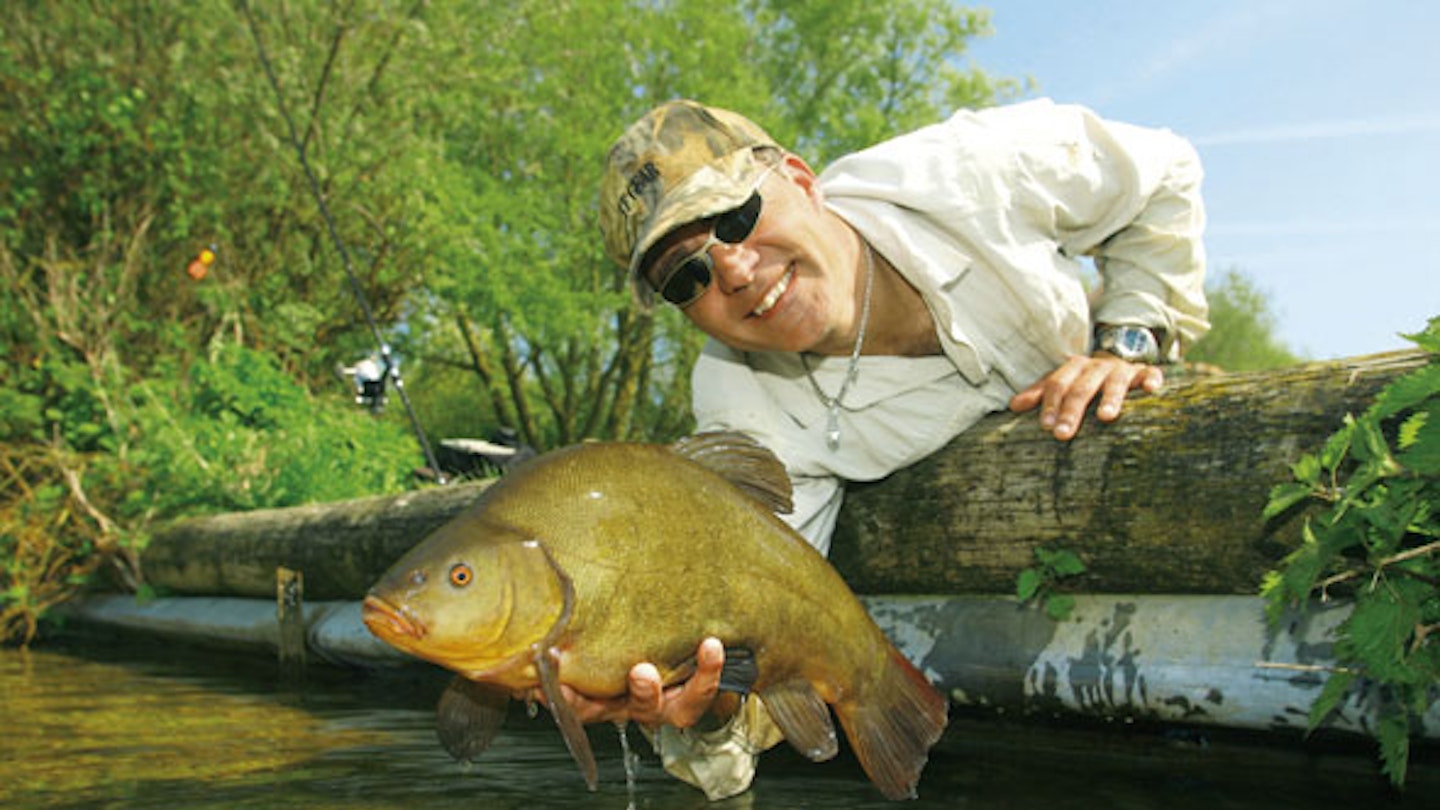
At the venue where these pictures were taken, Horseshoe Lake in Gloucestershire, I fished the perfect tench spot.
Located at 40 yards range, within easy casting distance of a loaded swimfeeder, I found a patch of thinner weed surrounded by the heavy stuff.
Perfect. I knew my rig and bait would be presented cleanly but the heavy weed nearby would give sanctuary from which to attract fish to my baited area.
STEP 3 - BAIT AND WAIT
Whereas I used to catch tench by regularly loosefeeding a few maggots or grains of corn round my float, the cornerstone of my modern tench attack is a ‘bait and wait’ tactic – I lay a large bed of feed on the bottom then wait for fish to settle on it.
If you are fishing at short range you can bait an area by catapult, for feeding at longer distances you can use groundbait to bind feed into balls that can be catapulted further.
But the best way to lay a bed of bait 30 or 40 yards from the bank is with a bait rocket, also known as a ‘spod’. Spodding is a technique many dismiss as being too advanced. I’ve often been told it’s something reserved for the ‘bivvy boys’.
Well, I’m telling you it isn’t hard to do at all, and here’s what you need to start spodding:
A strong, cheap, spod rod. Several firms produce them for around £50, like my TF Gear Signature Spod rod.
A large capacity reel, I use the £50 Okuma Axeon.
Braided mainline, such as 30lb TF Gear Grunt Banana braid.
A spod, like the Free Spirit Particle Spod.
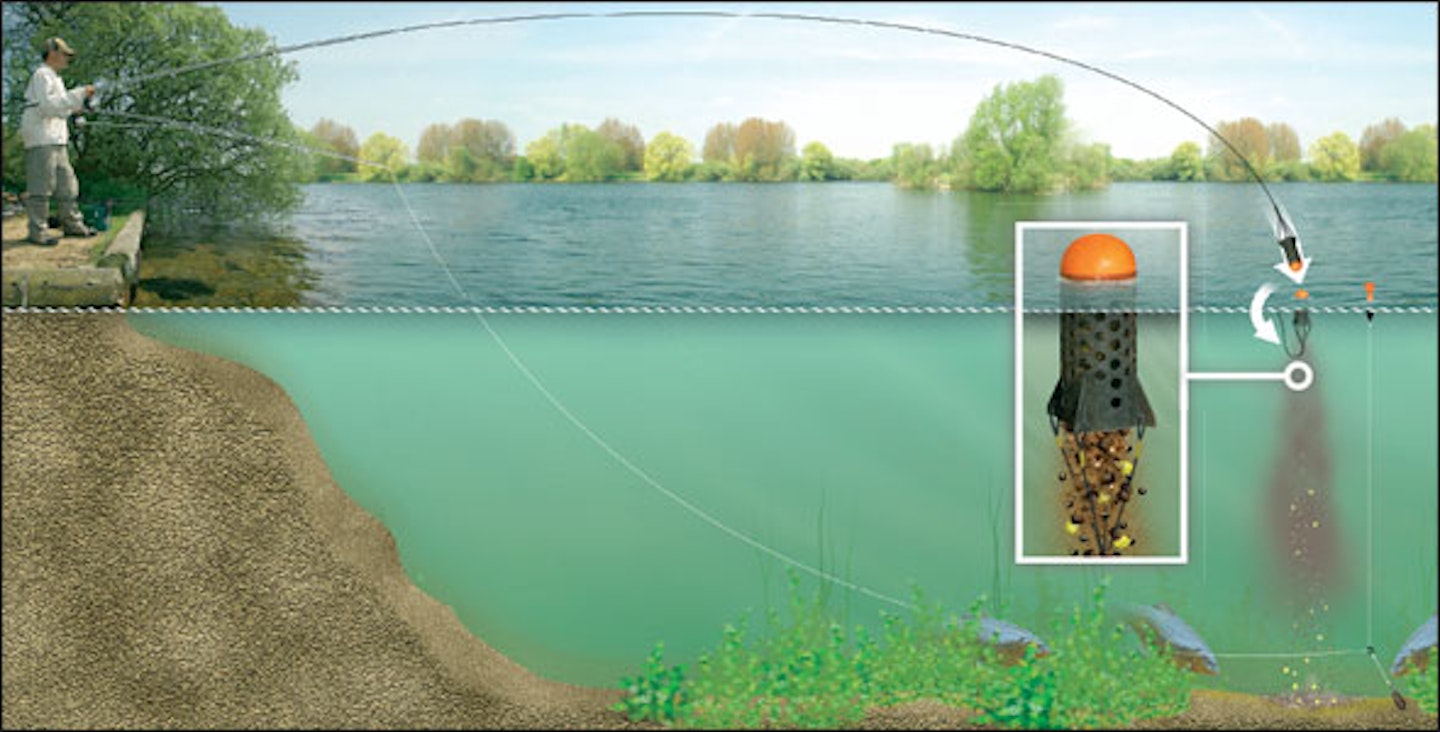
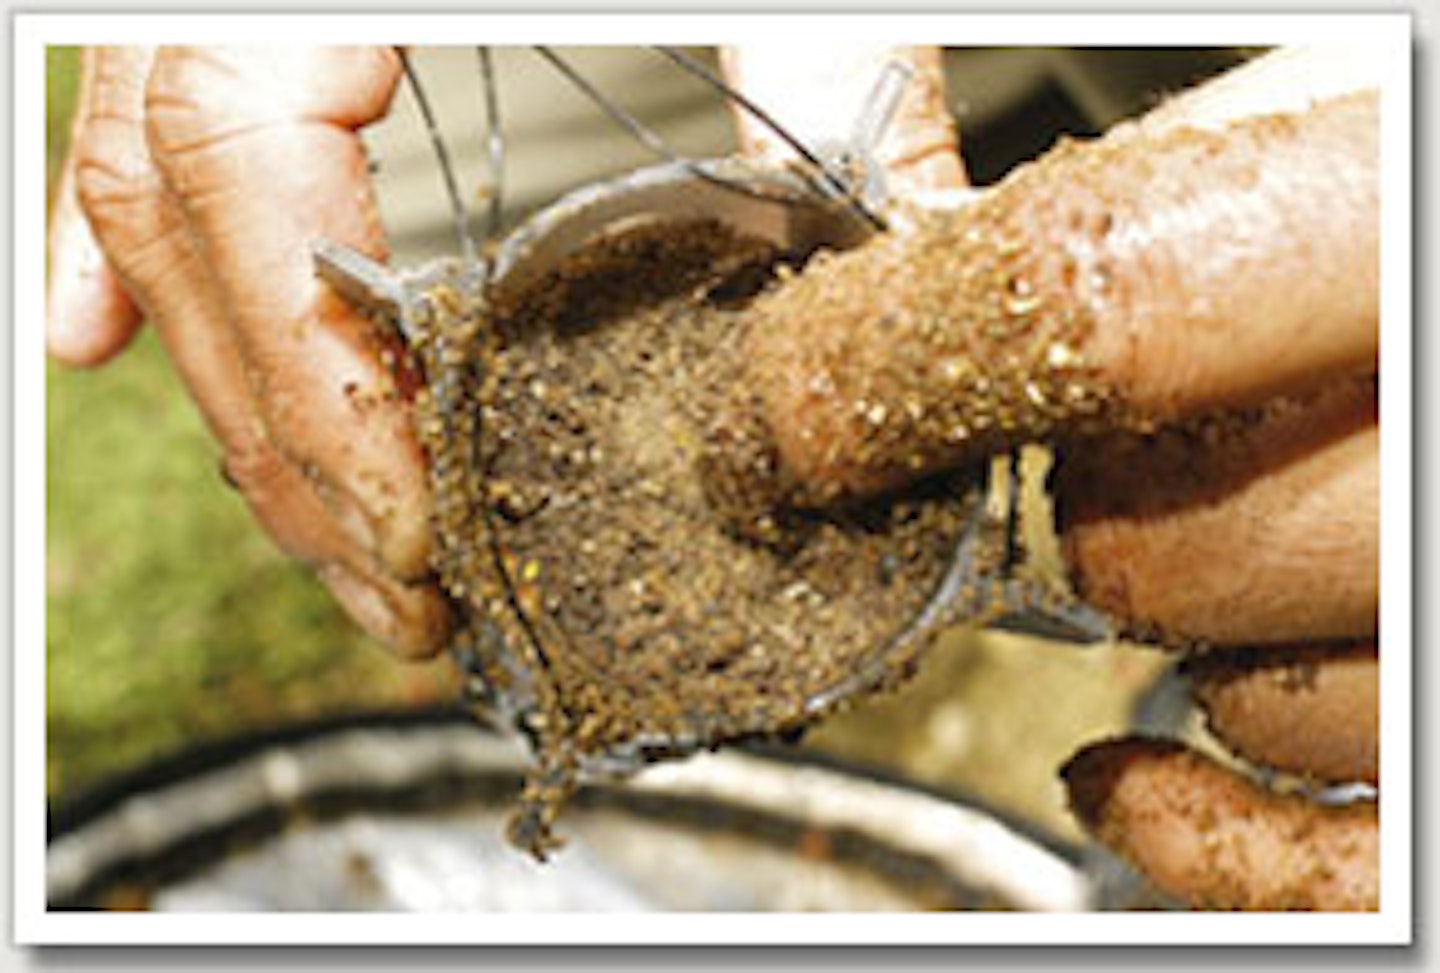
All you do is thread the braided line through the rings of the spod rod, tie on the spod, fill it with bait and cast it at your marker float.
As the diagram (above) shows, when the spod hits the water the buoyant nose causes it to ‘up end’ and the bait is dumped on the spot you’ve selected with the float. EASY!
Spodding has four great advantages:
1 - With practice it allows you to deliver bait with great accuracy.
2 - It shortcircuits baiting up – you can spod lots of bait in 10 minutes giving you more time to go fishing.
3 - Spods allow you to feed small particles of food beyond catapult range. These tiny bits of food hold fish in your swim for a long time.
4 - It gets you catching quickly. With a carpet of feed on the lakebed fish respond quickly to your hookbait.
In the sequence (below), I detail what baits I use in the spod but I also show you how I load it to ensure minimum spillage when I cast out.
- Load half the spod with a mix of hemp, corn and a few maple peas
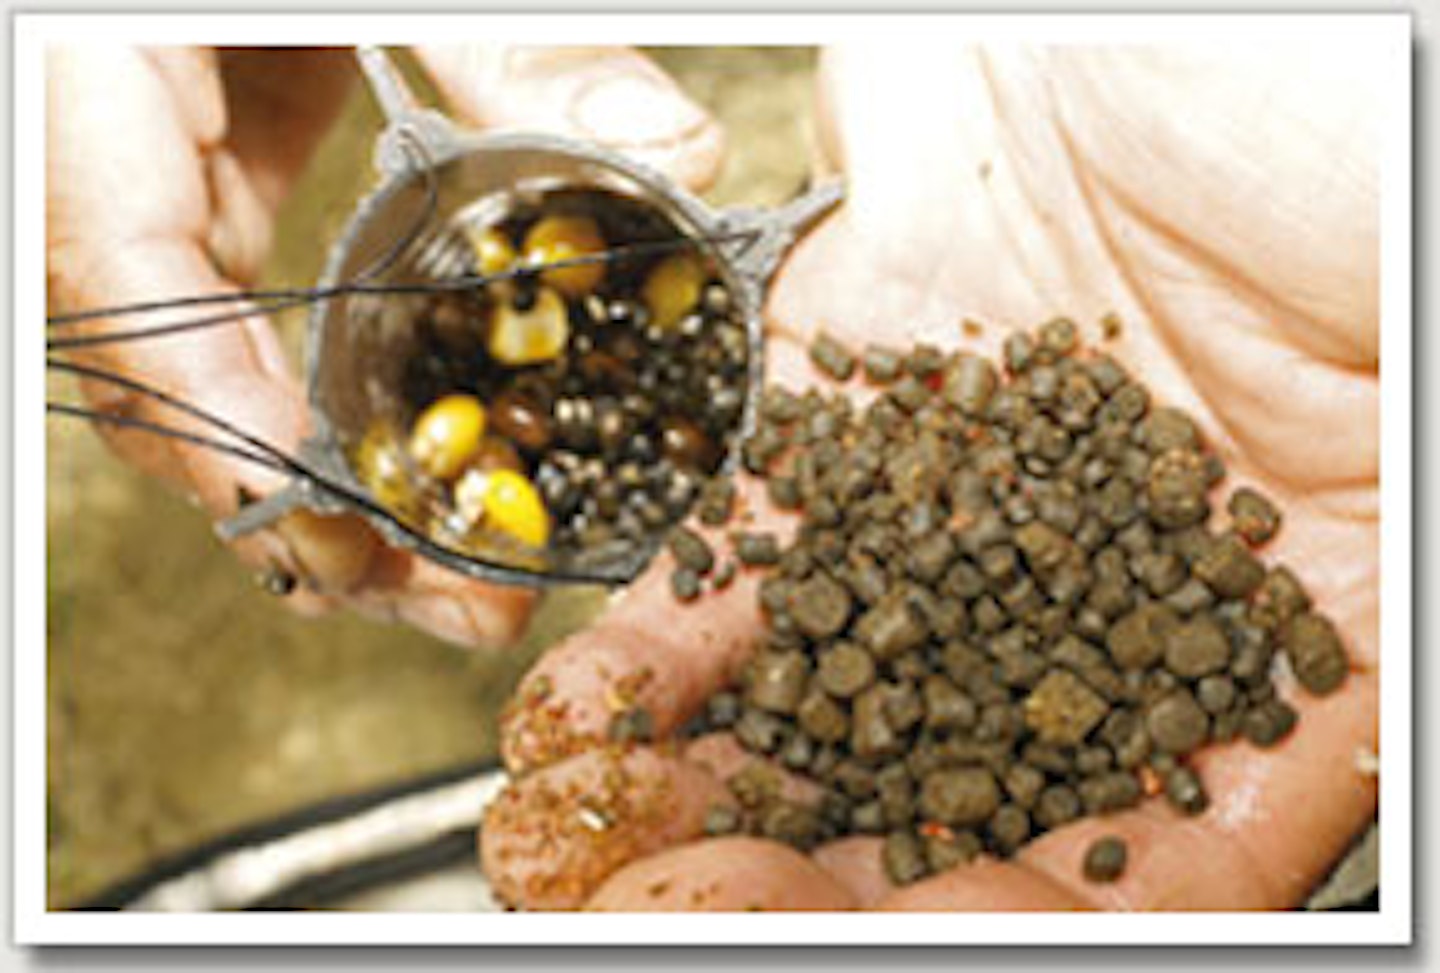
- Fill a quarter of the spod with pellets and a few small boilies

- Add a groundbait cap to the spod to stop any contents spilling on the cast
- Gently tap down the feed - it will explode on contact with the water
.jpg?auto=format&w=1440&q=80)
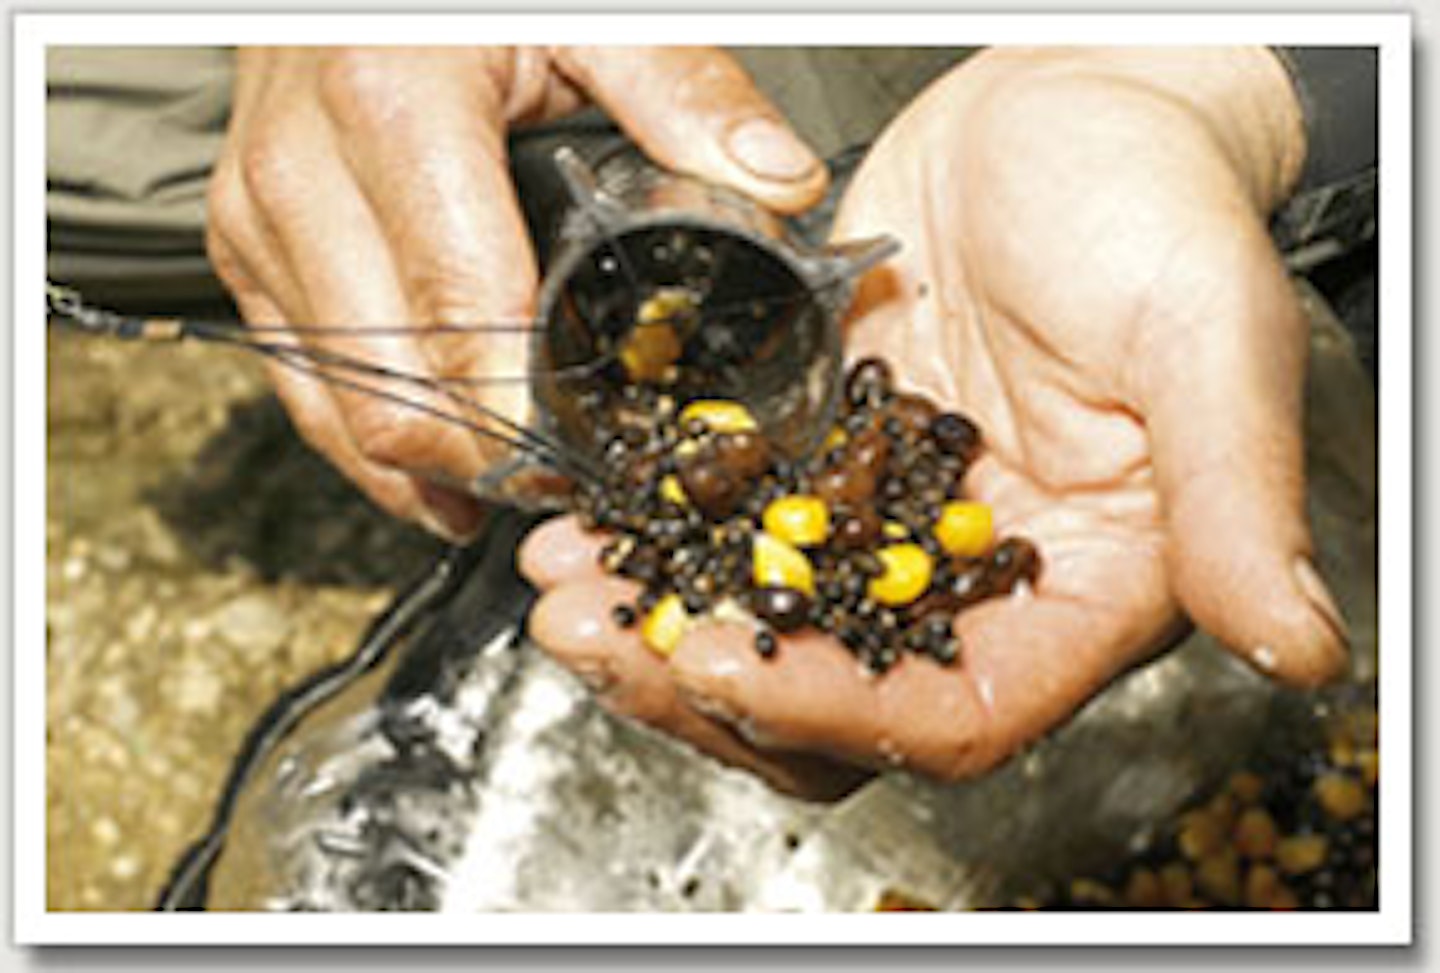
Now to the business end and the good news is my rig is easy to tie and uses the most basic of baits - maggots.
As the diagram (above) shows, I use a ready-tied TF Gear Secret Trap leader, fitted with a lead clip, onto which I slip a large Drennan openend feeder. The feeder is stuffed with red maggots sandwiched between two plugs of groundbait (top right).
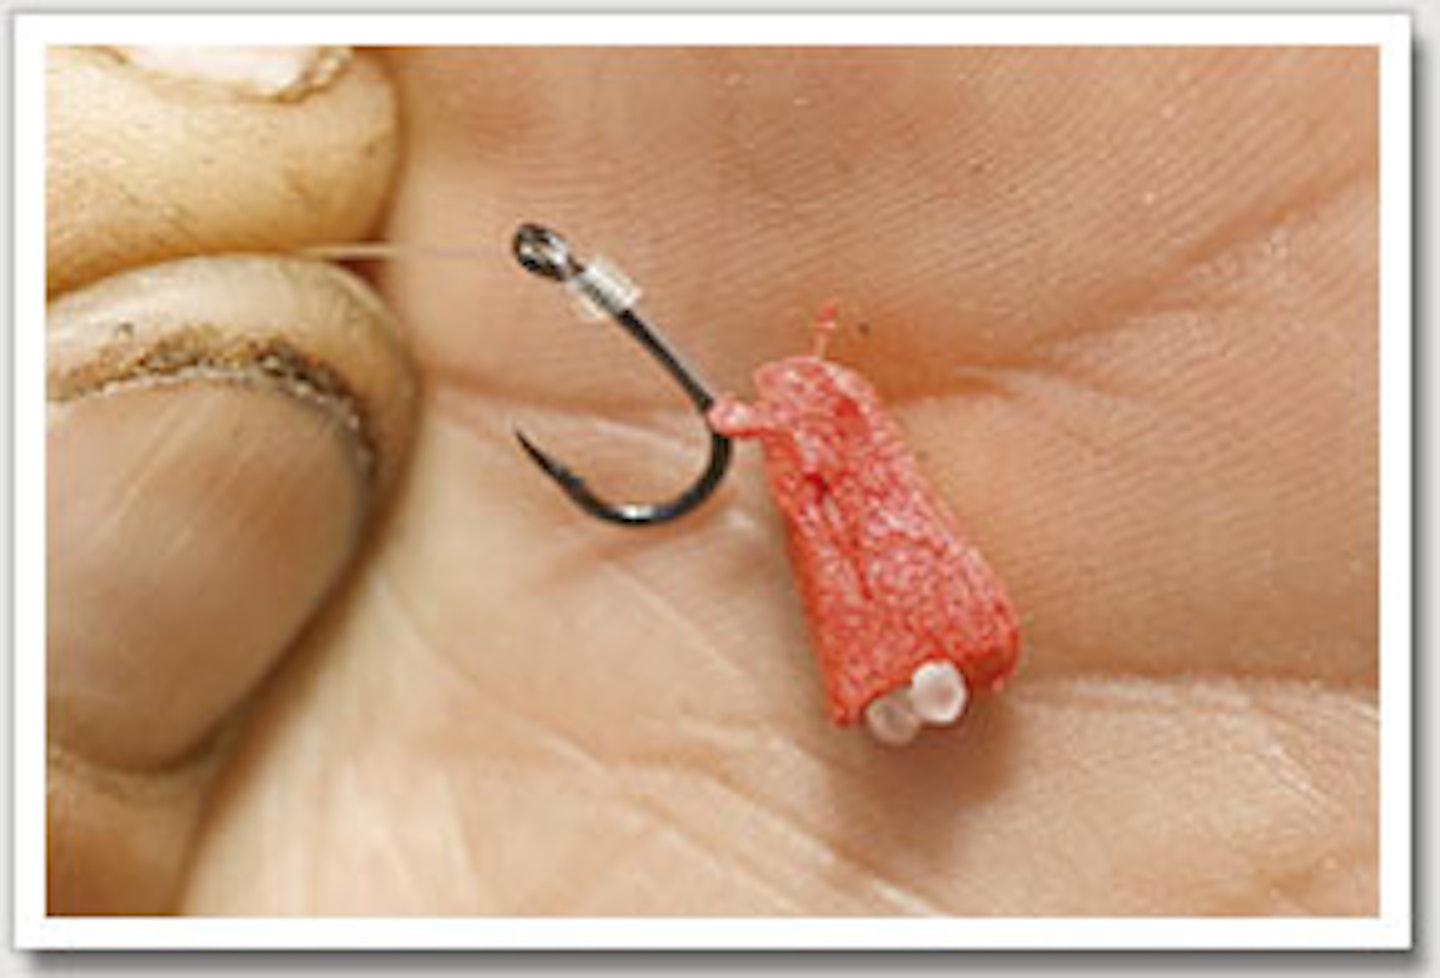
As for my hooklink, I use a knotless knot (see sequence below) to attach a size 10 Korda Wide Gape hook to a 10lb TF Gear Invisilink hooklink. It’s a soft, tough line to take the strain of playing tench in weed. In fact the only remotely clever bit of the rig is the hookbait.
As you can, see I fill the hook with four or five maggots but also thread a sliver of red rig foam to the hair loop formed with the knotless knot.
Why? Well the weight of the hook will be off-set by the foam, making the hookbait behave naturally and appear less suspicious to a fish.
.jpg?auto=format&w=1440&q=80)
- Get some red rig foam. Firms like Fox and Solar produce it.
.jpg?auto=format&w=1440&q=80)
- Cut the foam into a maggoty-looking sliver. It doesn’t need to be a work of art, just a maggot sized barrel!
.jpg?auto=format&w=1440&q=80)
- Tie a loop in the end of your hooklink line and thread the foam onto it.
.jpg?auto=format&w=1440&q=80)
- Thread the line through the back of the eye on a size 10 Korda Wide Gape.
.jpg?auto=format&w=1440&q=80)
- Position the fake foam maggot at the back of the hook. The top of the ‘bait’ should be level with the hook bend.
.jpg?auto=format&w=1440&q=80)
- Whip the line down the shank five times, work from the eye toward the bend. Pass the line through the back of the eye.
- This is what the finished knotless knot looks like with the foam ‘maggot’ in place to counter the weight of the hook.
- Add three, four or five red maggots to the hook to complete the hookbait. Tench love red maggots.